Southern New Hampshire University | SNHU-CYB210: Computer Networking
Install and Configure DHCP and DNS Servers
Exercises
- Introduction
- Exercise 1 - Installing and Configuring DHCP
- Exercise 2 - Installing and Configuring DNS
- Summary
Introduction
The Install and Configure DHCP and DNS Servers module provides you with the instruction and computer hardware to develop your hands on skills in the defined topics. This module includes the following exercises:
- Installing and Configuring DHCP
- Installing and Configuring DNS
dc640c20-9434-45ea-b7c2-6d4d6a196bfc
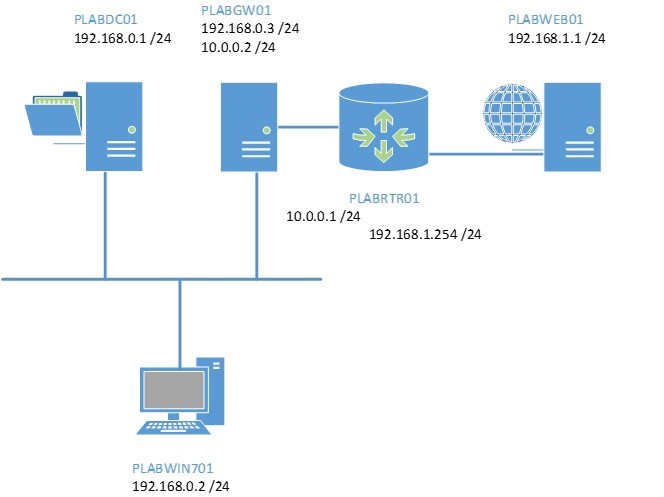
Lab Diagram
During your session you will have access to the following lab configuration.
Connecting to your Lab
In this module you will be working on the following equipment to carry out the steps defined in each exercise.
- PLABDC01 (Windows Server 2008 R2 - Domain Controller)
- PLABGW01 (Windows Server 2008 R2 -Member Server)
- PLABWIN701 (Windows 7 - Domain Workstation)
To start, simply choose a device and click Power on. In some cases, the devices may power on automatically.
For further information and technical support, please see our Help and Support page.
Copyright © Practice Labs 2007 - 2018. All rights reserved.
Exercise 1 - Installing and Configuring DHCP
Dynamic Host Configuration Protocol (DHCP) is a network service that leases IP addresses to computers on a network. DHCP streamlines the allocation of IP addresses to computers as it prevents duplicate IP addresses and ensures correct configuration of network settings like subnet mask, default gateway and DNS, because the IP address pool is configured typically on just one server.
To better understand this technology, refer also to your course material or use your preferred search engine to research this topic in detail.
Task 1 - Prepare for Installation of DHCP
To prepare for installation of DHCP, perform the following steps:
Step 1
Ensure you have powered on the required devices defined in the introduction.
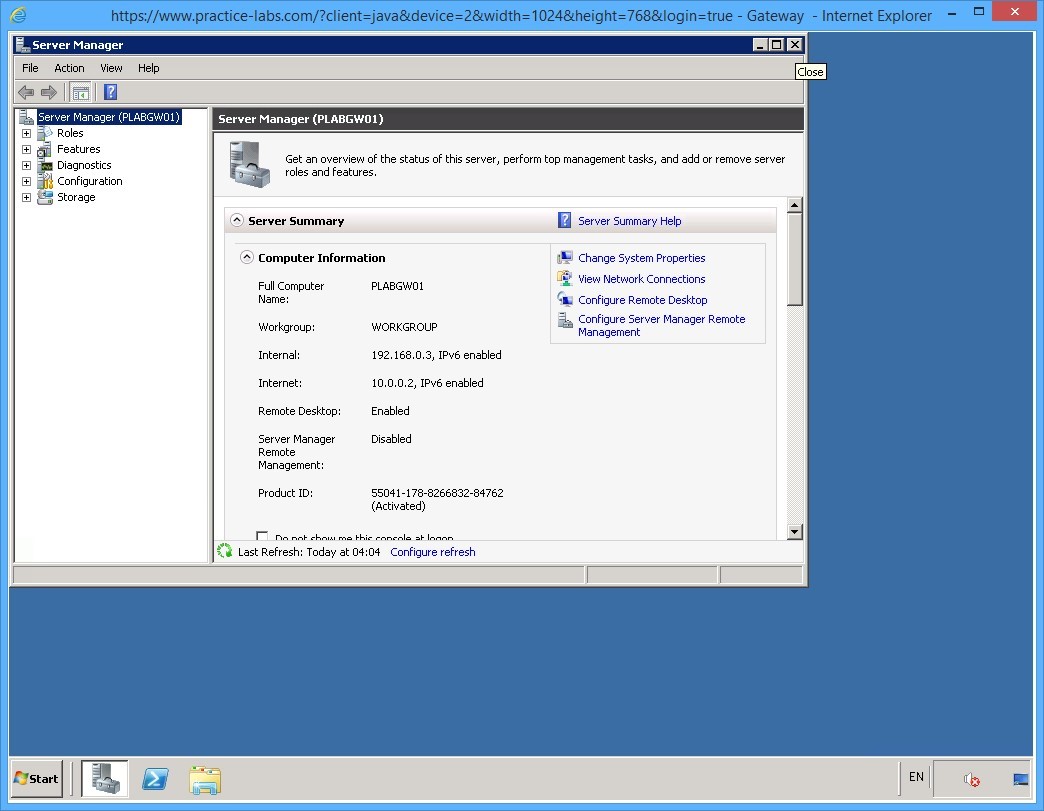
Connect to the PLABGW01 device.
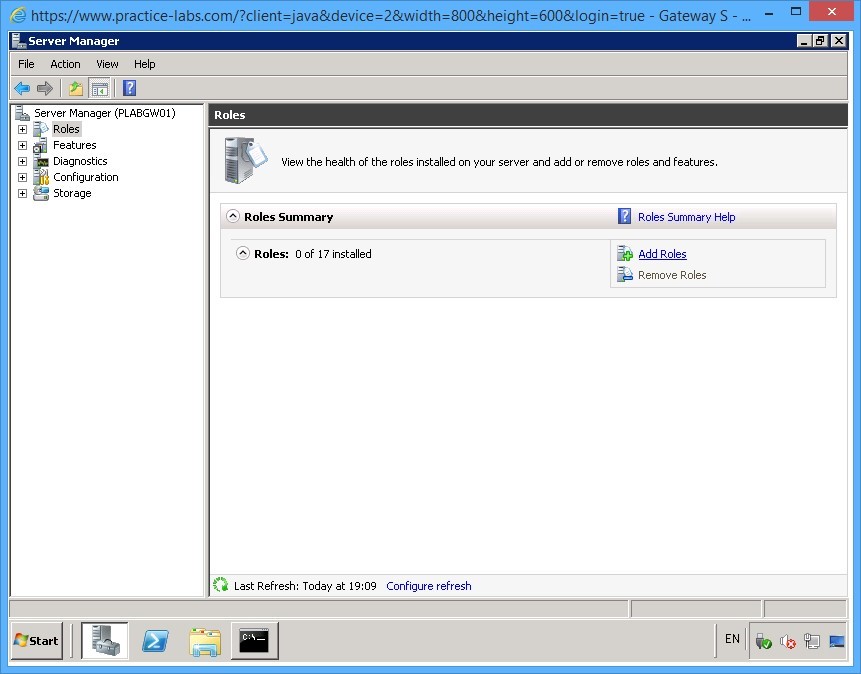
Server Manager application window opens upon logon.
Close Server Manager for now.
Step 2
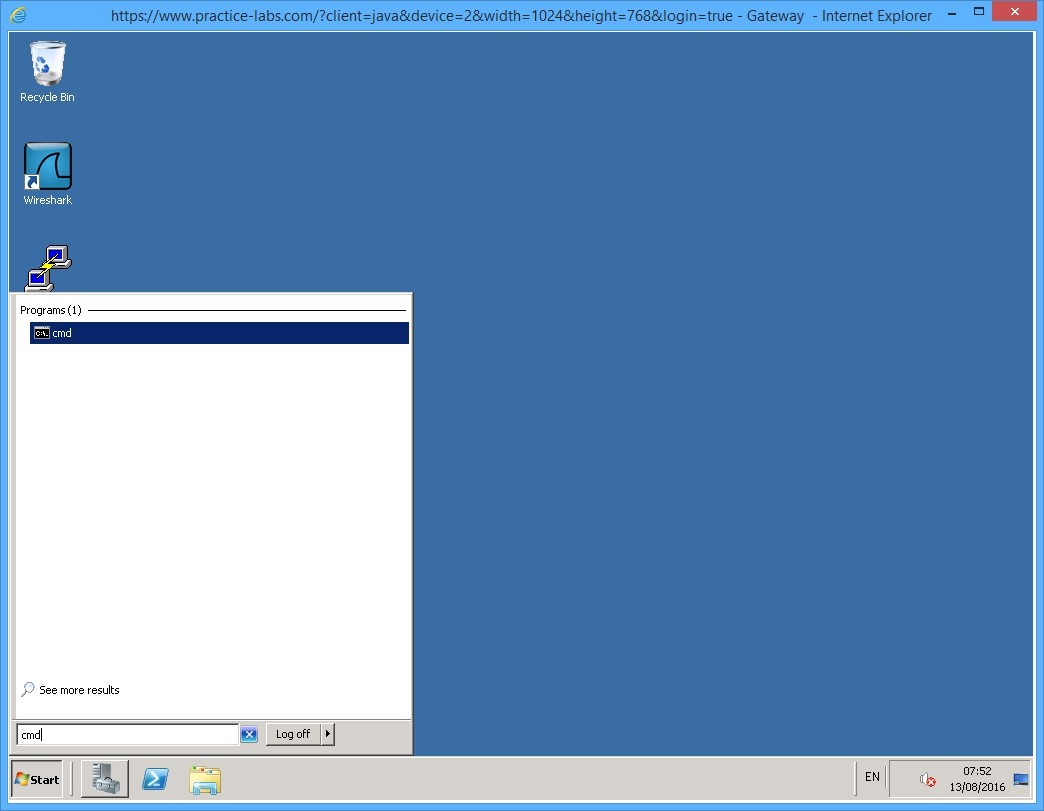
Click Start and in the Search programs and files box, type:
cmd
Press Enter.
Step 3
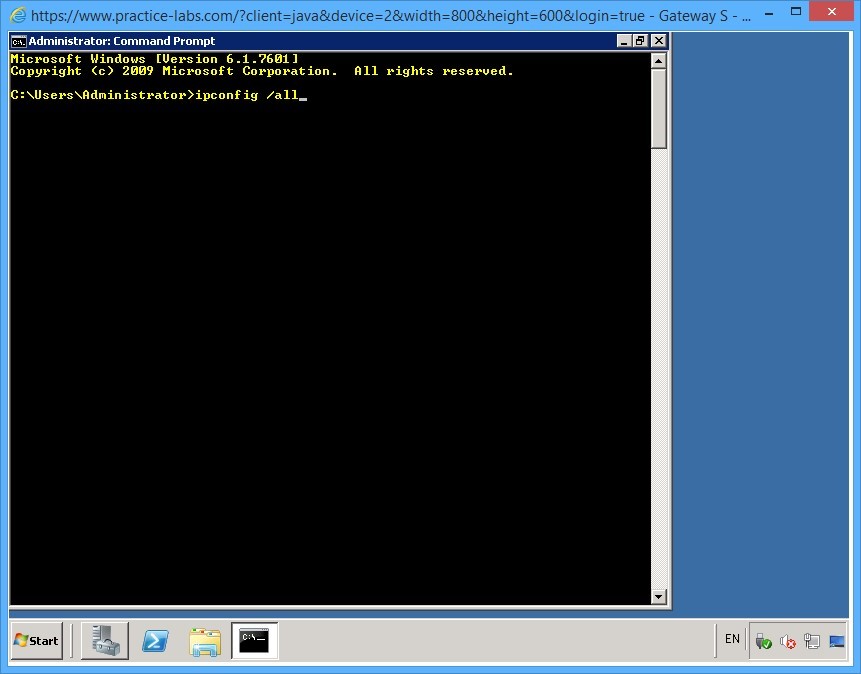
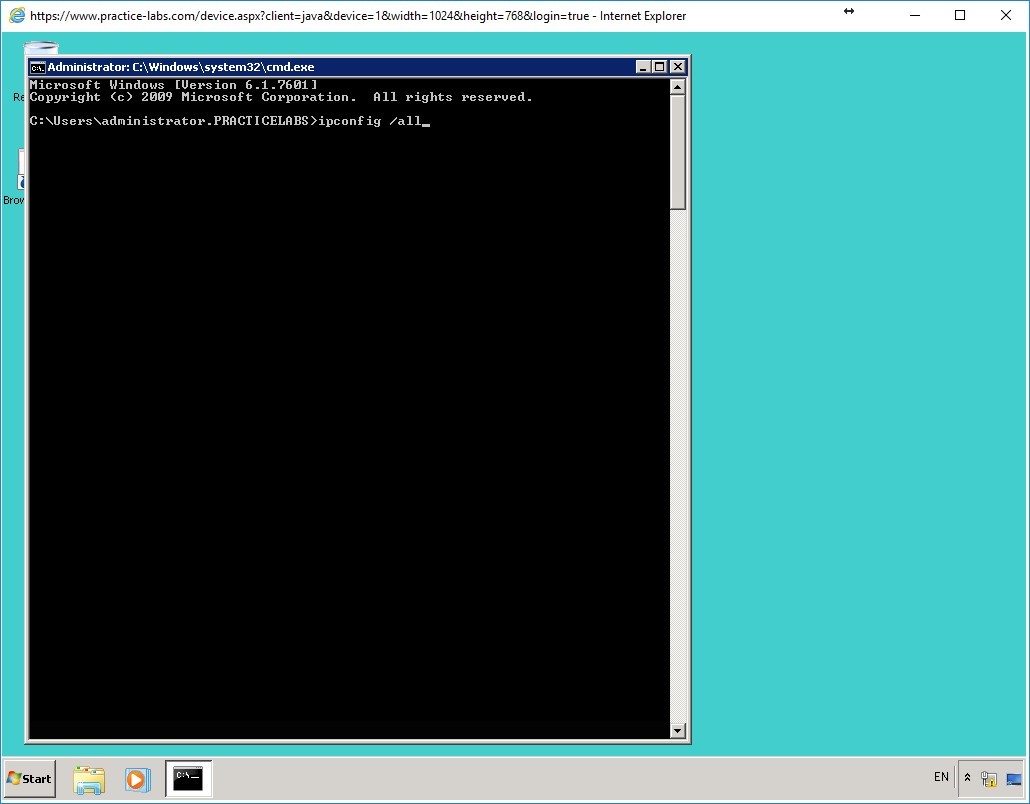
On the command prompt, enter the command:
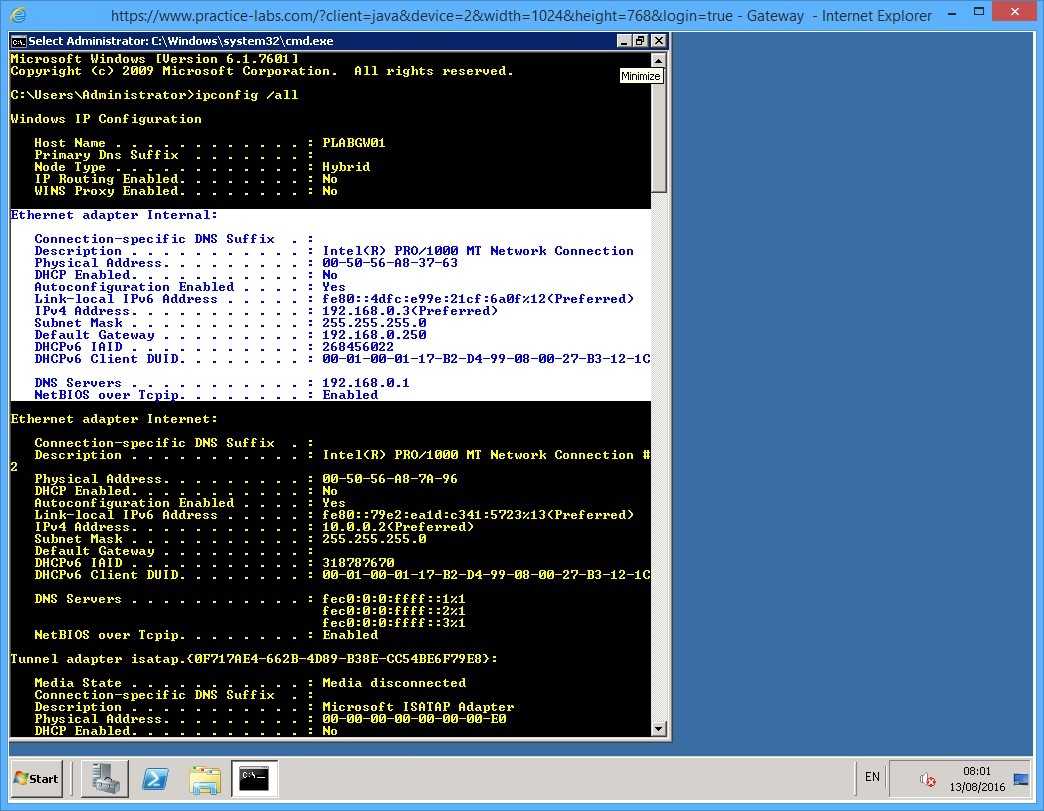
ipconfig /all
Press Enter.
Step 4
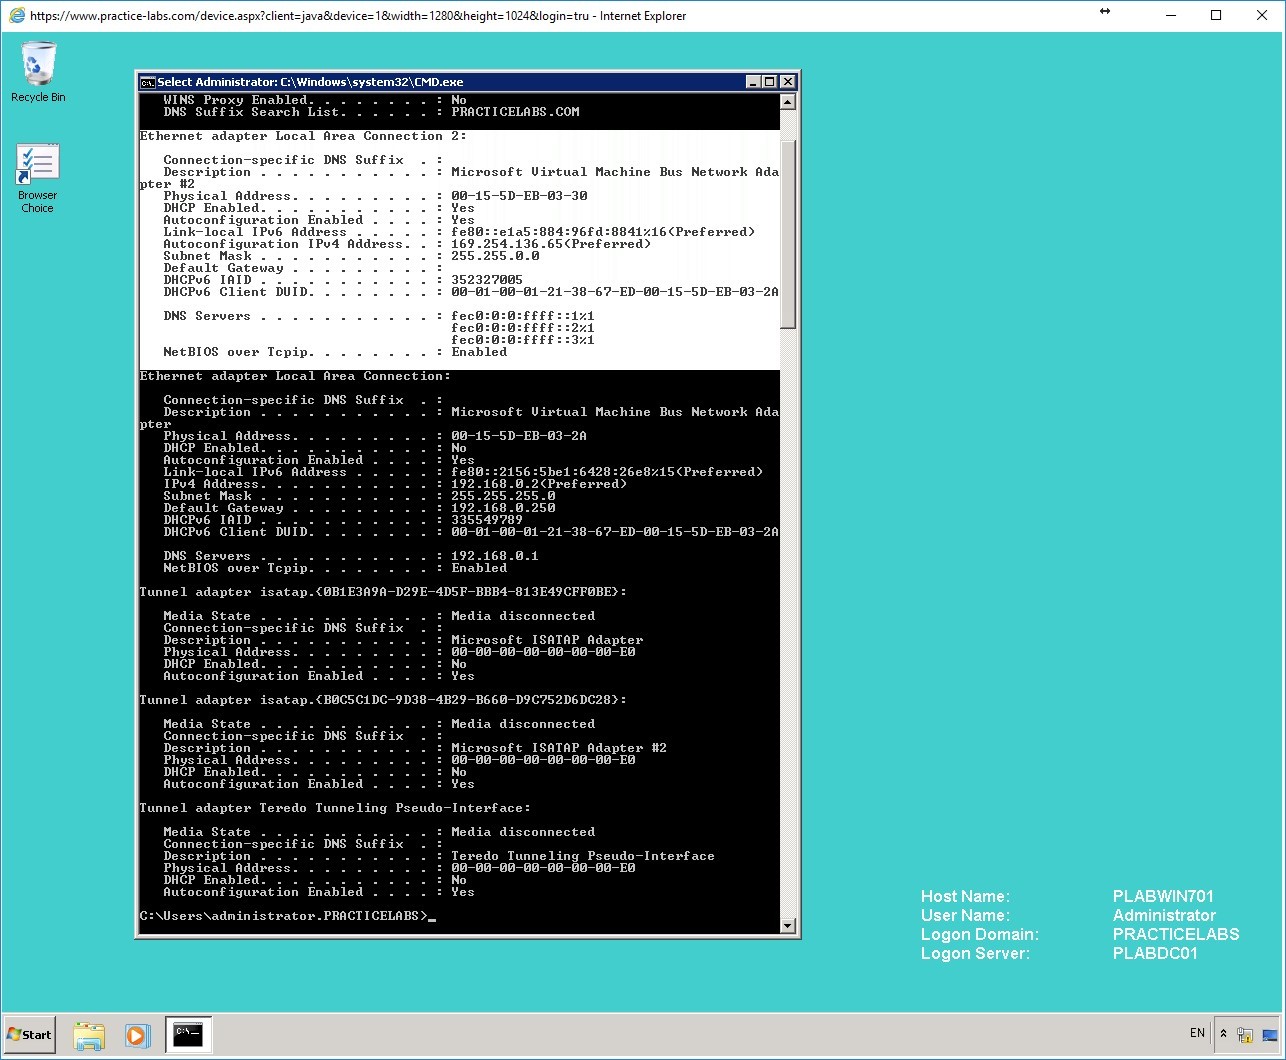
Detailed IP configuration of the server is displayed.
Locate the section Ethernet adapter Internal section.
From this detail, note that the values of IP address, subnet mask, and the default gateway are as follows:
IP address: 192.168.0.3
Subnet mask: 255.255.255.0
Default gateway: 192.168.0.250
Preferred DNS server IP: 192.168.0.1
Minimize the command prompt window.
Keep all devices powered on in their current state and proceed to the next task.
Task 2 - Install DHCP
To install DHCP on the member server, perform the following steps:
Step 1
On PLABGW01 device, click Server Manager on taskbar.
Step 2
On the Server Manager interface, select Roles node.
Click Add Roles from the Roles pane on the right.
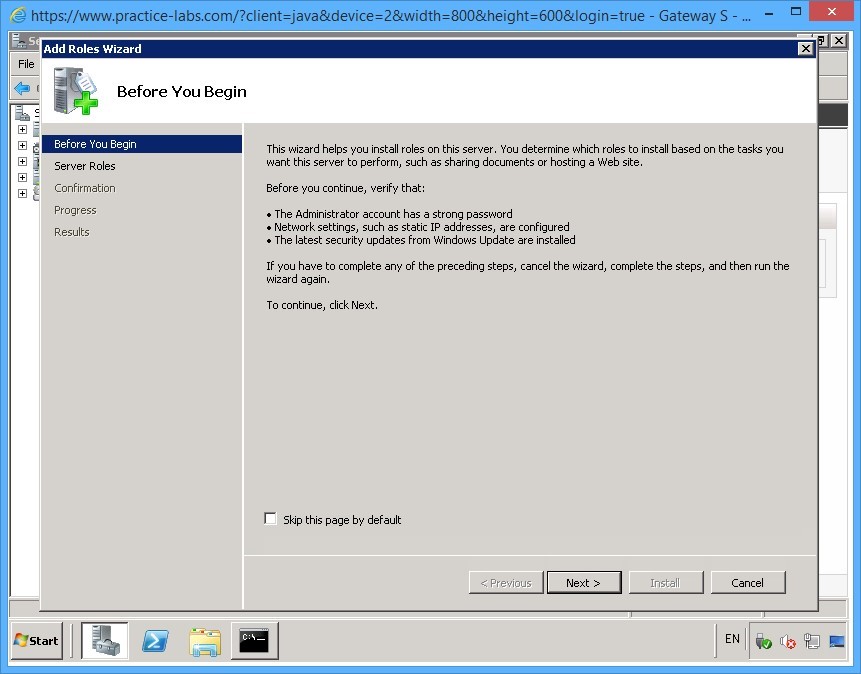
Step 3
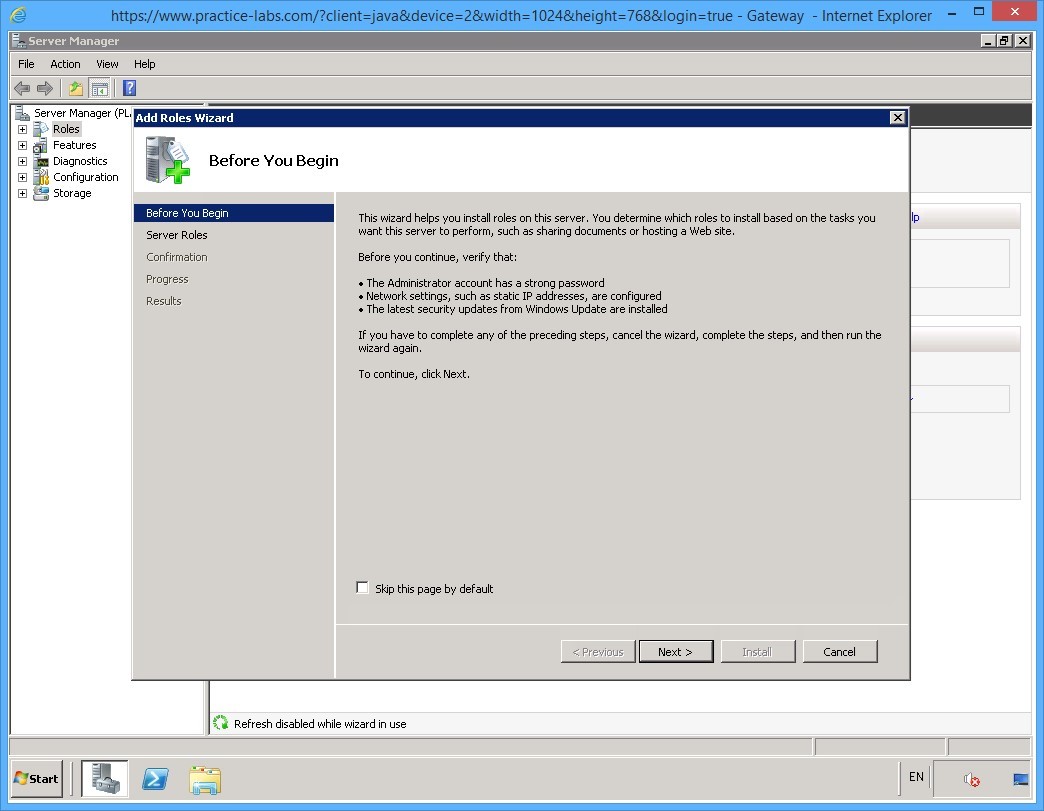
The Add Roles Wizard window is displayed.
On the Before You Begin page, read the information and click Next.
Step 4
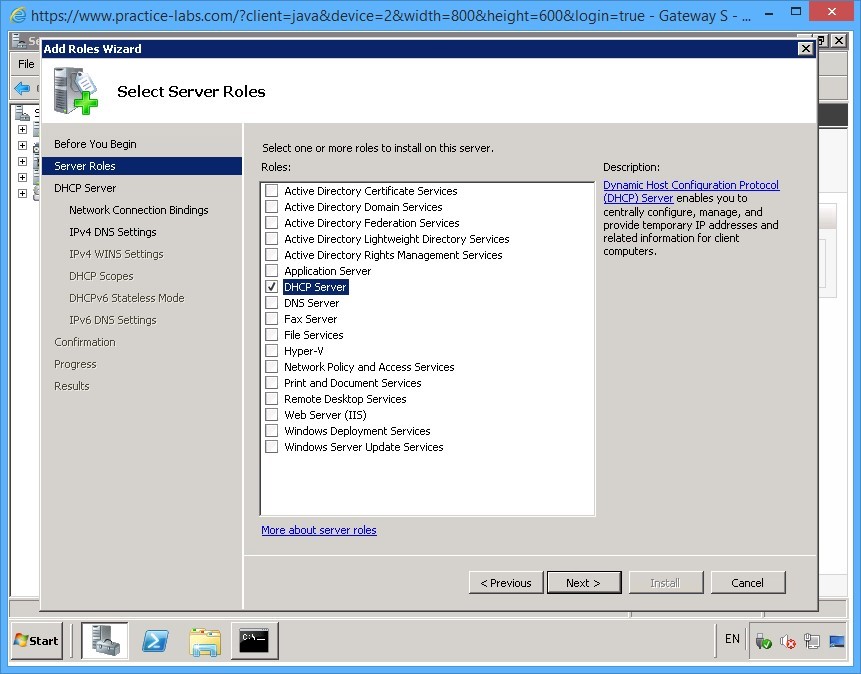
On the Select Server Roles page, check the DHCP Server role on the Roles list and click Next.
Step 5
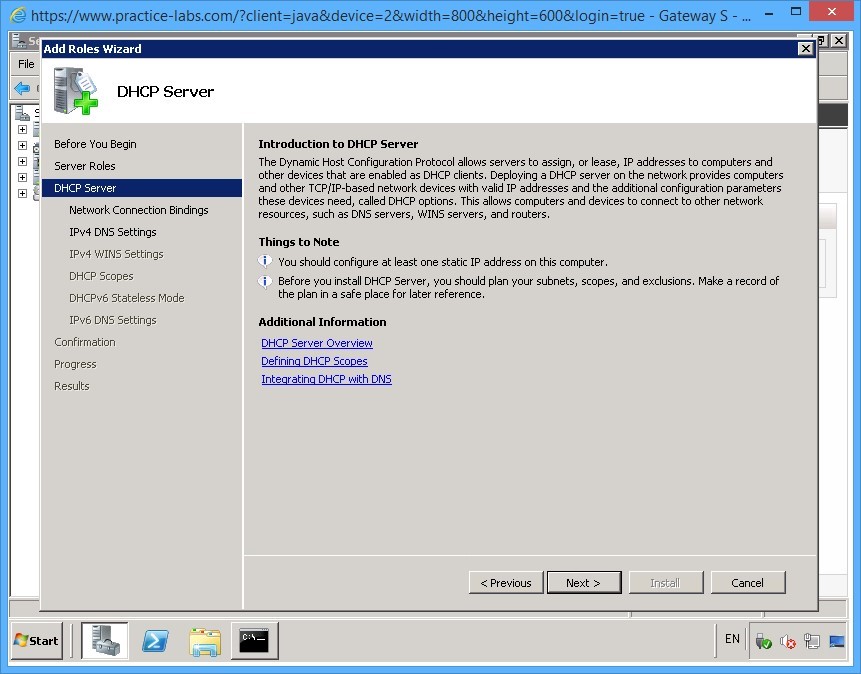
On the DHCP Server page, read the information about this service and click Next.
Step 6
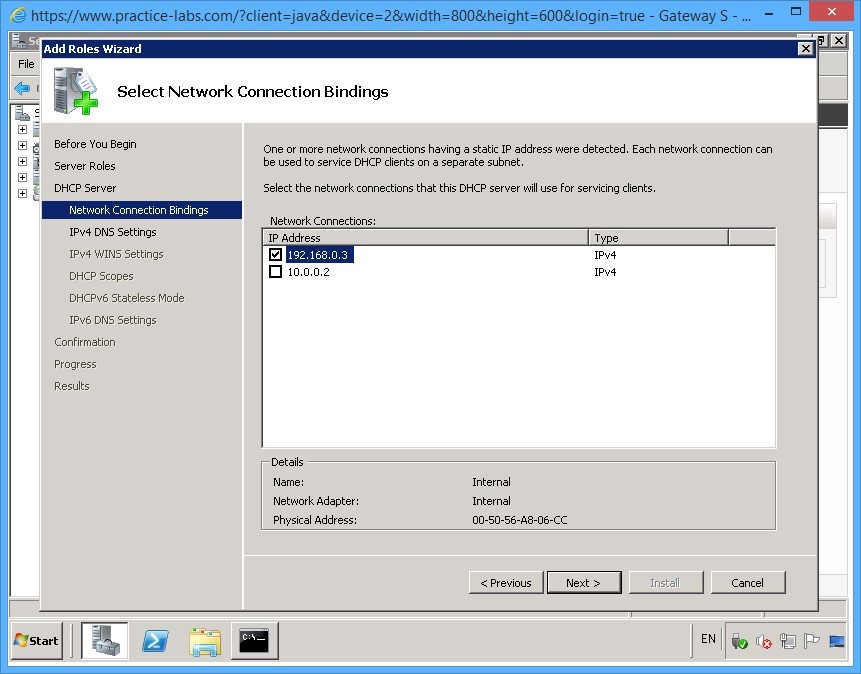
On the Select Network Connection Bindings page, ensure 192.168.0.3 is selected and clear 10.0.0.2 check box.
This means that DHCP server will listen to 192.168.0.3 for connection requests from DHCP clients.
Click Next.
Step 7
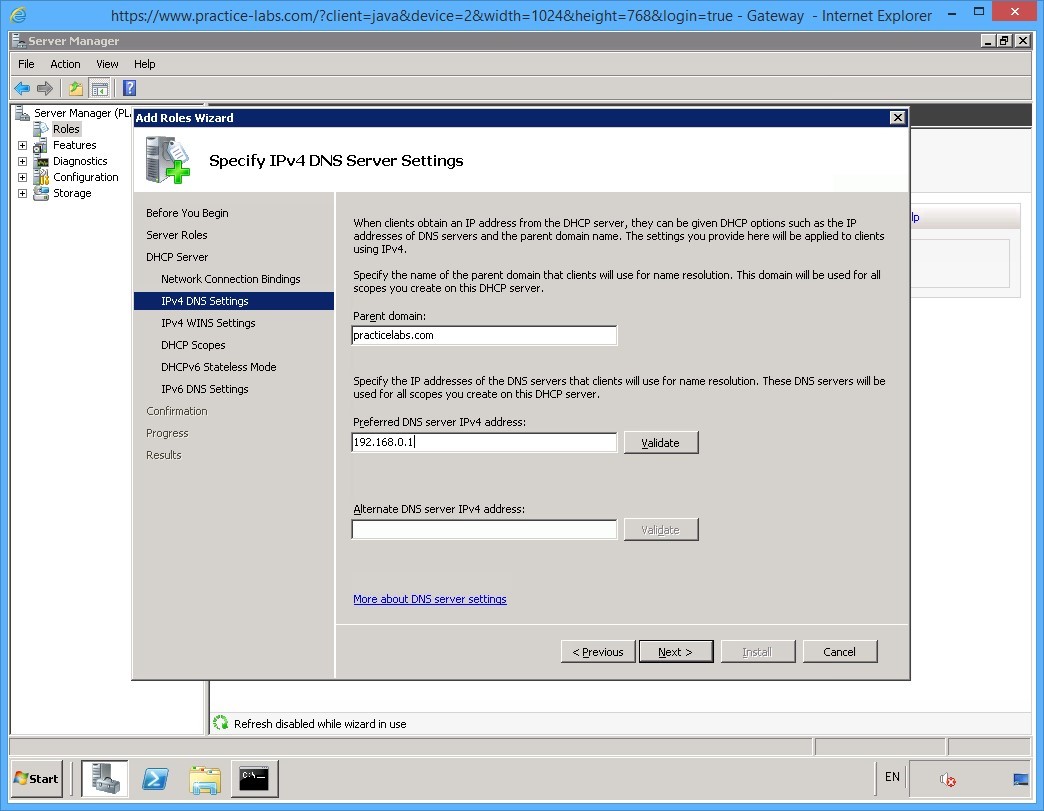
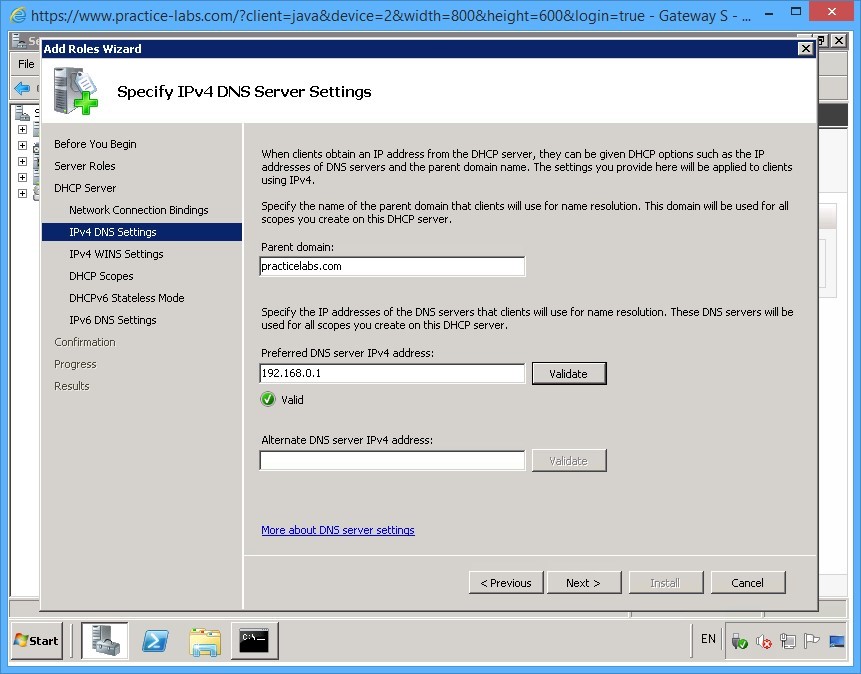
On the Specify IPv4 DNS Server Settings page, in the Parent domain text box, type:
practicelabs.com
In the Preferred DNS server IPv4 address text box, type:
192.168.0.1
Click Validate.
Step 8
When the Valid status green check appears, click Next.
Step 9
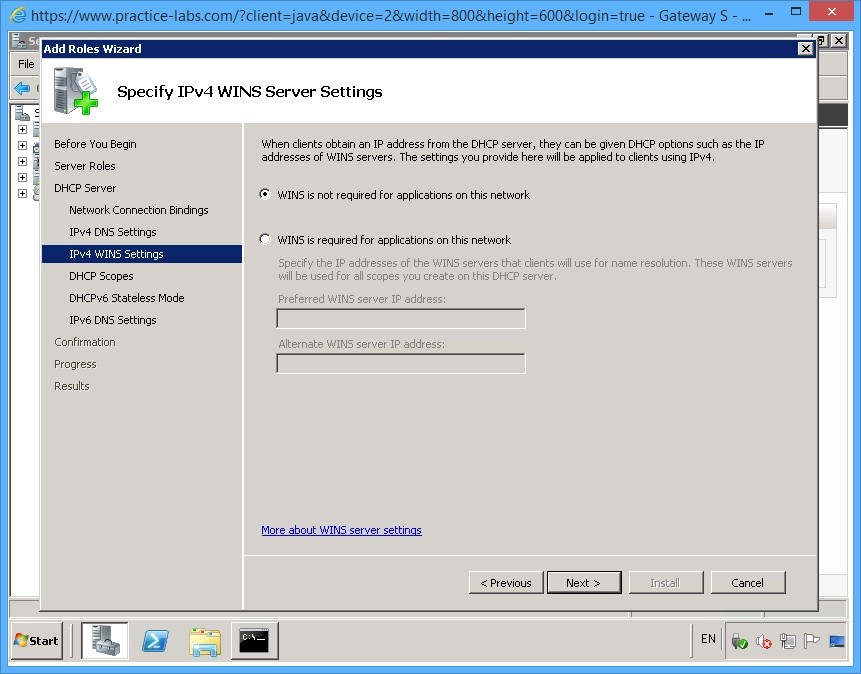
On the Specify IPv4 WINS Server Settings page, keep the default selection of WINS is not required for applications on this network and click Next.
Step 10
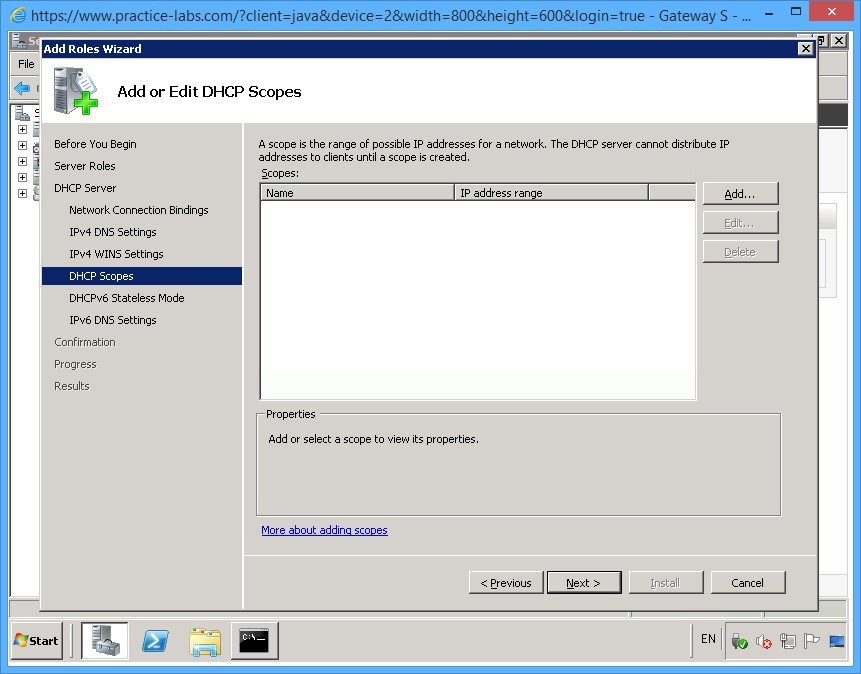
On the Add or Edit DHCP Scopes page, you will add the details of the scopes later. Note that in this property page, you can add the scopes right away.
Click Next.
Step 11
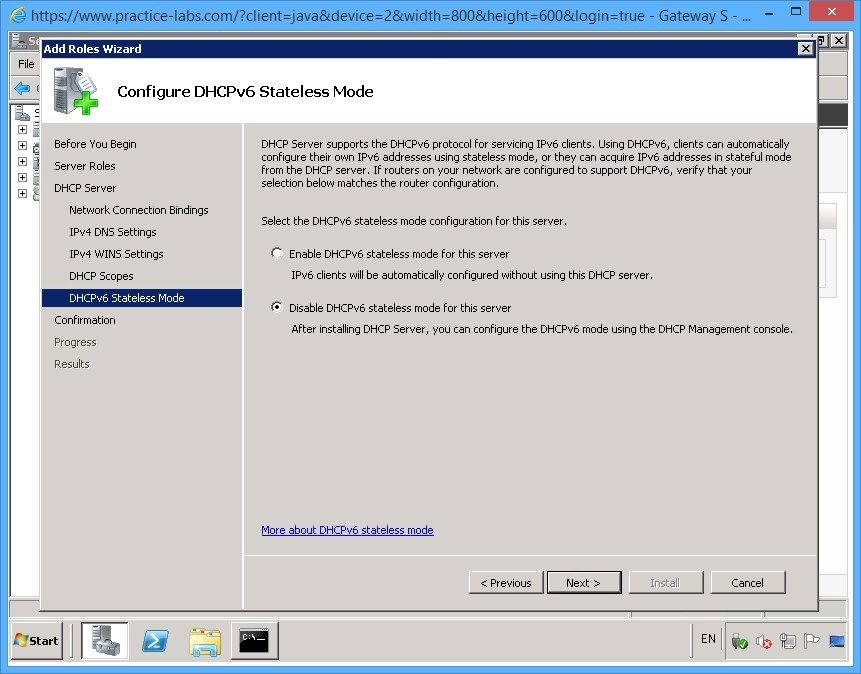
On the Configure DHCPv6 Stateless Mode page, select Disable DHCPv6 stateless mode for this server option button.
Click Next.
Step 12
On the Confirm Installation Selections page, review the installation selections and click Install.
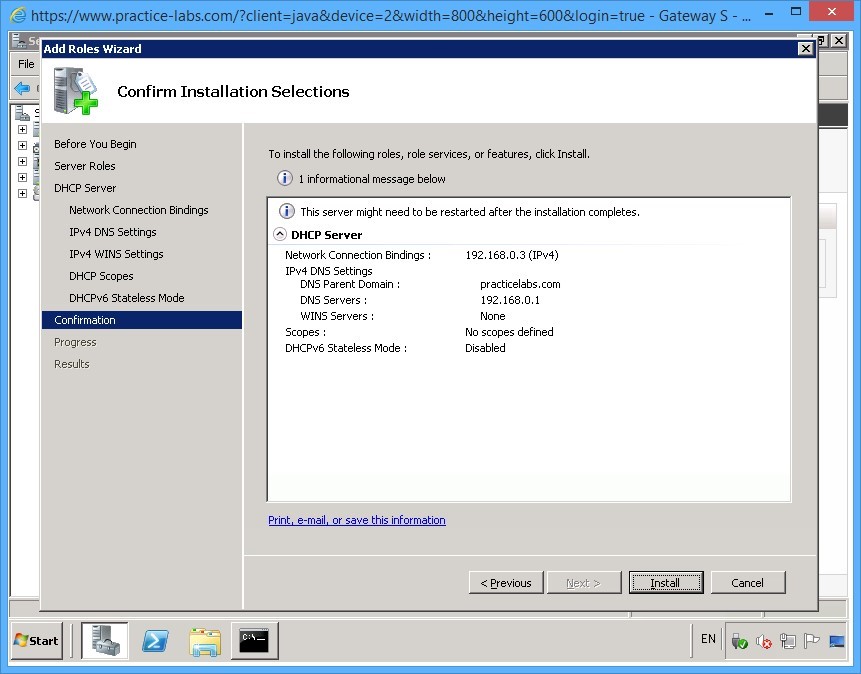
Step 13
The installation progress is displayed on the Installation Progress page, please wait.

Step 14
After the installation process, the Installation Results page displays the status of installation.
Read the information on the screen and click Close.
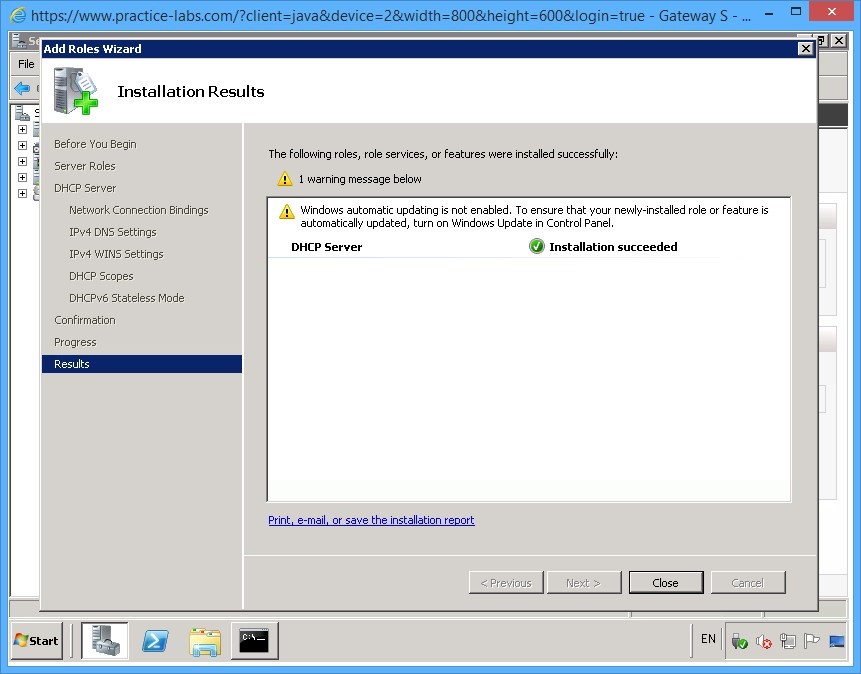
Step 15
You are redirected back to the Server Manager window.
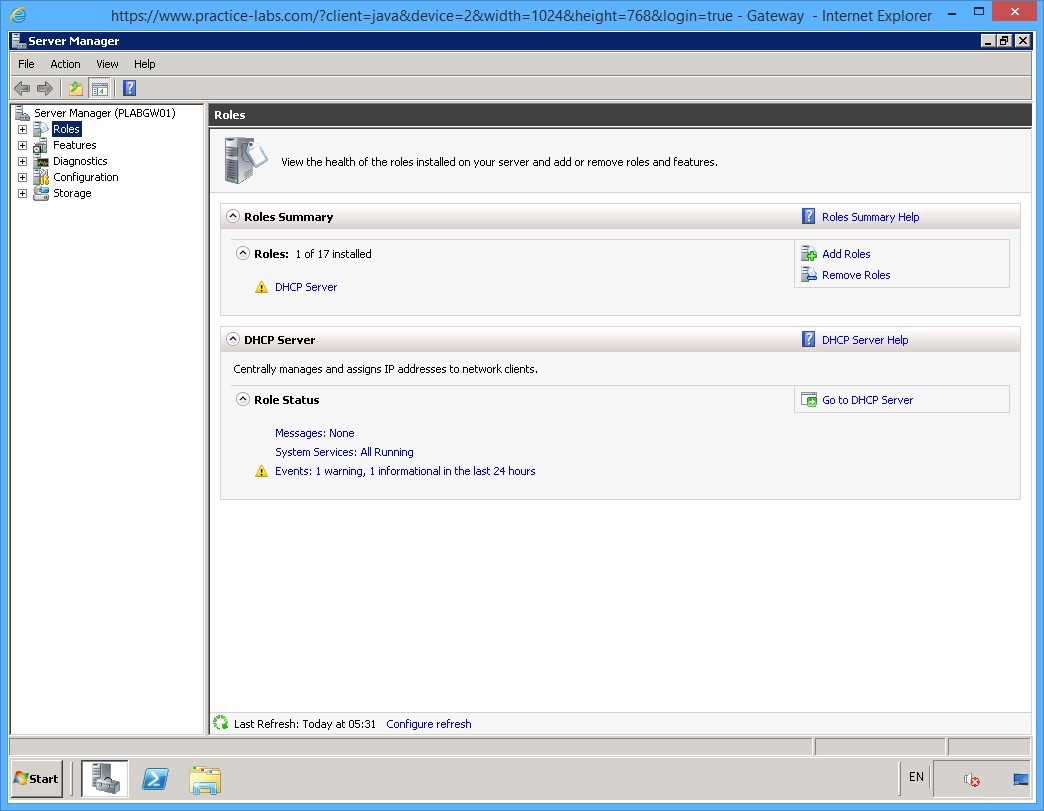
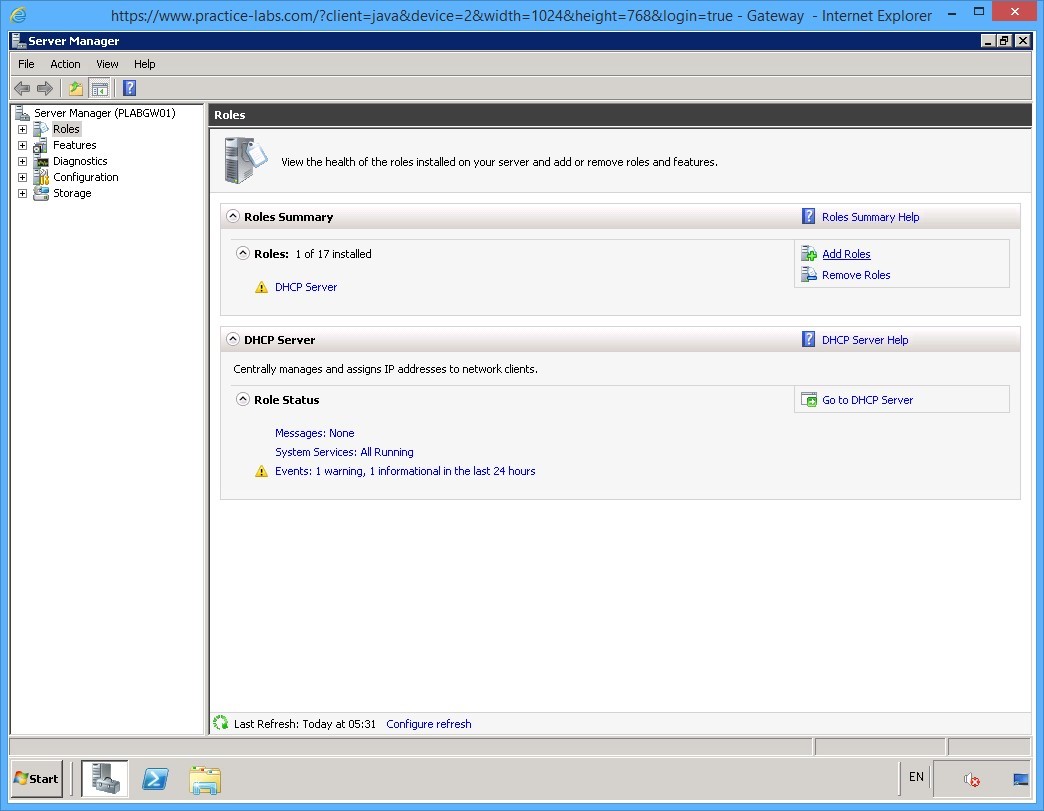
The Role Summary section in the right pane now displays the DHCP Server role installed.
Close the Server Manager window.

Keep all devices powered on in their current state and proceed to the next task.
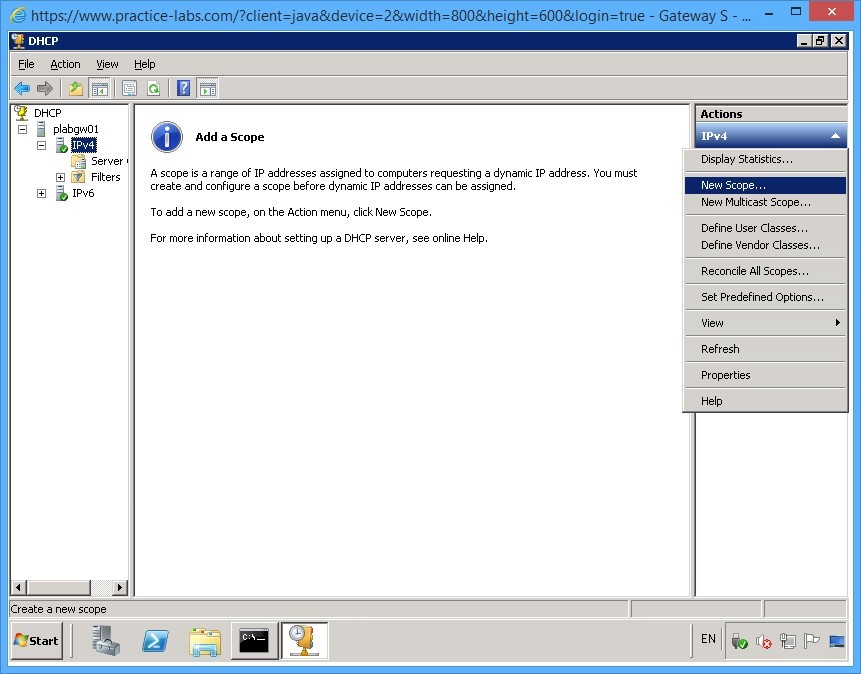
Task 3 - Add Scopes with Lease Time on the DHCP Server
To add scopes (IP address pool) and other network settings that will be given to DHCP clients, perform the following steps:
Step 1
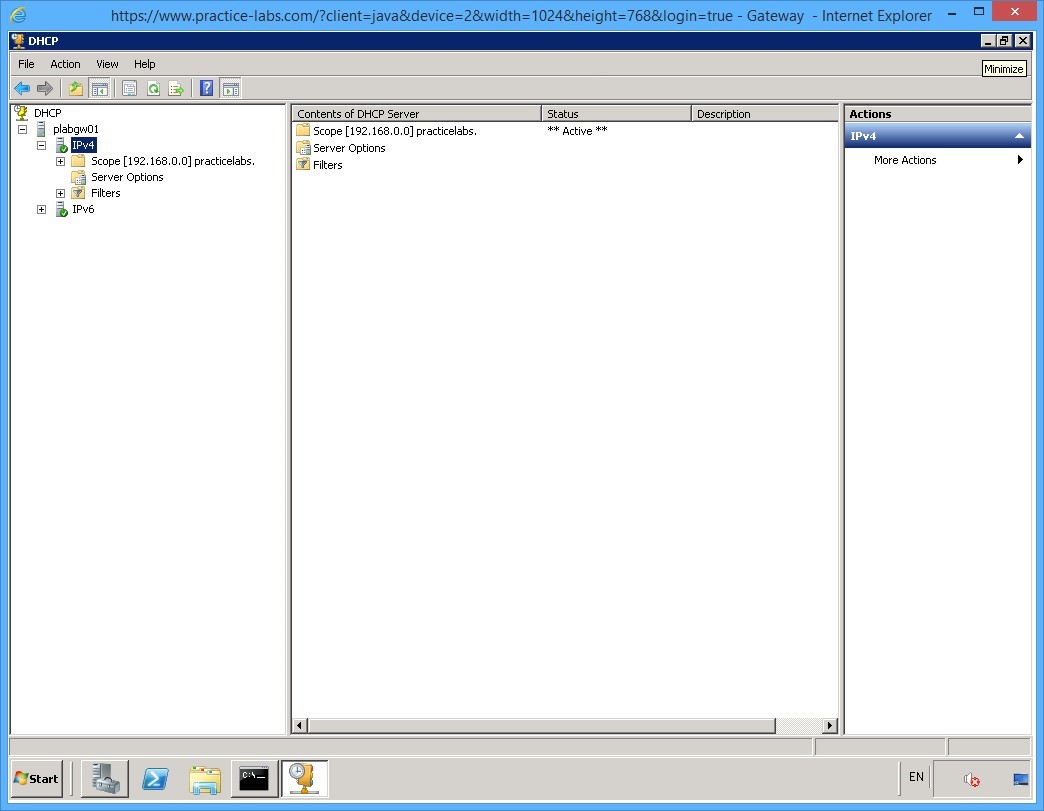
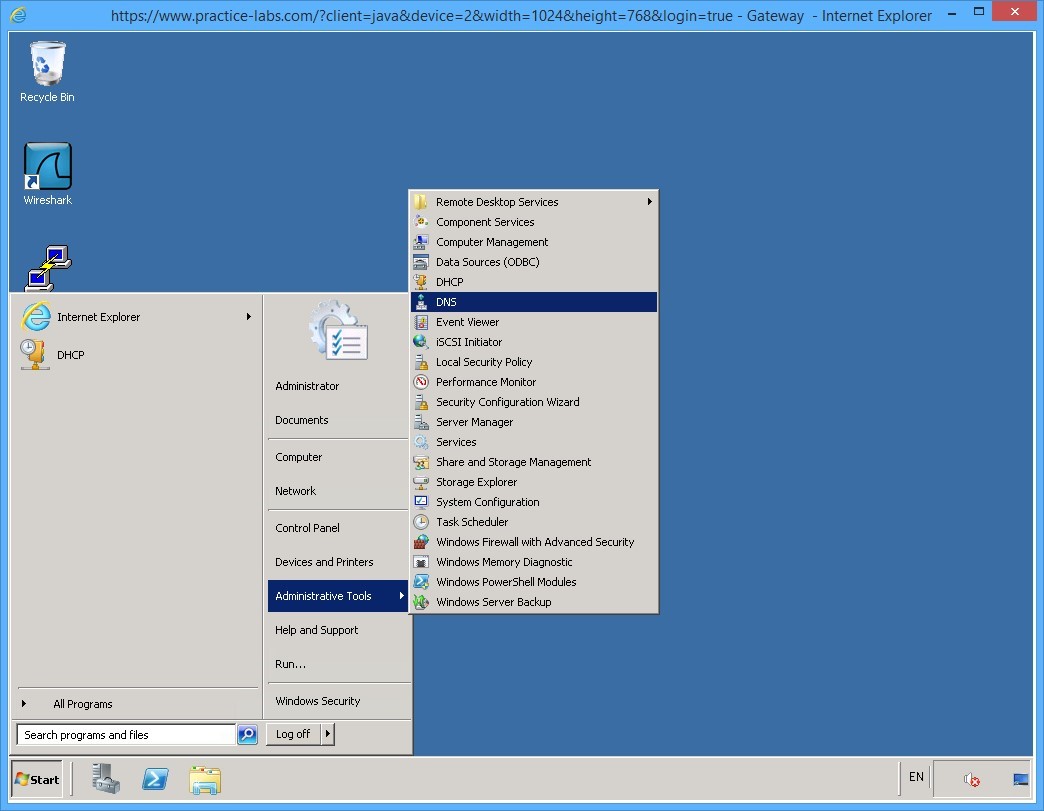
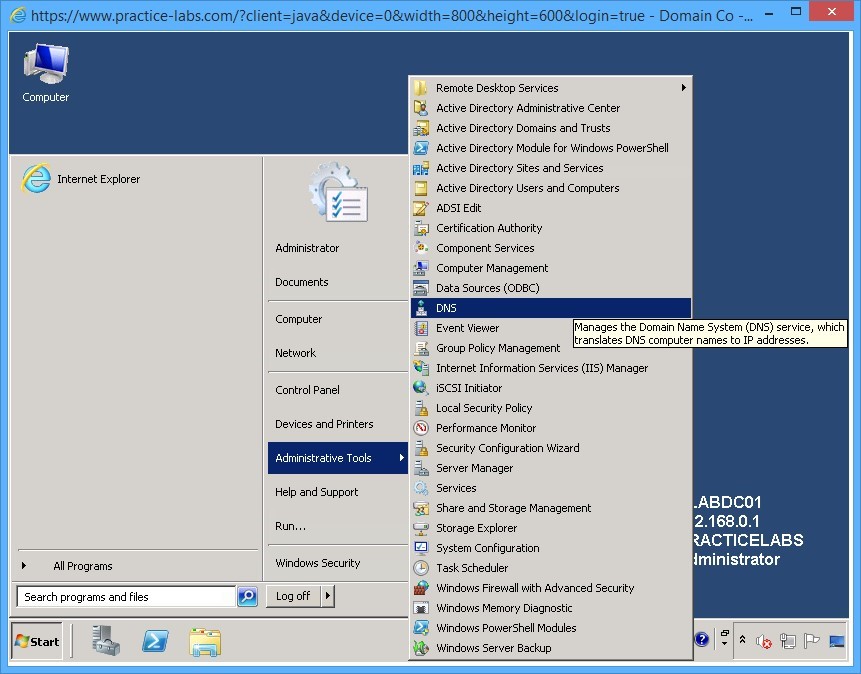
On PLABGW01 device, click Start, select Administrative Tools and then select DHCP.
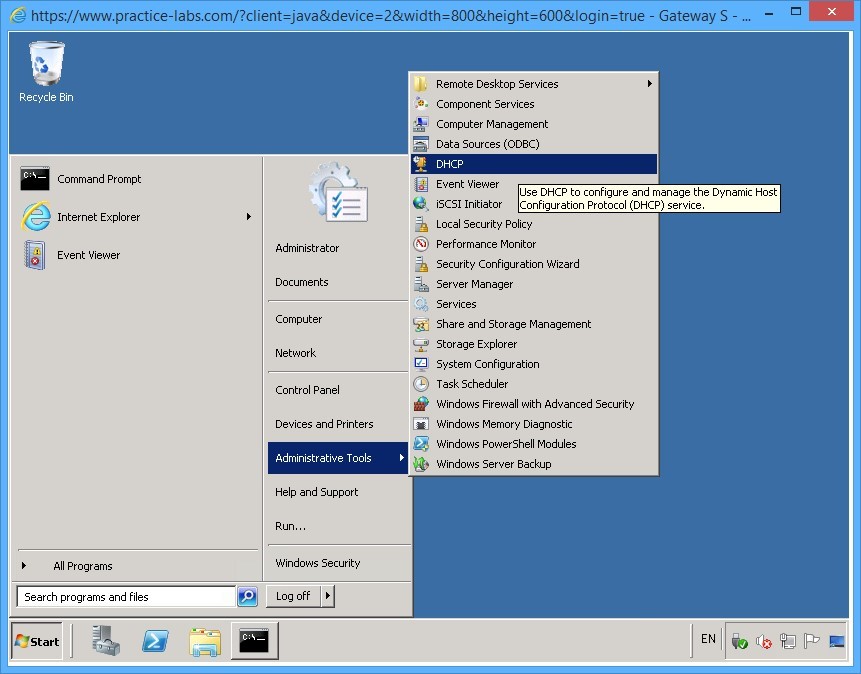
Step 2
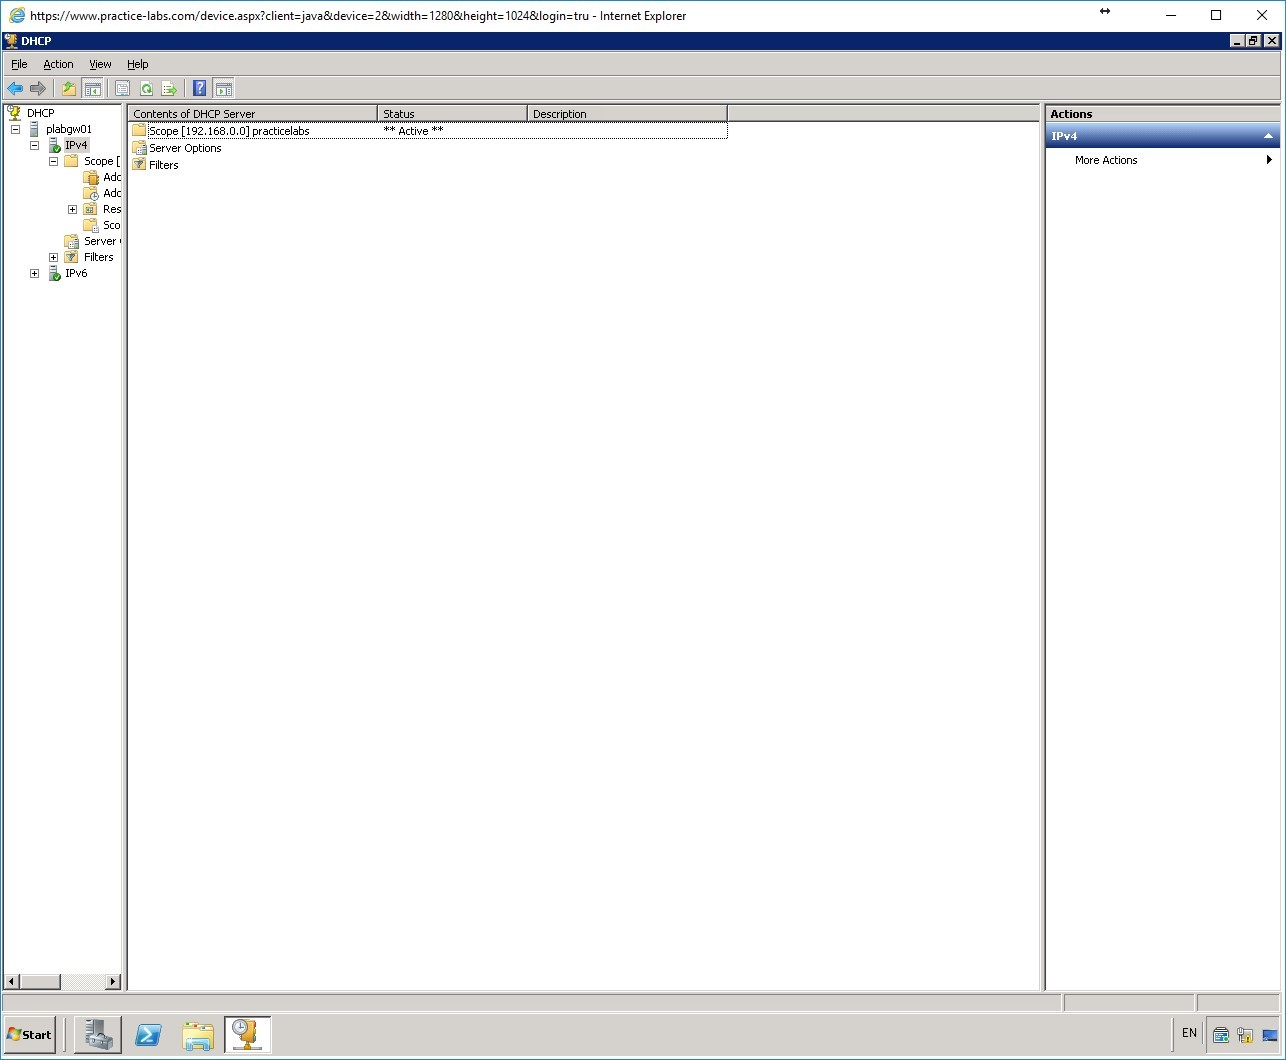
The DHCP window is displayed.
Expand the plabgw01 in the left pane and then select IPv4 node.
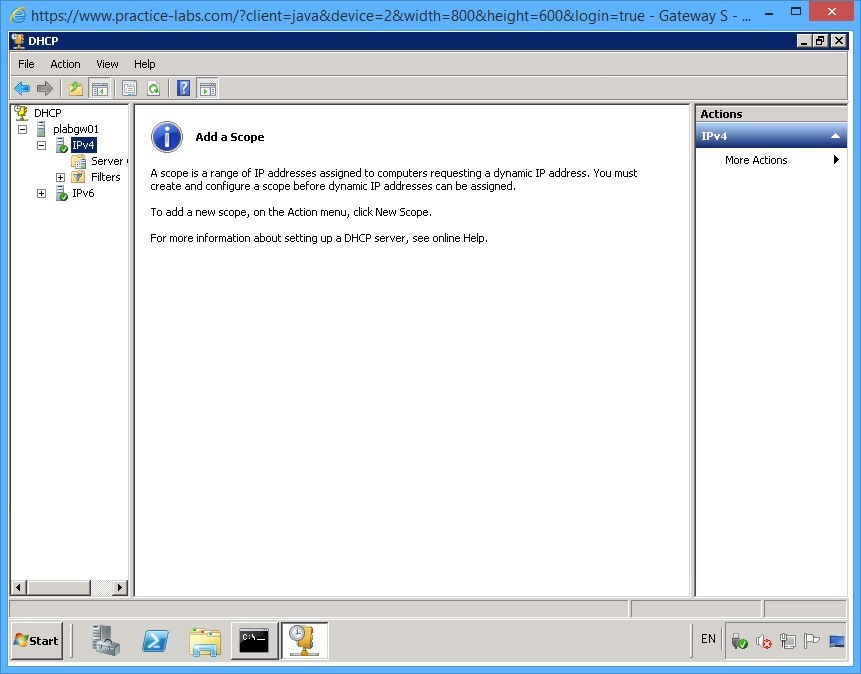
Step 3
In the right pane, click More Actions under the Actions pane and select New Scope.
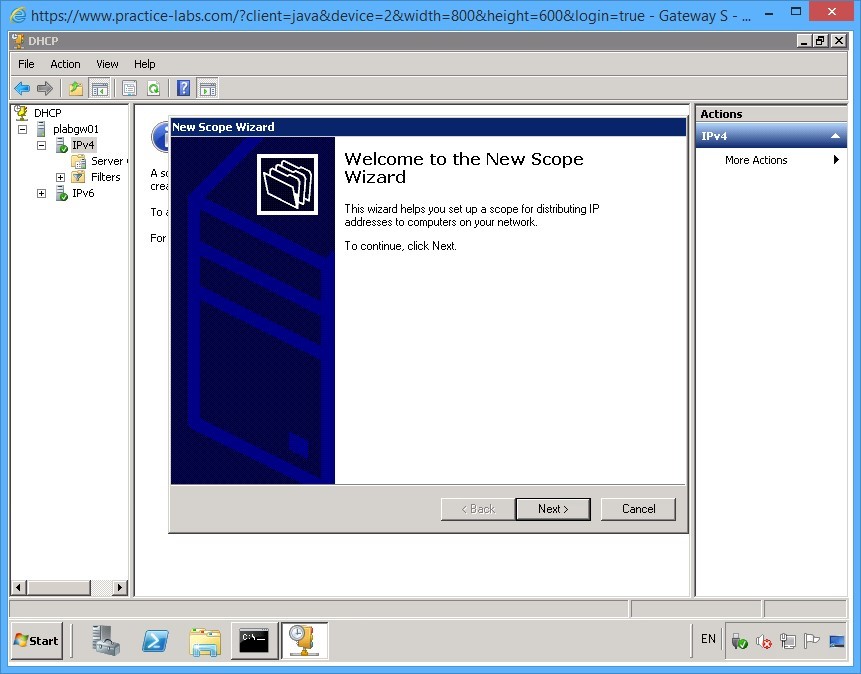
Step 4
The New Scope Wizard window is displayed.
On the Welcome to the New Scope Wizard page, read the information and click Next.
Step 5
On the Scope Name page, in the Name textbox, type:
practicelabs
Click Next.

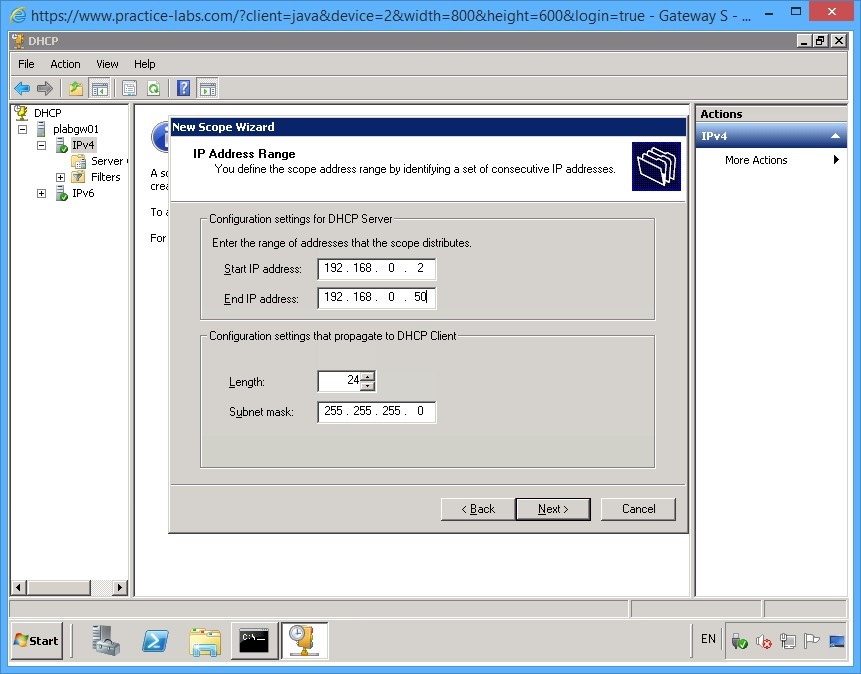
Step 6
On the IP Address Range page, click in the Start IP address field and type:
192.168.0.2
In the End IP address field, type:
192.168.0.50
Keep the default values in Length and Subnet mask textboxes.
Click Next.
Step 7
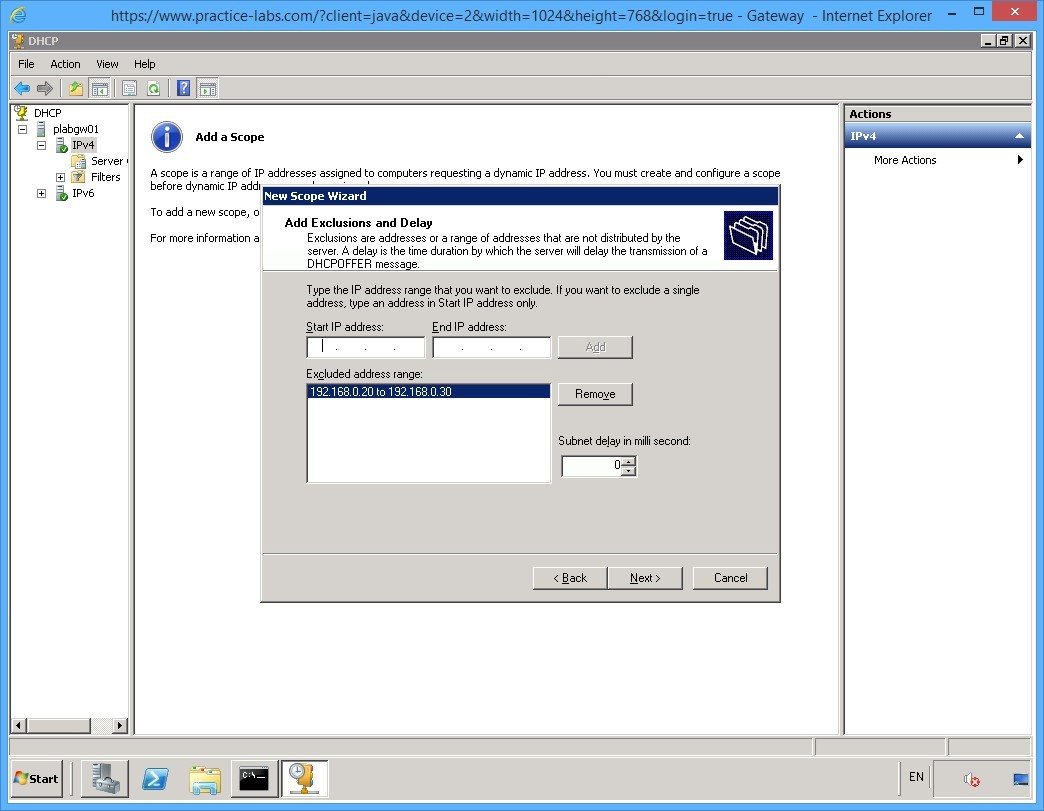
On the Add Exclusions and Delay page, click the Start IP address field and type:
192.168.0.20
Click the End IP address field and type:
192.168.0.30
Click Add.
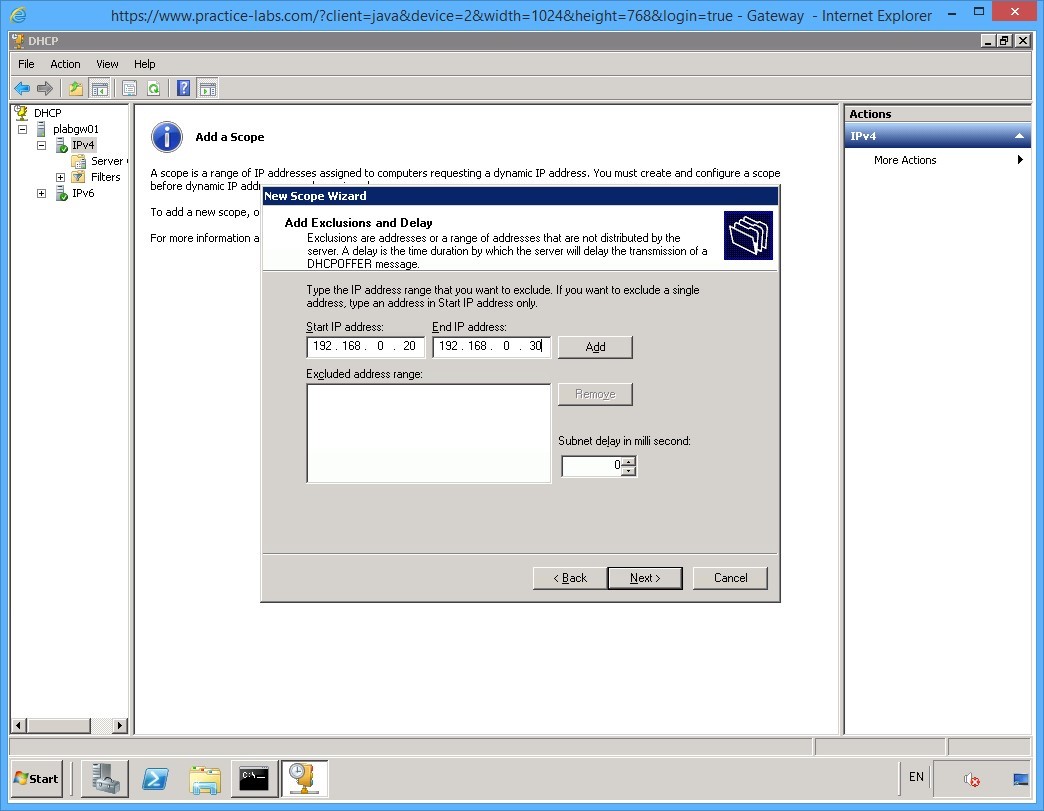
Step 8
After adding the IP address block 192.168.0.20-192.168.0.30 in the Exclude address range text box, click Next.
Step 9
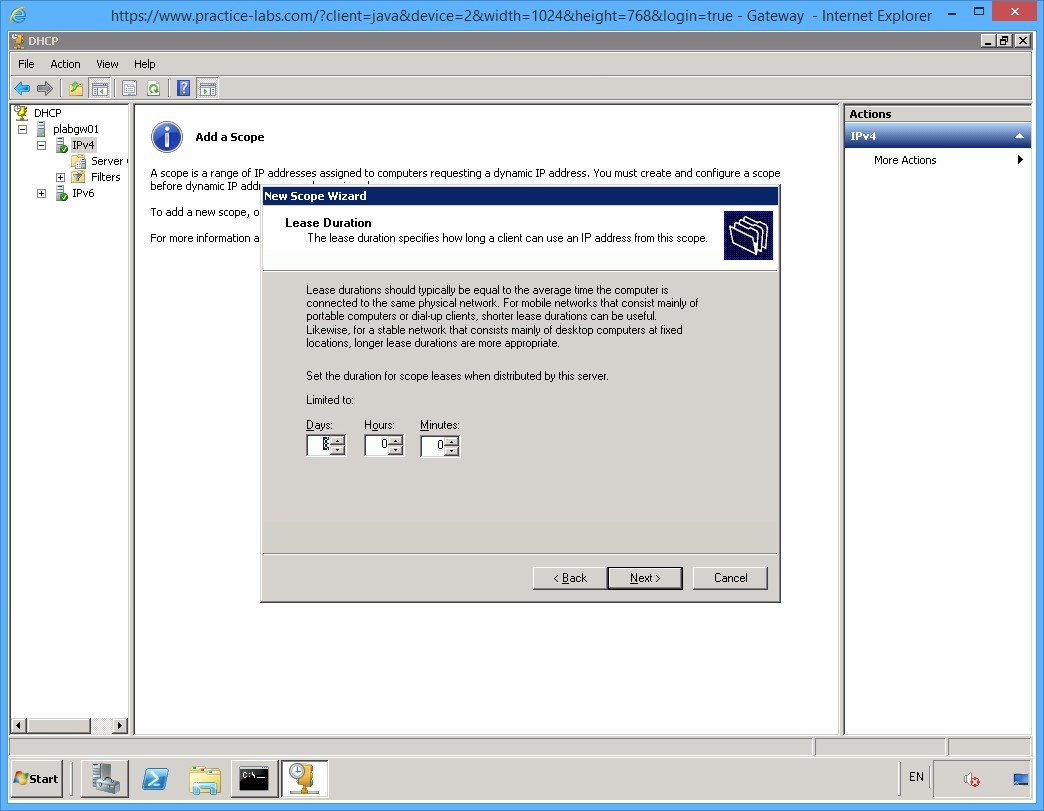
On the Lease Duration page, keep the default values and click Next.
Step 10
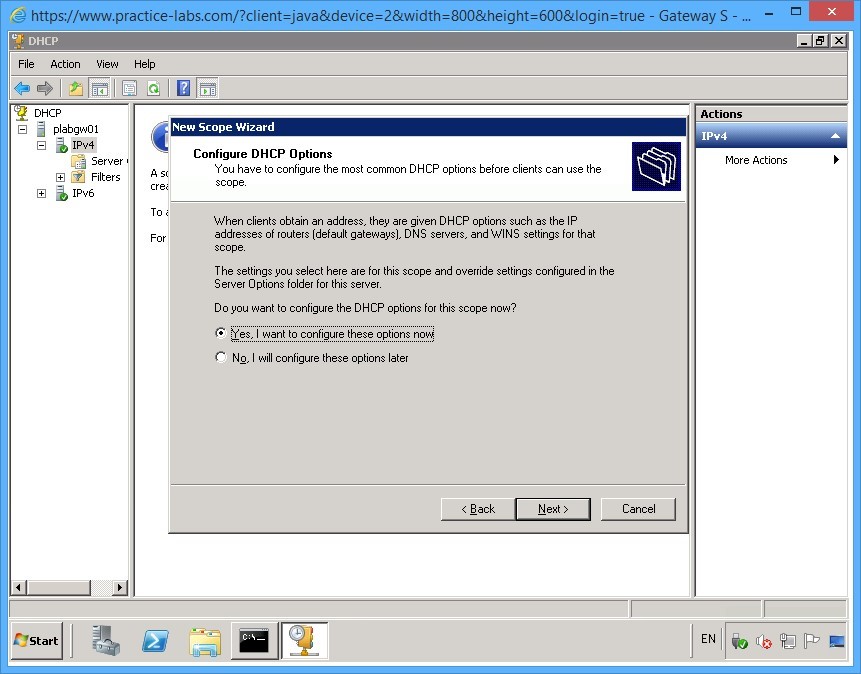
On the Configure DHCP Options page, verify that Yes, I want to configure these options now option button is selected.
Click Next.
Step 11
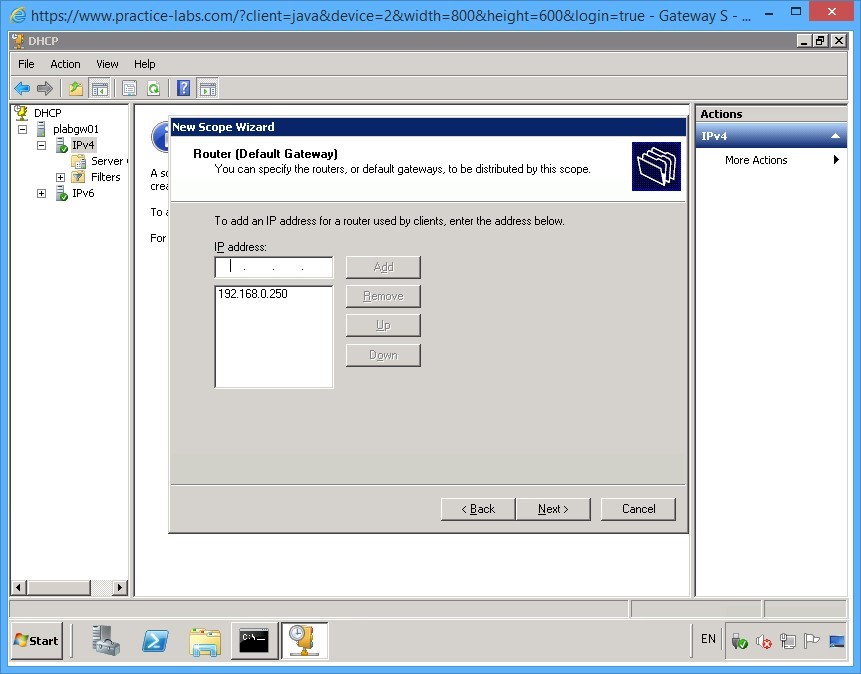
On the Router (Default Gateway) page, the IP address textbox, type:
192.168.0.250
Click Add.
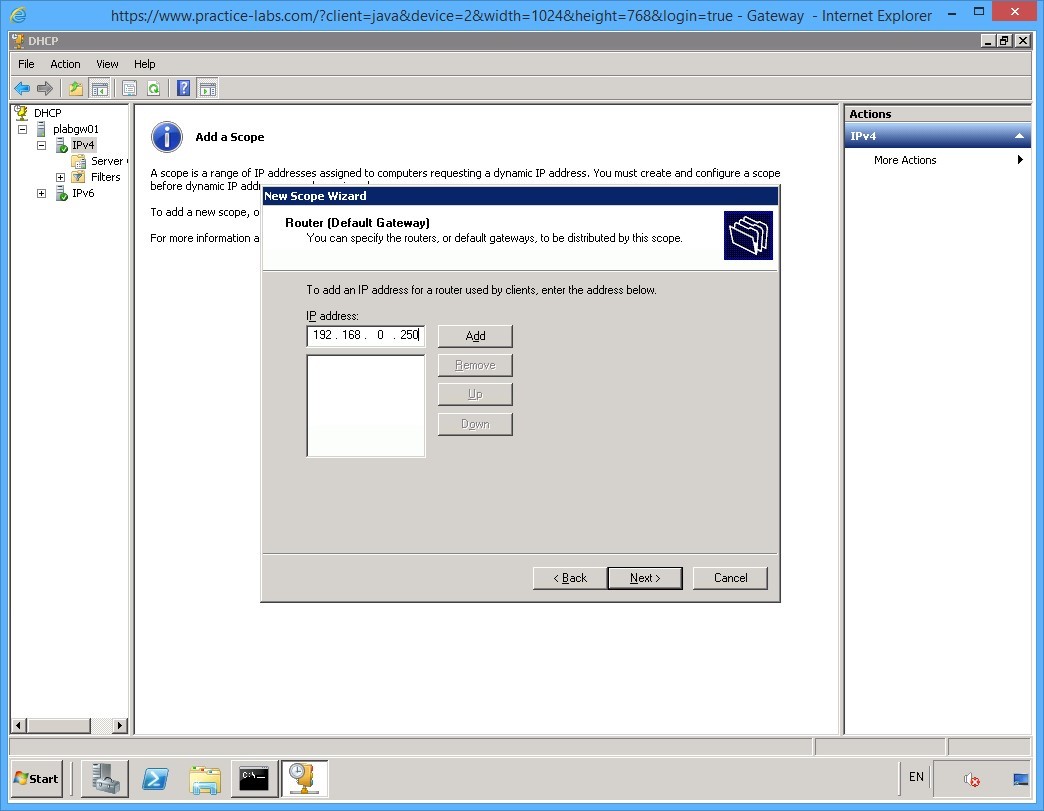
Step 12
After adding 192.168.0.250 in the Router list box, click Next.
Step 13
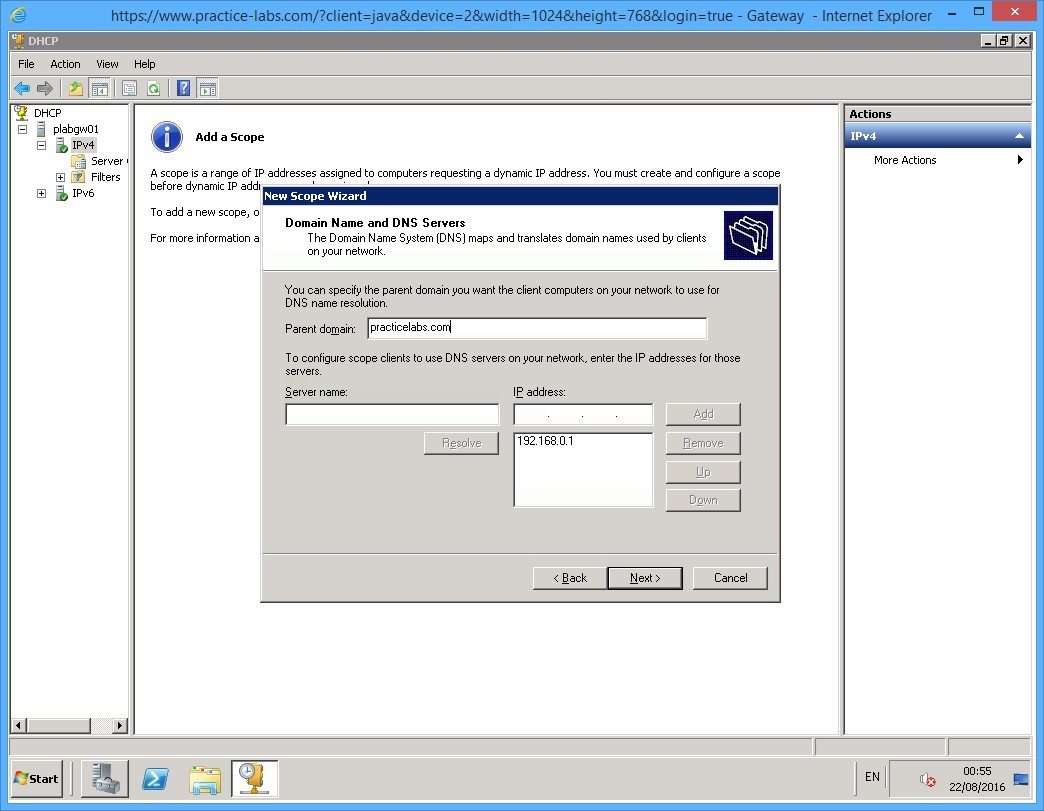
On the Domain Name and DNS Servers page, note the IP address of the default DNS server has already been added in the IP address list box.
On the Parent domain text box, type:
practicelabs.com
Click Next.
Step 14
On the WINS Servers page, do not add any WINS server.
Click Next.

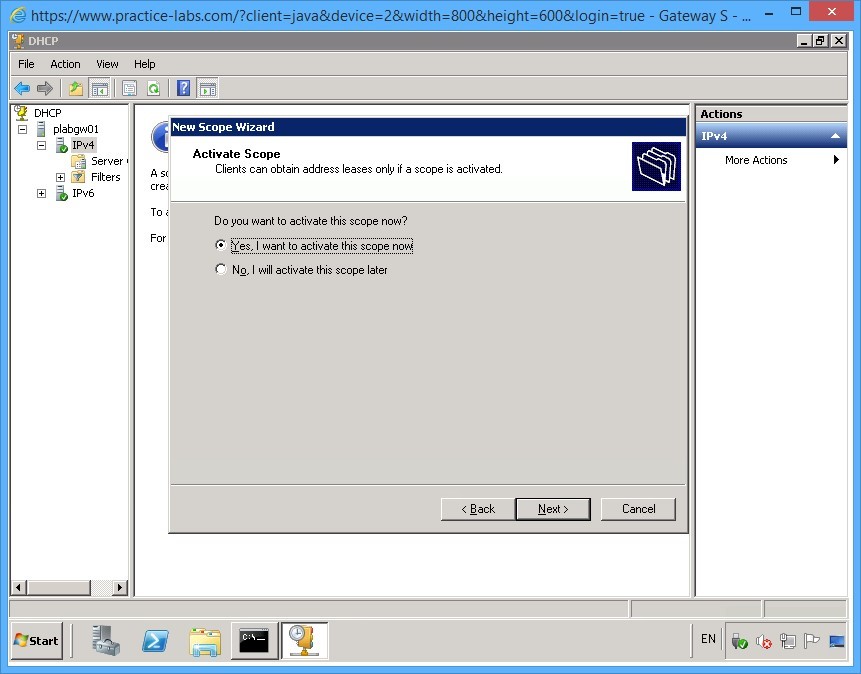
Step 15
On the Activate Scope page, ensure that Yes, I want to activate this scope now option is selected.
Click Next.
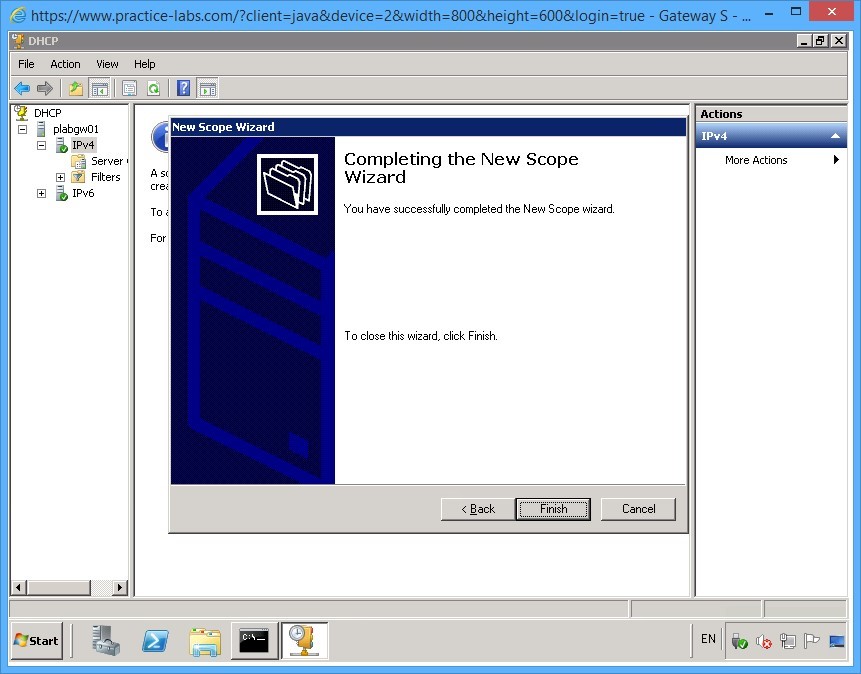
Step 16
On the Completing the New Scope Wizard page, click Finish.
Step 17
You are now back on the DHCP window.
Expand the console tree on the left pane. The activated scope called Scope [192.168.0.0] practicelabs, is listed under the IPv4 protocol node.
Keep the DHCP application window open.
Keep all devices powered on in their current state and proceed to the next task.
Task 4 - Configure Reservations on DHCP Server
IP addresses can be set aside for important devices in your network to ensure that these devices will have their dedicated IP address. To configure reservations, perform the following steps:
Step 1
Connect to PLABWIN701 device.
Click Start and in the Search programs and files box, type:
cmd
Press Enter.
Step 2
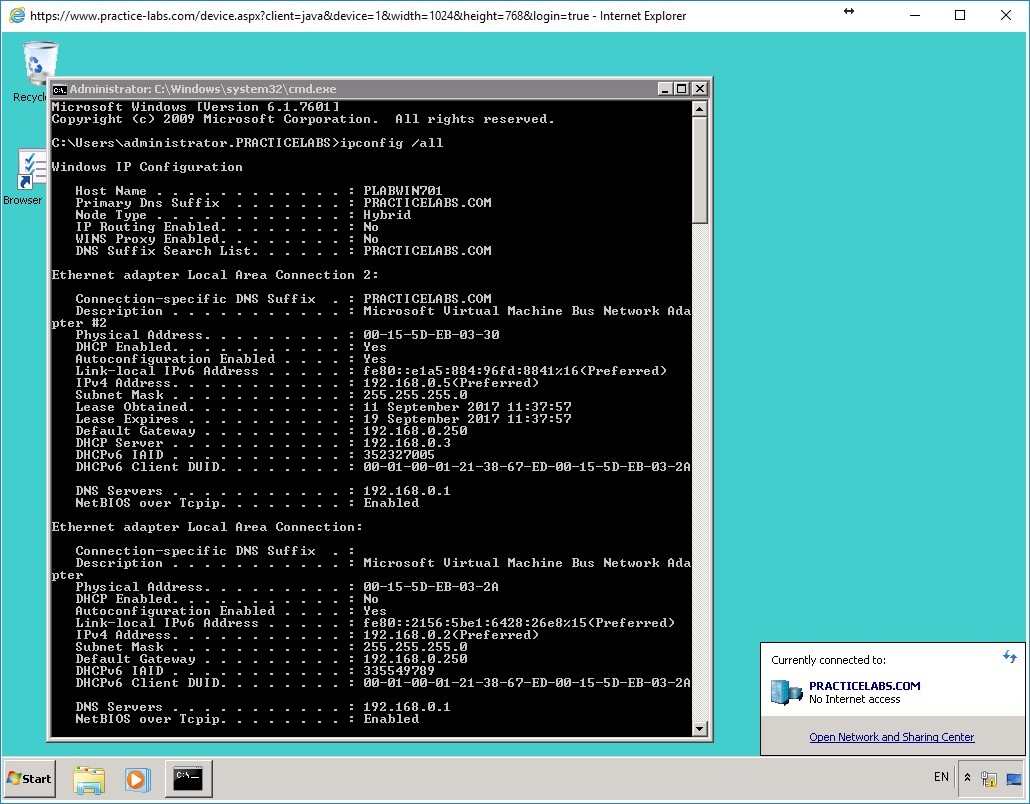
From the command prompt, type:
ipconfig /all
Press Enter.
Step 3
Look for Local Area Connection 2 section and write down the Physical Address of the mentioned network connection for your reference.
Local Area Connection 2 is configured with an Automatic Private IP Address beginning with 169.254.x.x. This connection name will be configured with an IP address leased from DHCP server.
You will need this information later when you make reservations in DHCP.
Note: The Physical Address that you will get may slightly differ from the screen shot.
Keep the command prompt window open.
Step 4
Switch to PLABGW01 device.
The DHCP console is open.
Step 5
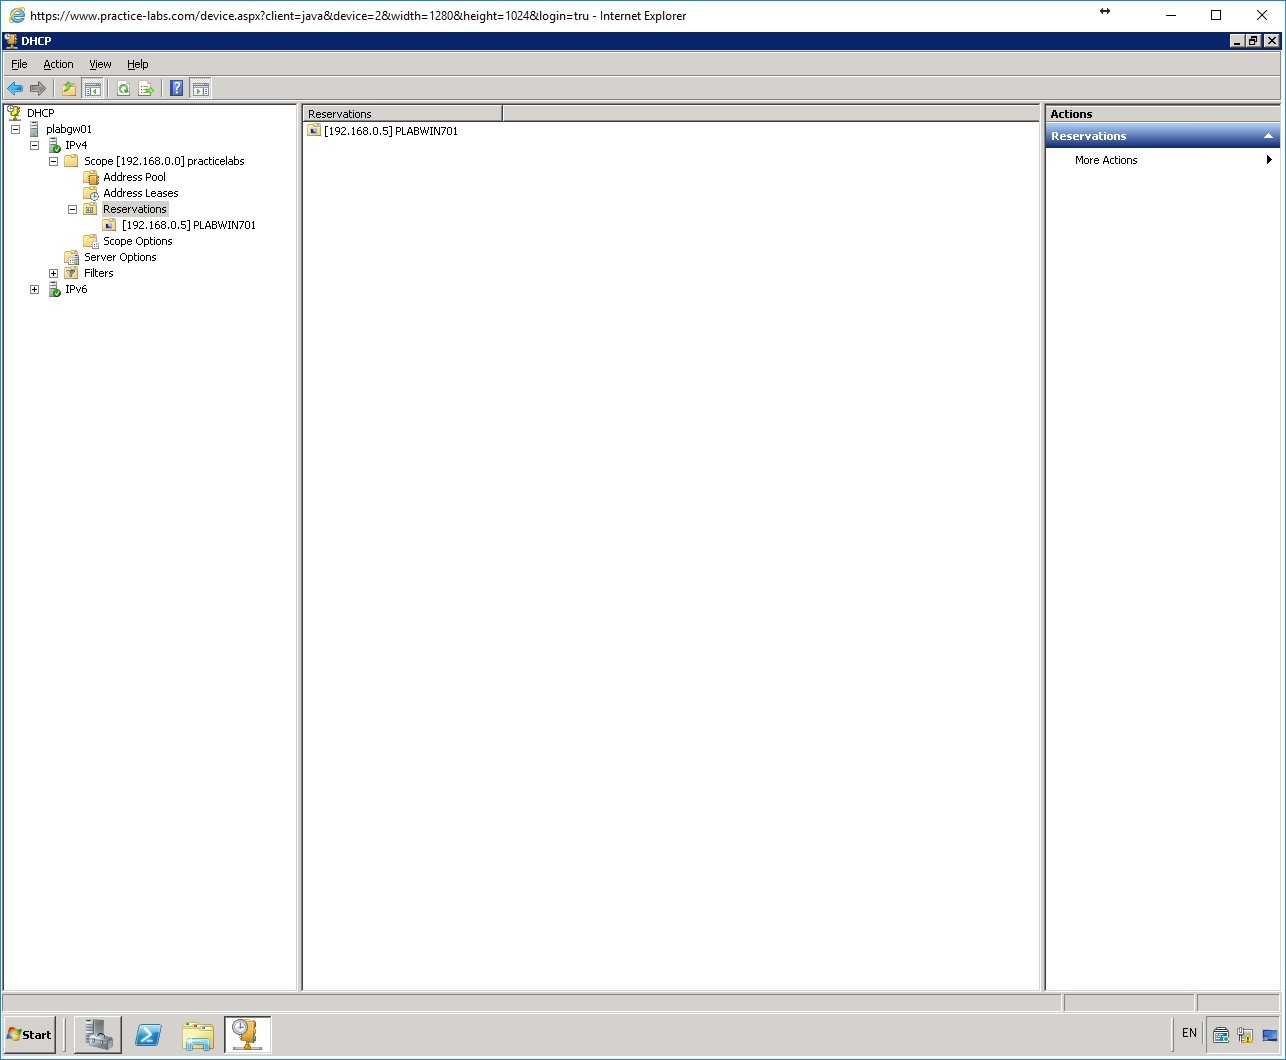
In the left pane, expand the console tree under IPv4 > Scope [192.168.0.0] practicelabs and select Reservations folder.
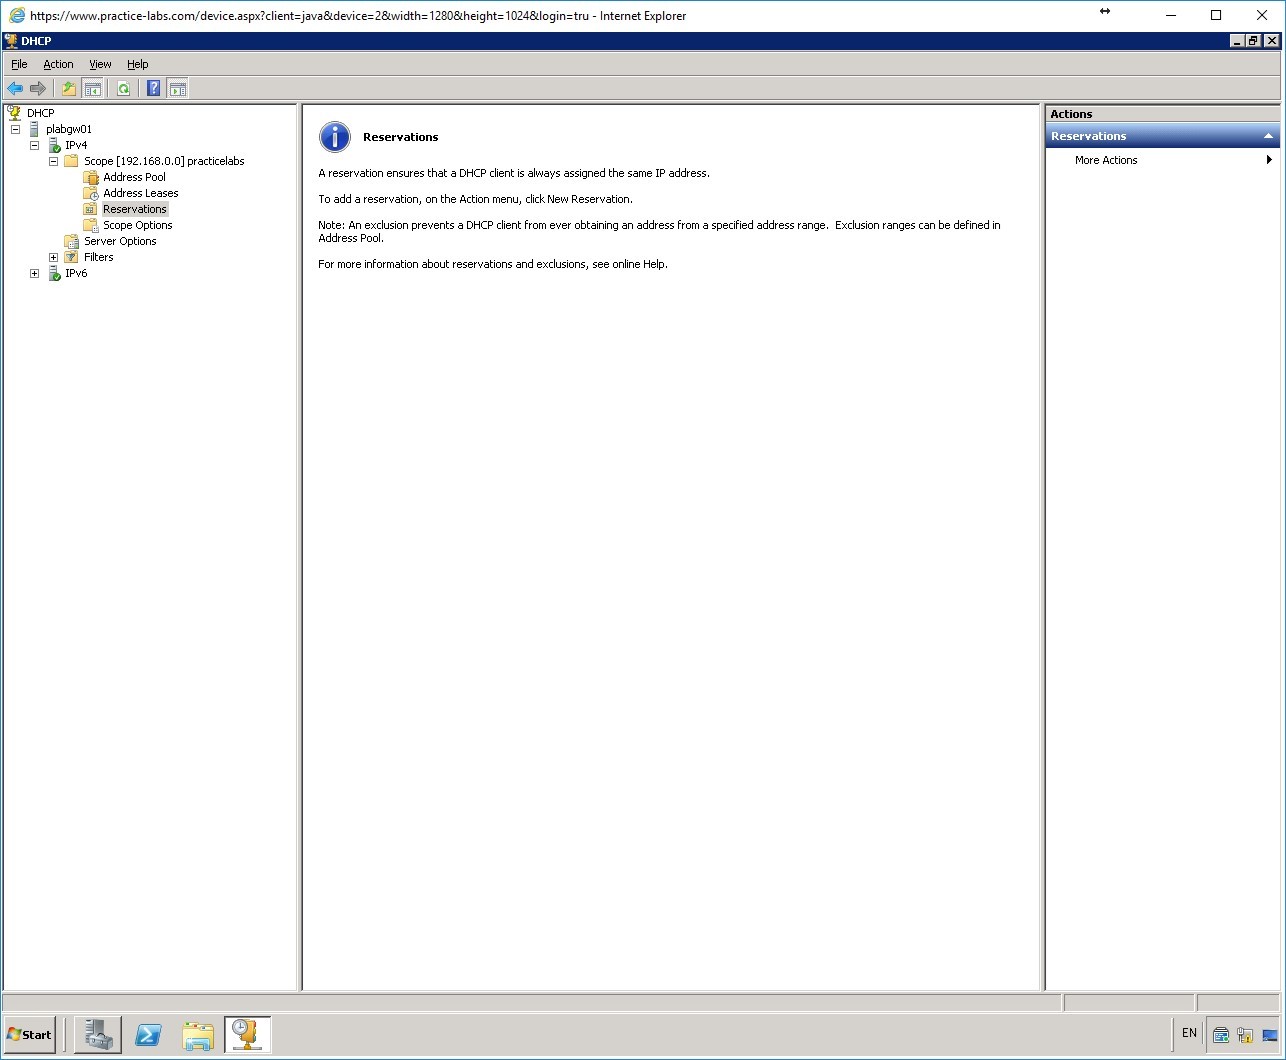
Step 6
Under the Actions panel on the right, click More Actions and select New Reservation.
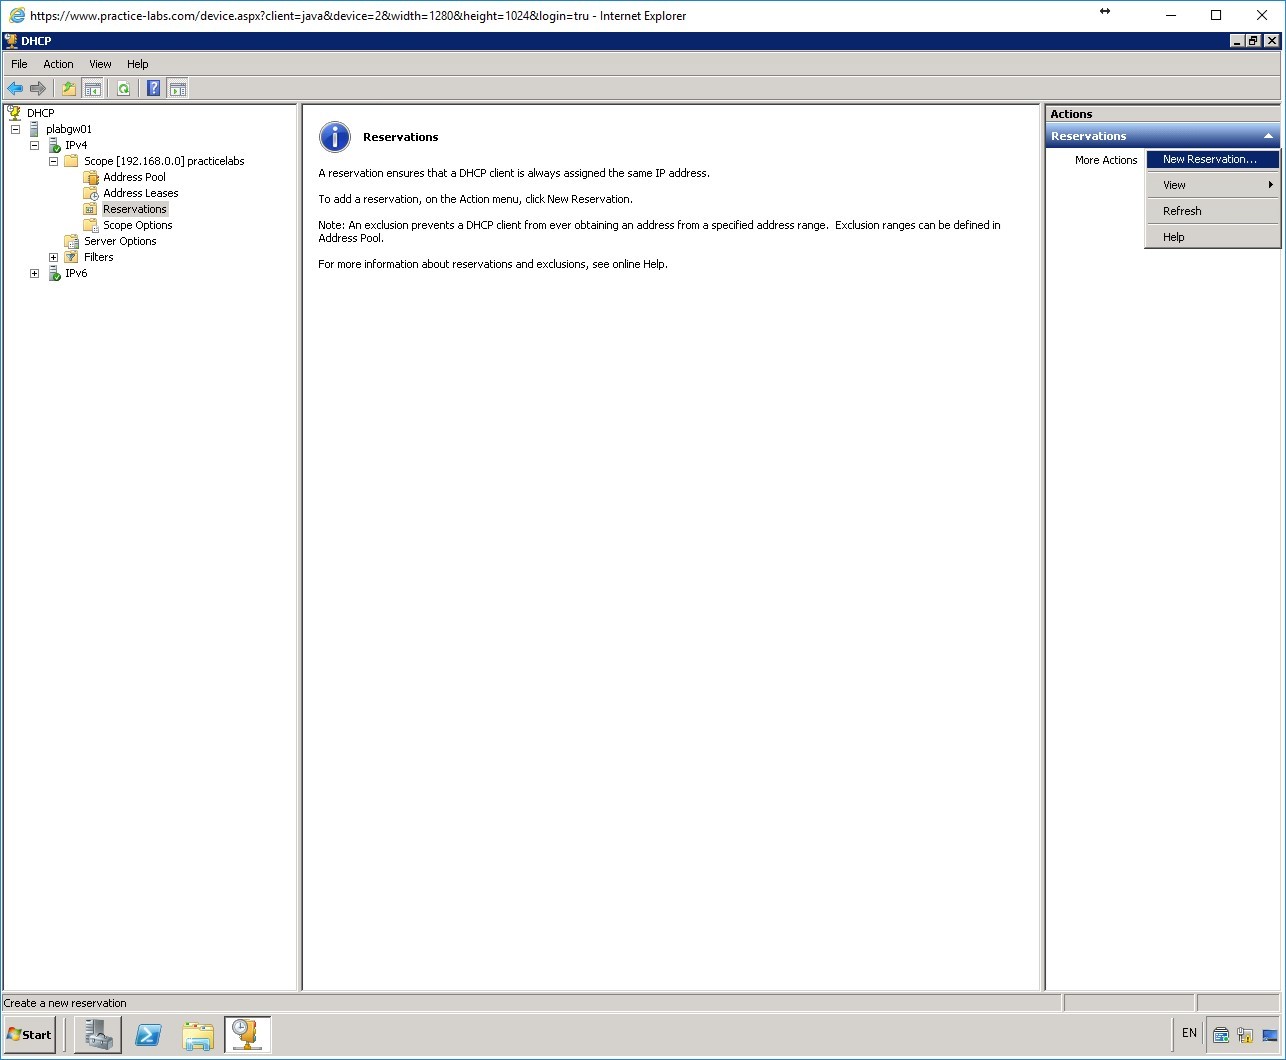
Step 7
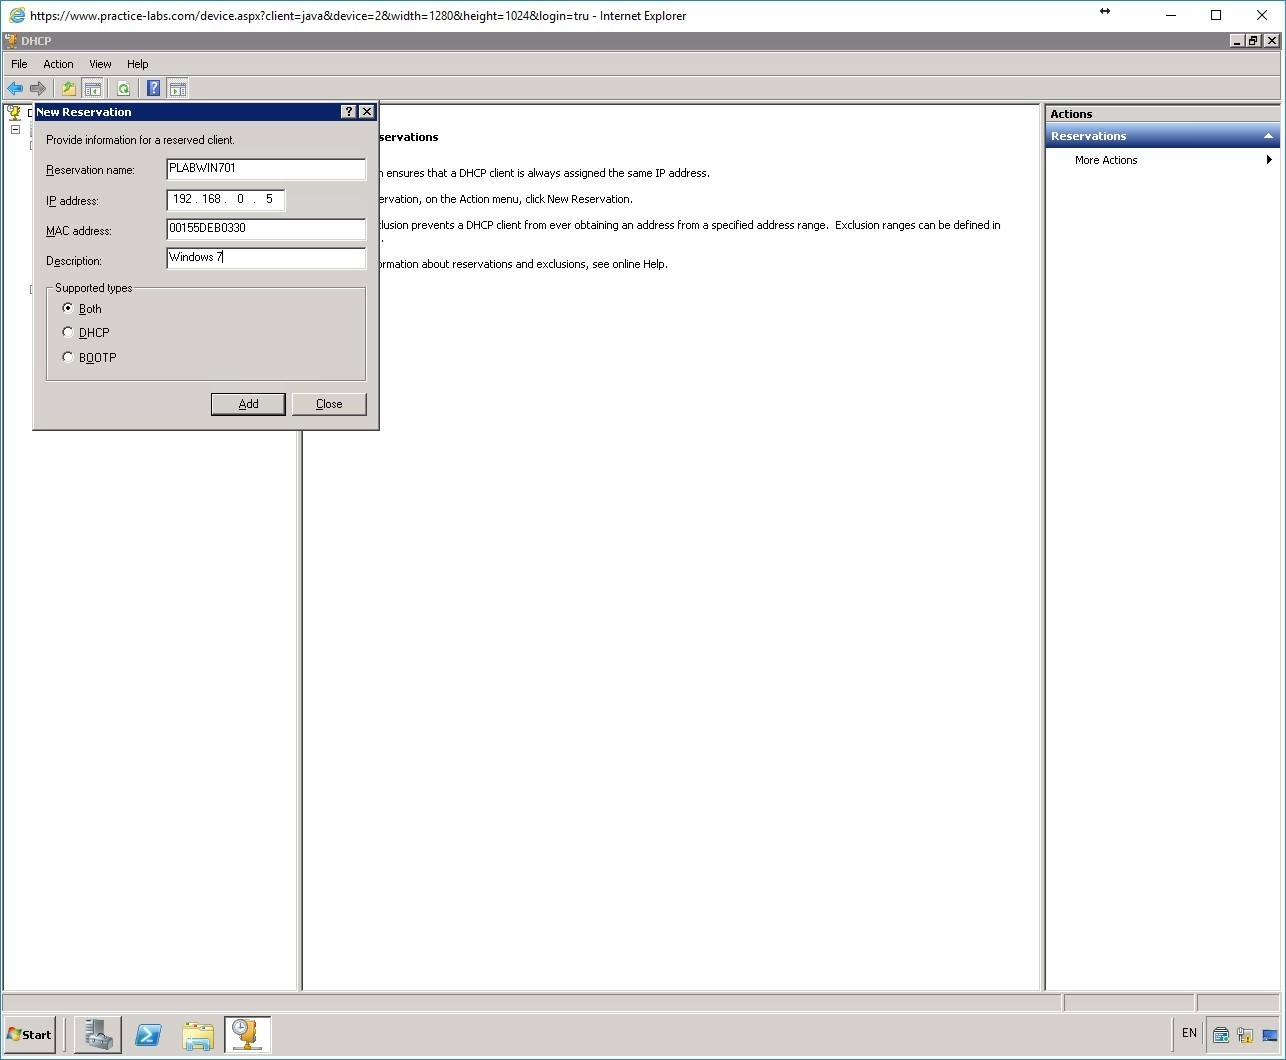
The New Reservation dialog box is displayed.
Please refer to your notes where you’d taken note of the Physical address of Local Area Connection 1 of PLABWIN701.
Important: Please note that the MAC address indicated here might be slightly different from your lab.
In the Reservation name: text box, type:
PLABWIN701
In the IP address text box, type:
192.168.0.5
In the MAC address text box, type:
<Type the Physical Address you collected in Step 3 here, without the hyphens>
In the Description text box, type:
Windows 7
In the Supported types section, select Both.
Click Add.
Step 8
Click Close to close New Reservation window.
Step 9
Expand Reservations node in the console tree on the left pane. Notice the reservation that you just added.
Close DHCP console.
Keep all devices powered on in their current state and proceed to the next task.
Task 5 - Verify Reserved IP Address for PLABWIN701
In this task, you will verify that the second network interface of PLABWIN701 can lease an IP address from PLABGW01 server.
Step 1
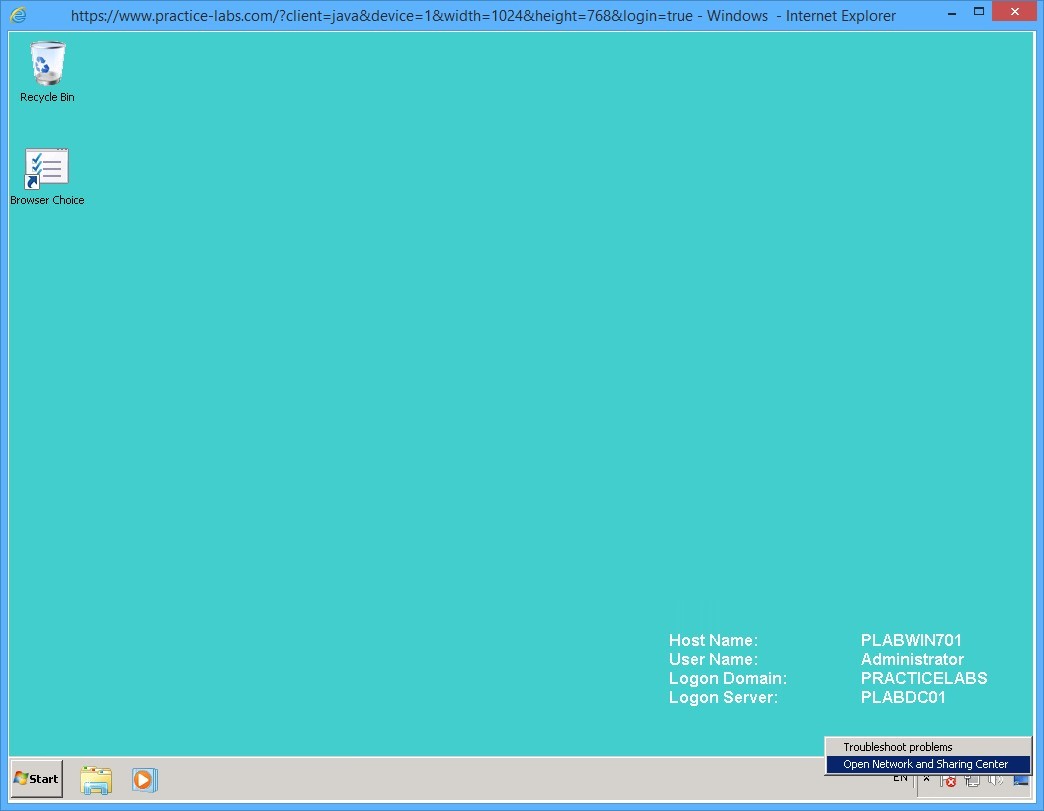
Switch to PLABWIN701 device.
Go to system tray and right-click the network icon. Select Open Network and Sharing Center.
Step 2
In Network and Sharing Center, click Change adapter settings on the left pane.

Step 3
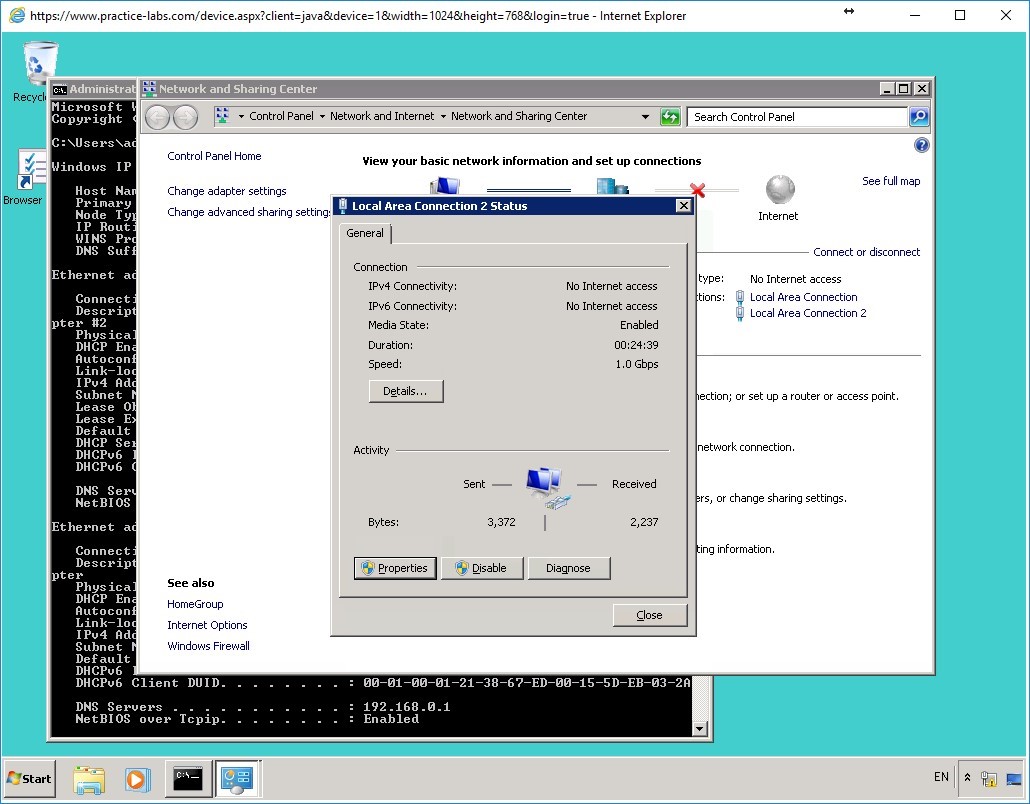
On the Network Connections window, right-click Local Area Connection 2 and select Status.

Step 4
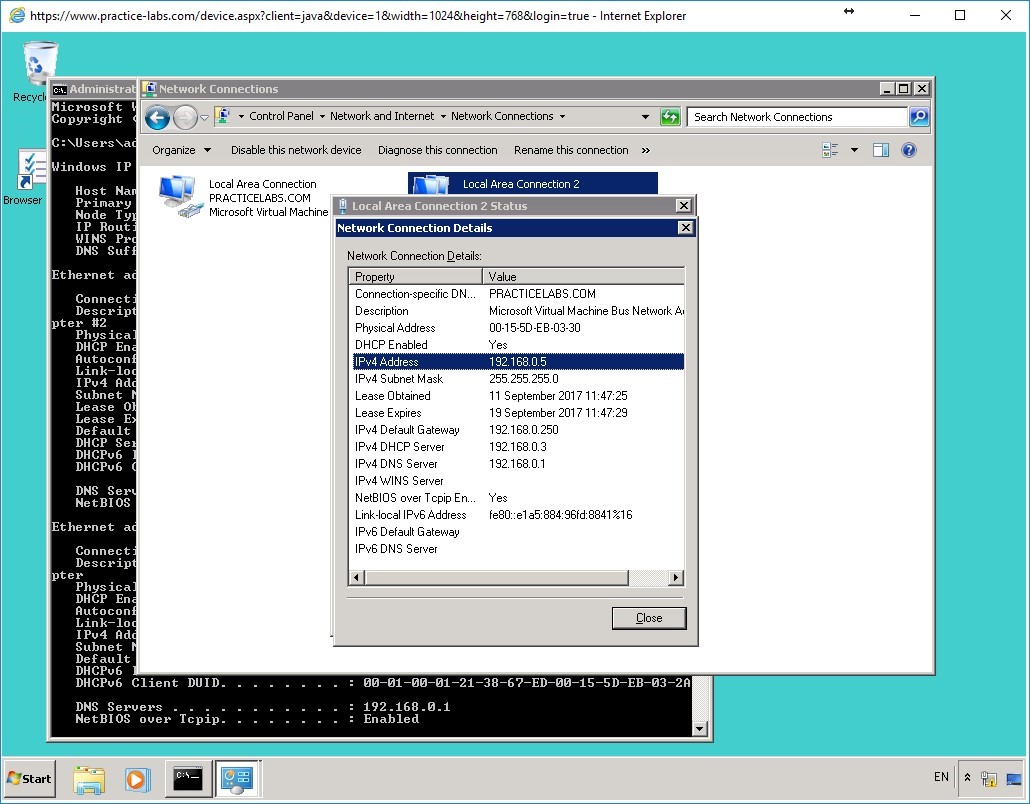
On the Local Area Connection 2 Status dialog box, click Details…
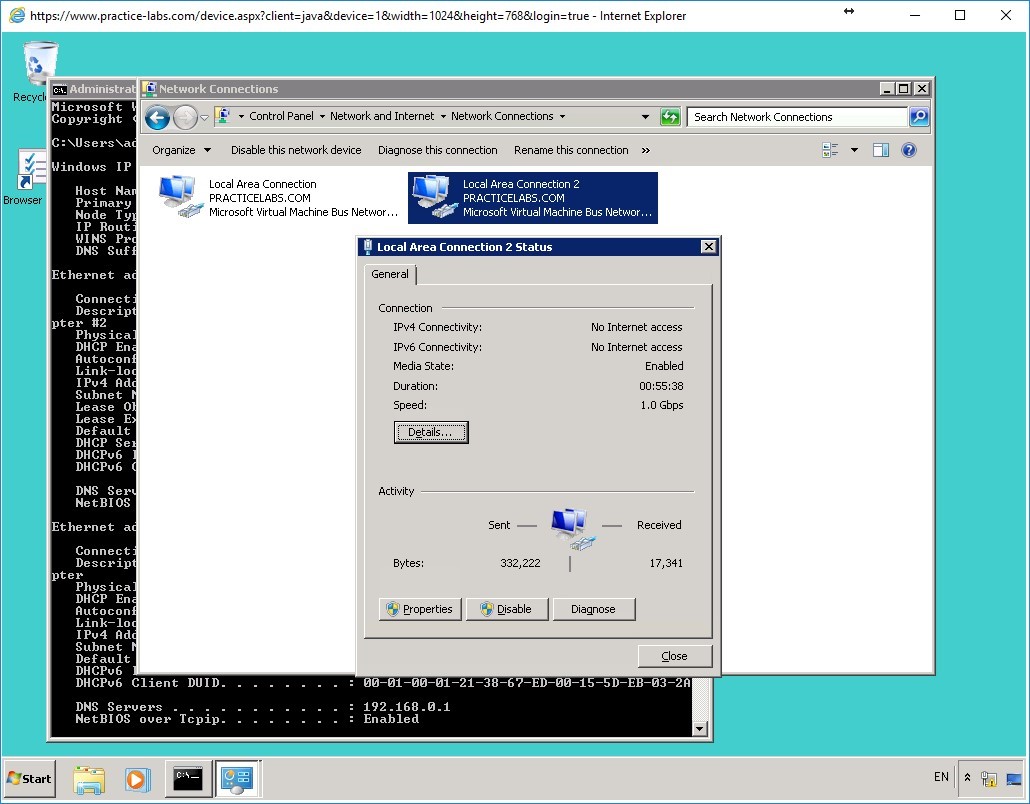
Step 5
On the Network Connection Details information box, verify that IPv4 Address is 192.168.0.5.
This is the IP address reserved for PLABWIN701.
Click Close button.
Important: If the IP address indicates 169.254.x.x, proceed to the next step. Otherwise skip to the next exercise about Domain Name System.

Step 6
Click Close to close Local Area Connection 2 Status window.
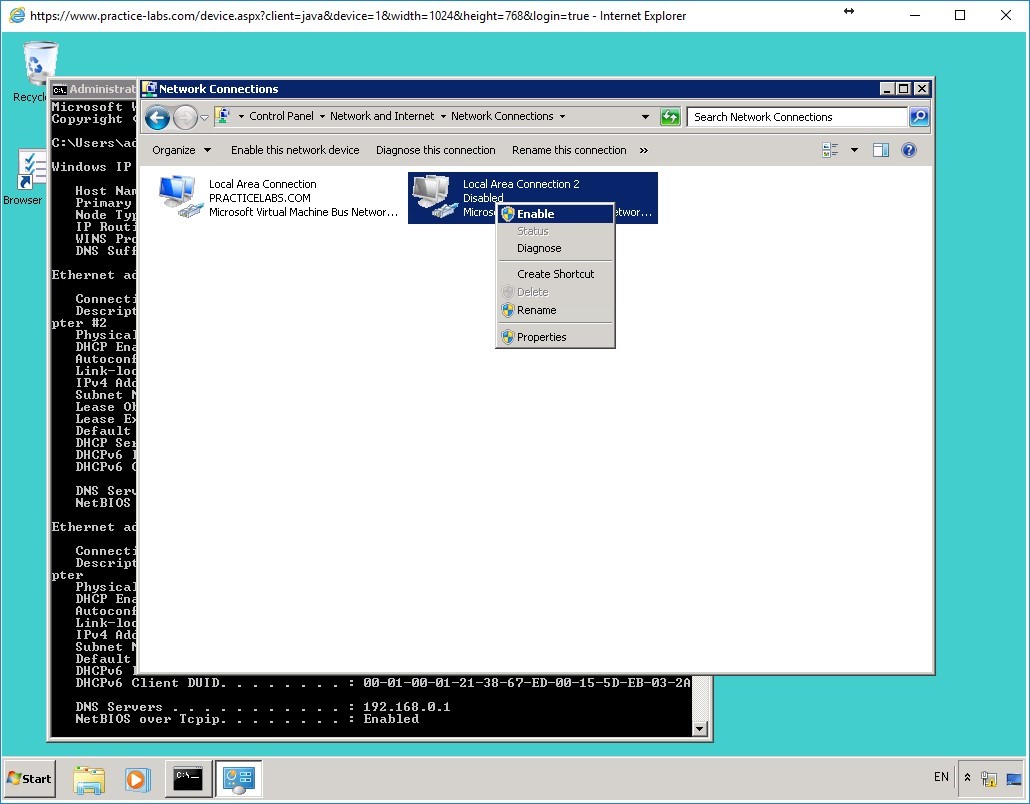
Back on the Network Connections window, right-click Local Area Connection 2 and select Disable.
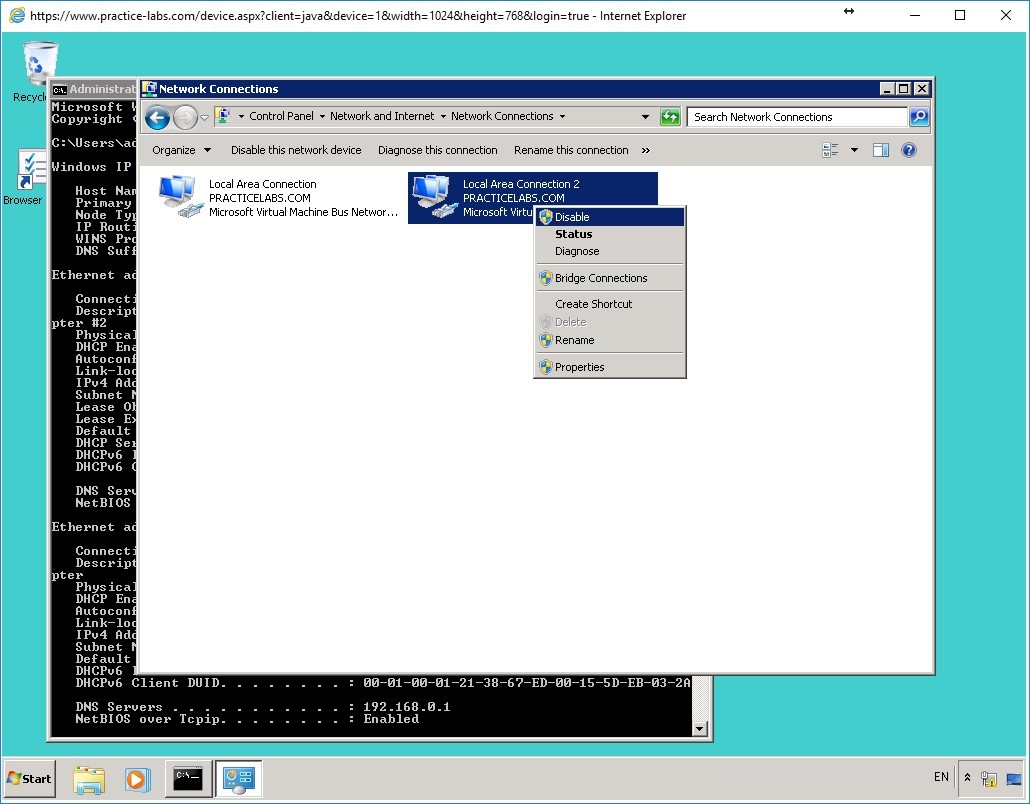
Step 7
Right-click again Local Area Connection 2 and select Enable.
Step 8
Please wait while Local Area Connection 2 is being enabled.
Right-click again Local Area Connection 2 and select Status.

Step 9
On the Local Area Connection 2 Status window, click Details to verify that the IPv4 address is 192.168.0.5.
Step 10
Click Close to close Network Connection Details window.
Similarly, close Local Area Connection 2 Status window.
Close the Network and Sharing Center and Command Prompt windows.
Keep all the devices powered on in their current state and proceed to the next exercise.
Exercise 2 - Installing and Configuring DNS
Doman Name System (DNS) is a network service that translates computer names or hostnames to numeric IP addresses or vice-versa. Although largely associated with the Internet, DNS can be used in a private network for the following benefits: Simplicity - computer names are easier to find than numeric IP addresses. Convenience- IP addresses can change but computer names can remain constant.
In this exercise, you will learn to install and configure DNS.
To better understand this technology, refer also to your course material or use your preferred search engine to research this topic in detail.
Task 1 - Install DNS
To install DNS, perform the following steps:
Step 1
Connect to the PLABGW01 device.
Launch Server Manager from the taskbar.
Step 2
The Server Manager window is displayed.
From the left pane, select Roles.
Step 3
In the right pane, under the Role Summary section, click Add Roles.
Step 4
The Add Roles Wizard is displayed.
On the Before You Begin page, read the details and click Next.
Step 5
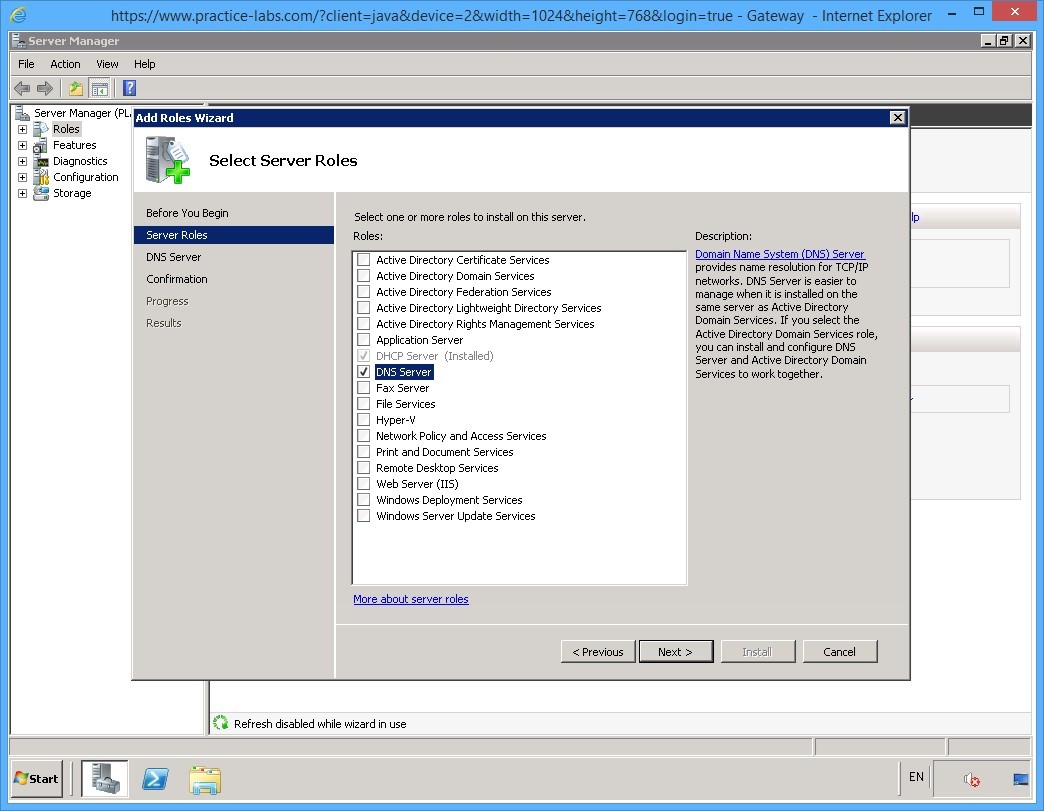
On the Select Server Roles page select DNS Server on the Roles list and click Next.
Step 6
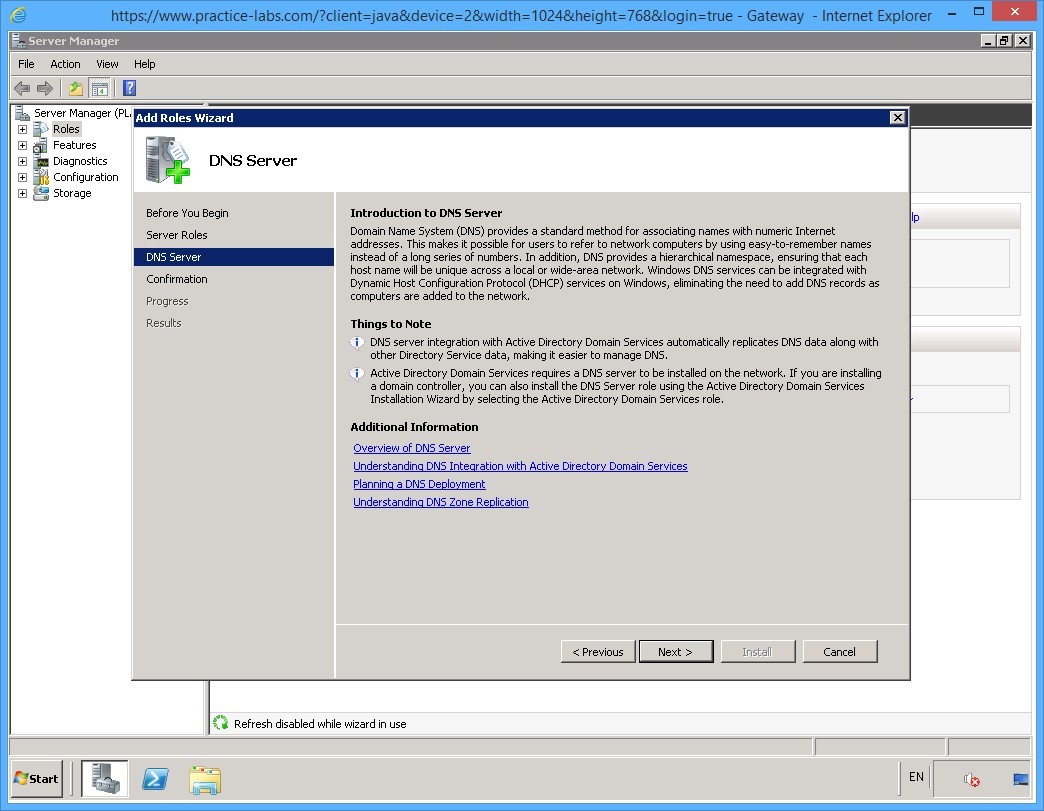
On the DNS Server page, go through the information and click Next.
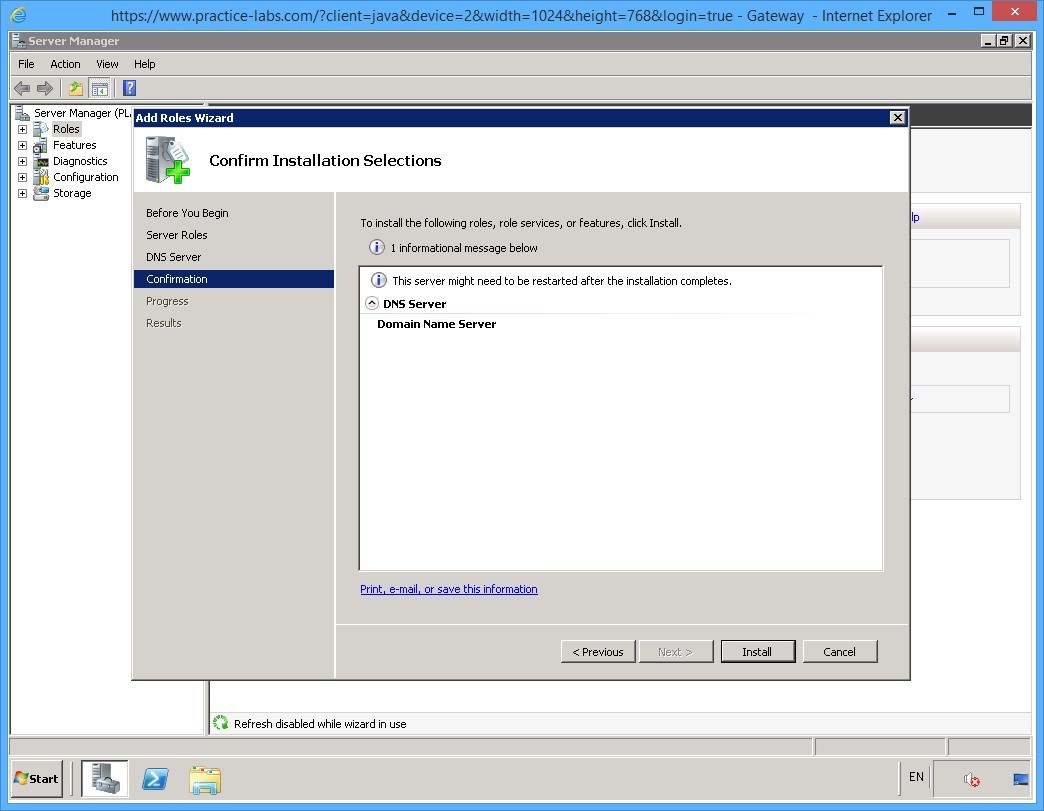
Step 7
On the Confirm Installation Selections page, verify the installation details and click Install.
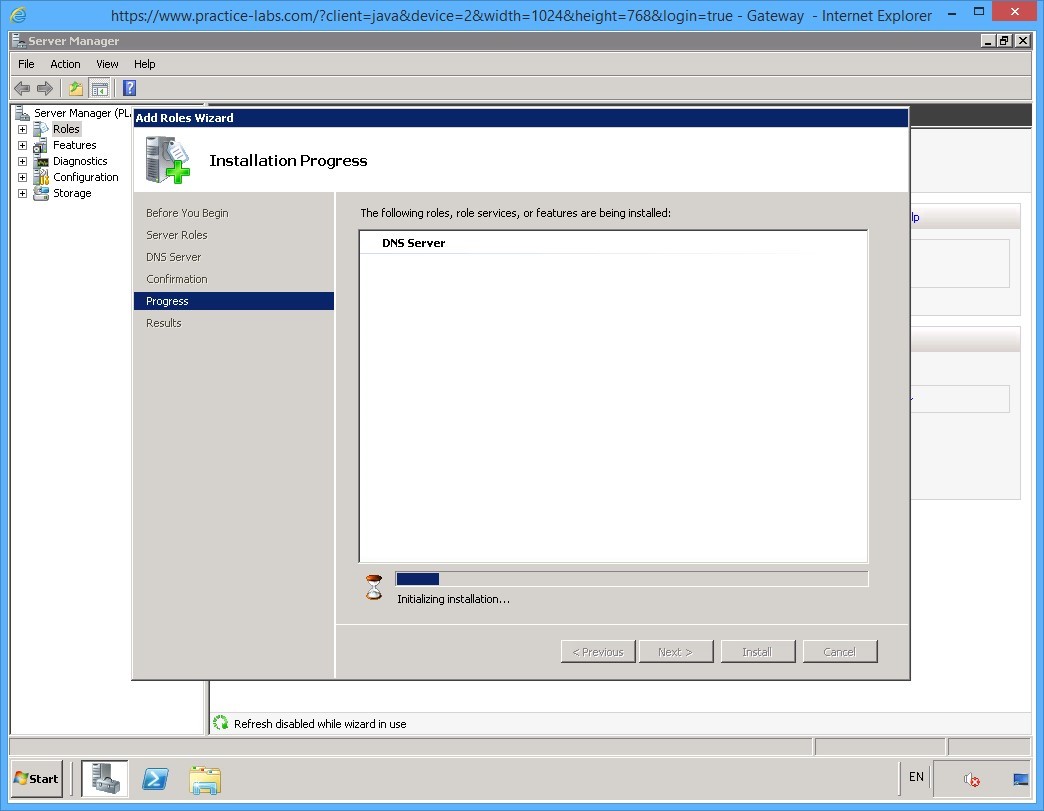
Step 8
The Installation Progress page displays the progress of the DNS server installation.
Please wait.
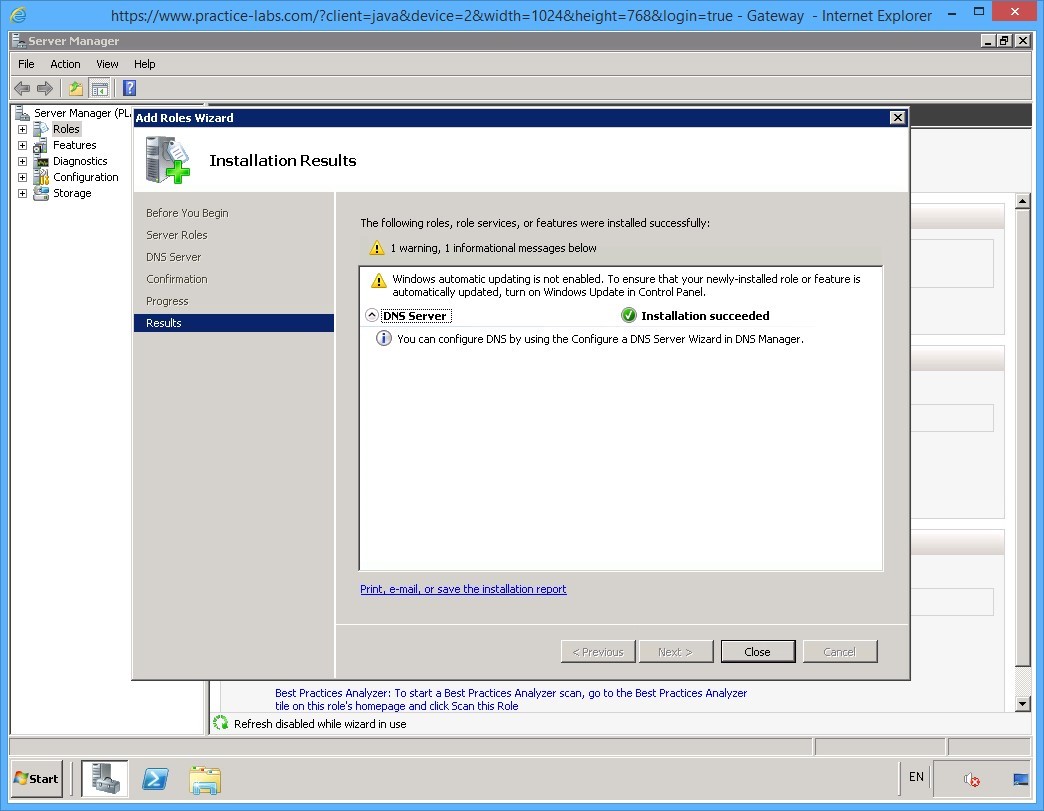
Step 9
The Installation Results page displays the installation details.
Read the details and click Close to exit the wizard.
Keep all devices powered on in their current state and proceed to the next task.
Task 2 - Configure DNS
To configure DNS, perform the following steps:
Step 1
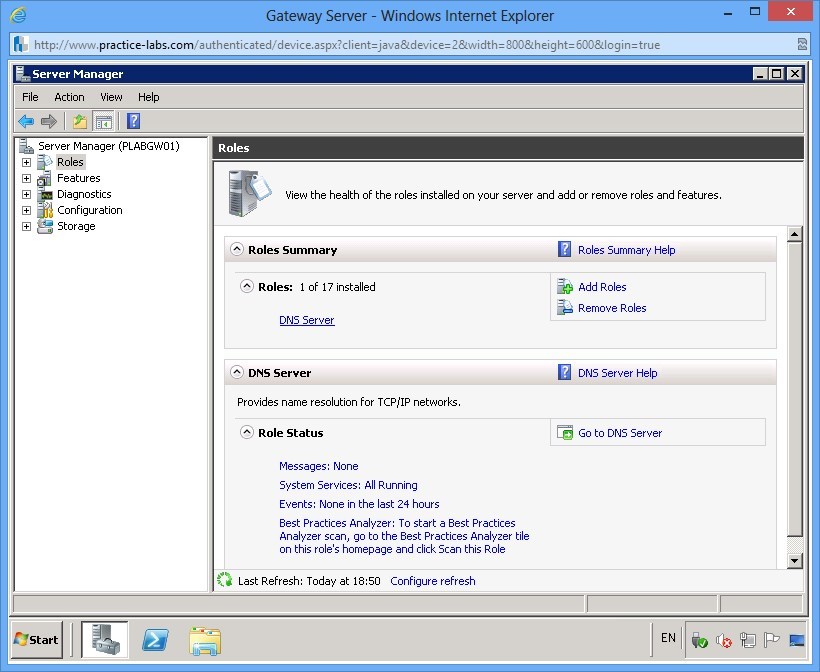
On PLABGW01 device, the Server Manager window is open.
Note that DNS Server is now added as an installed role in the Roles Summary section.
Step 2
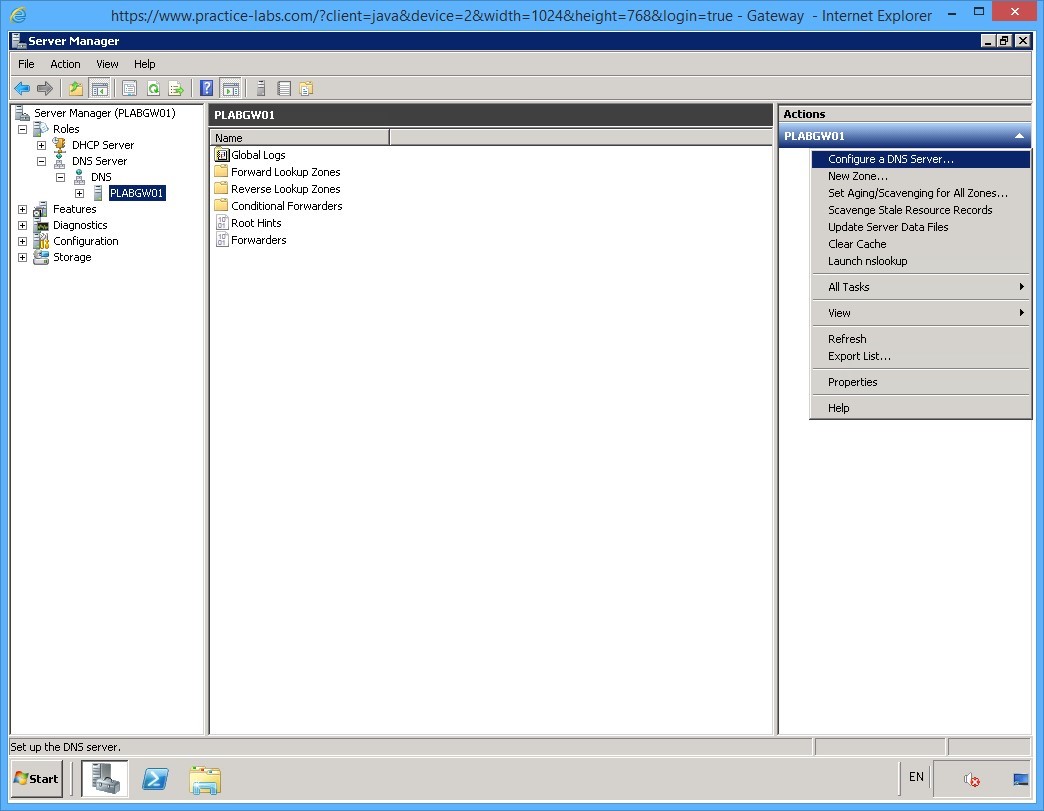
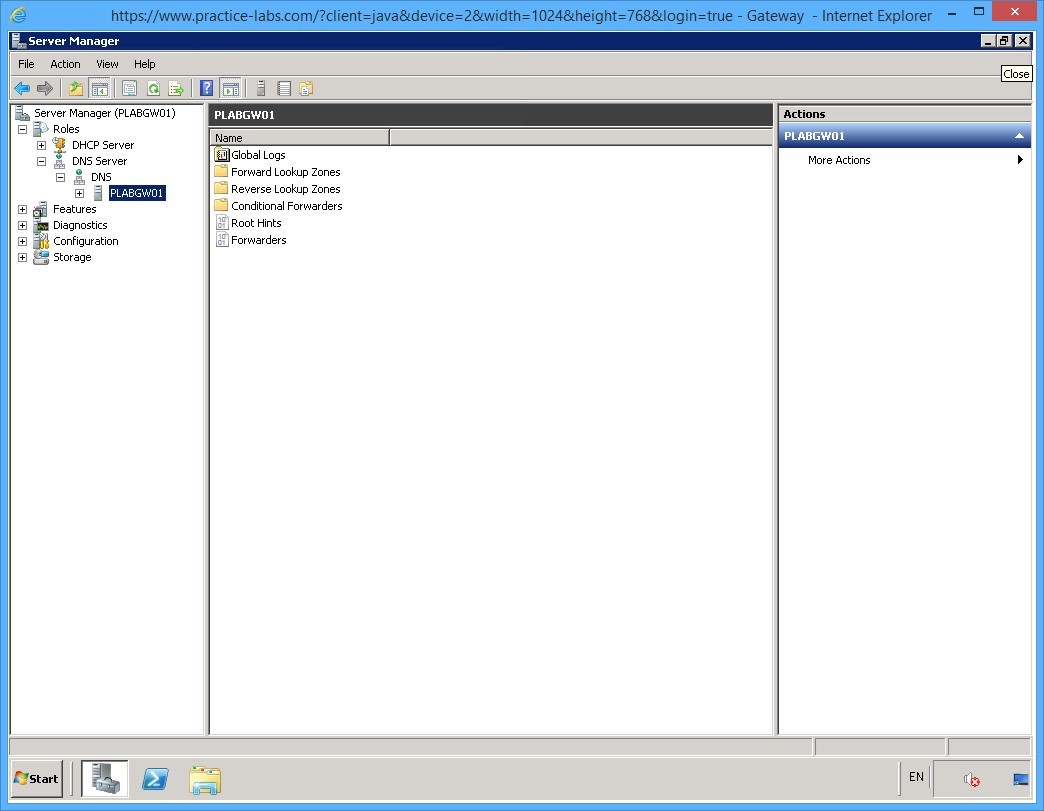
From the left pane, expand Roles, expand DNS Servers, and then expand DNS.
Select PLABGW01.
Details of this DNS server is displayed at the right pane.

Step 3
From the Actions pane on the right, select More Actions and select Configure a DNS Server.
Step 4
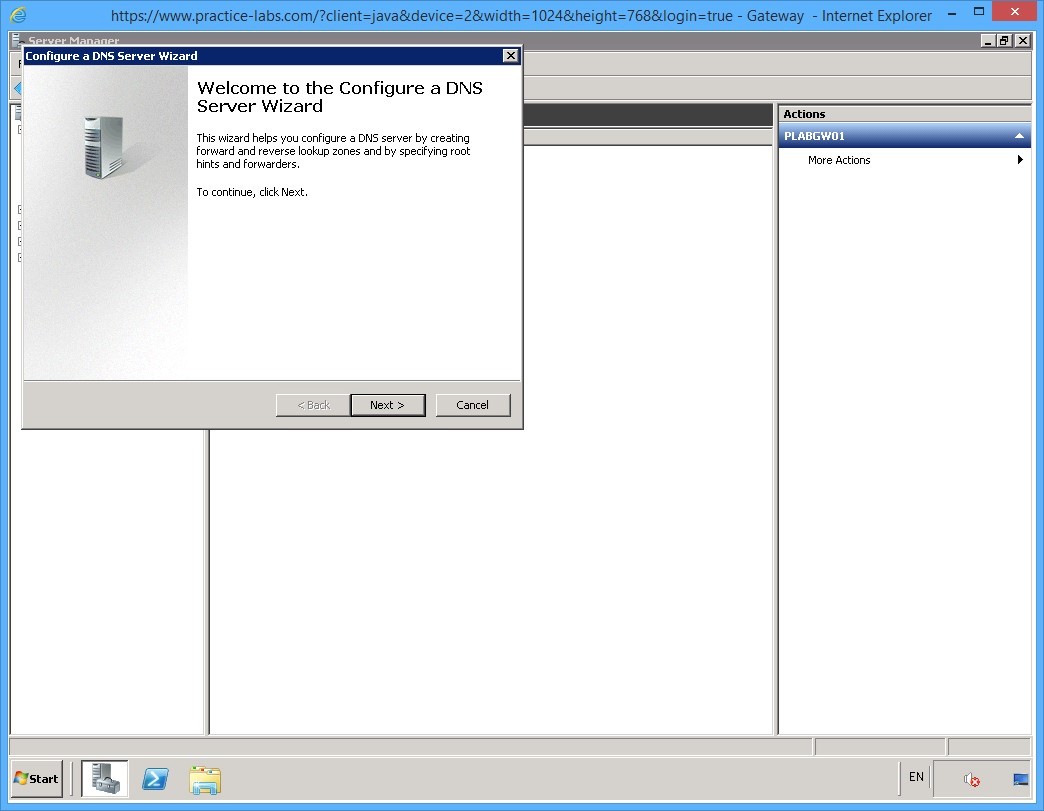
The Configure a DNS Server Wizard is displayed.
On the welcome page, read the information and click Next.
Step 5
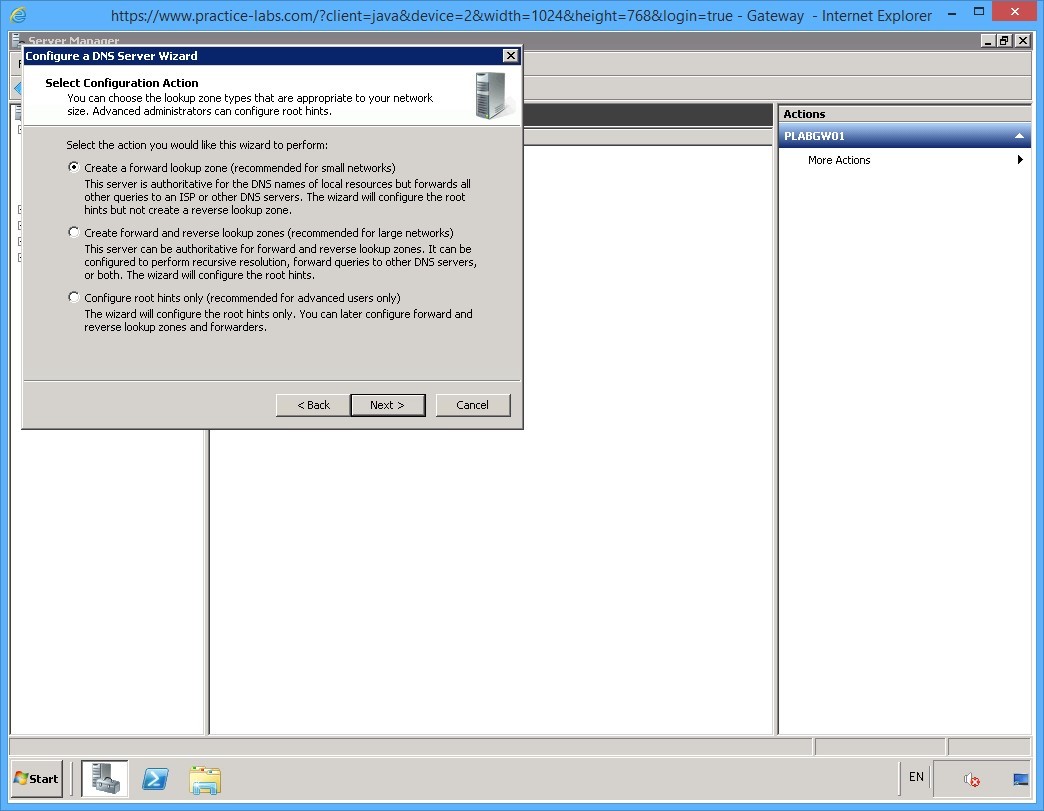
On the Select Configuration Action page, keep the default selection and click Next.
Step 6
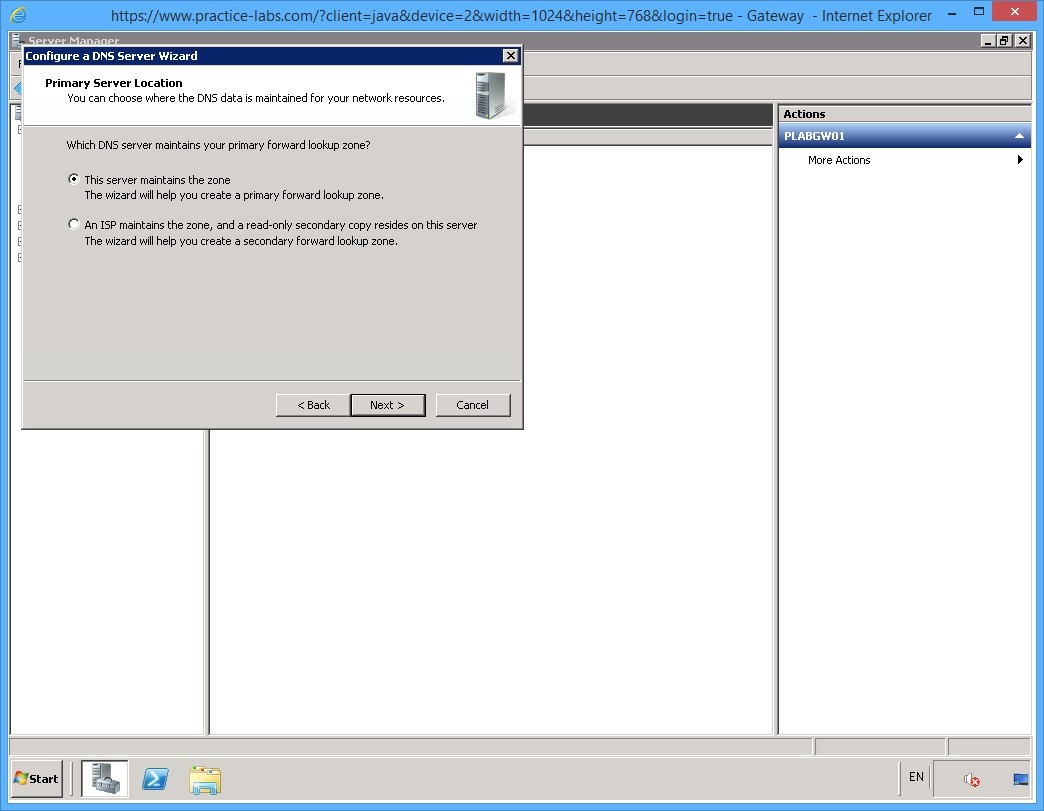
On the Primary Server Location page, keep the default selection of This server maintains the zone and click Next.
Step 7
The New Zone Wizard appears.
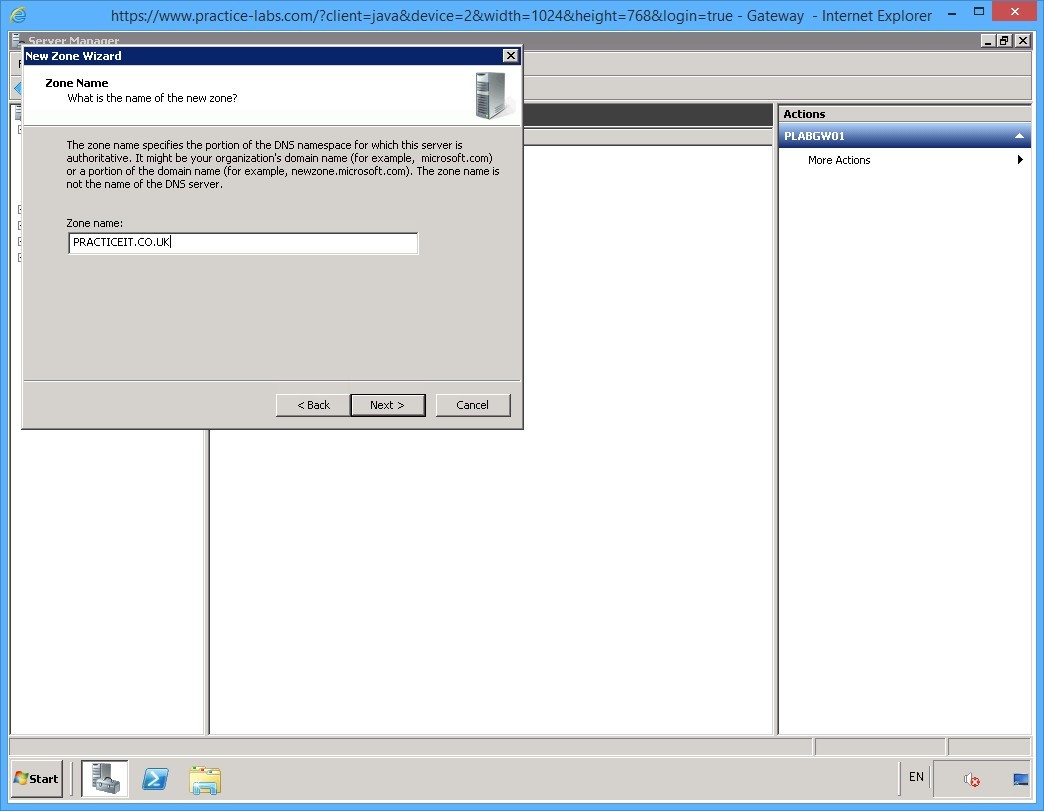
On the Zone Name page, type the following in the Zone name textbox:
PRACTICEIT.CO.UK
Click Next.
Step 8
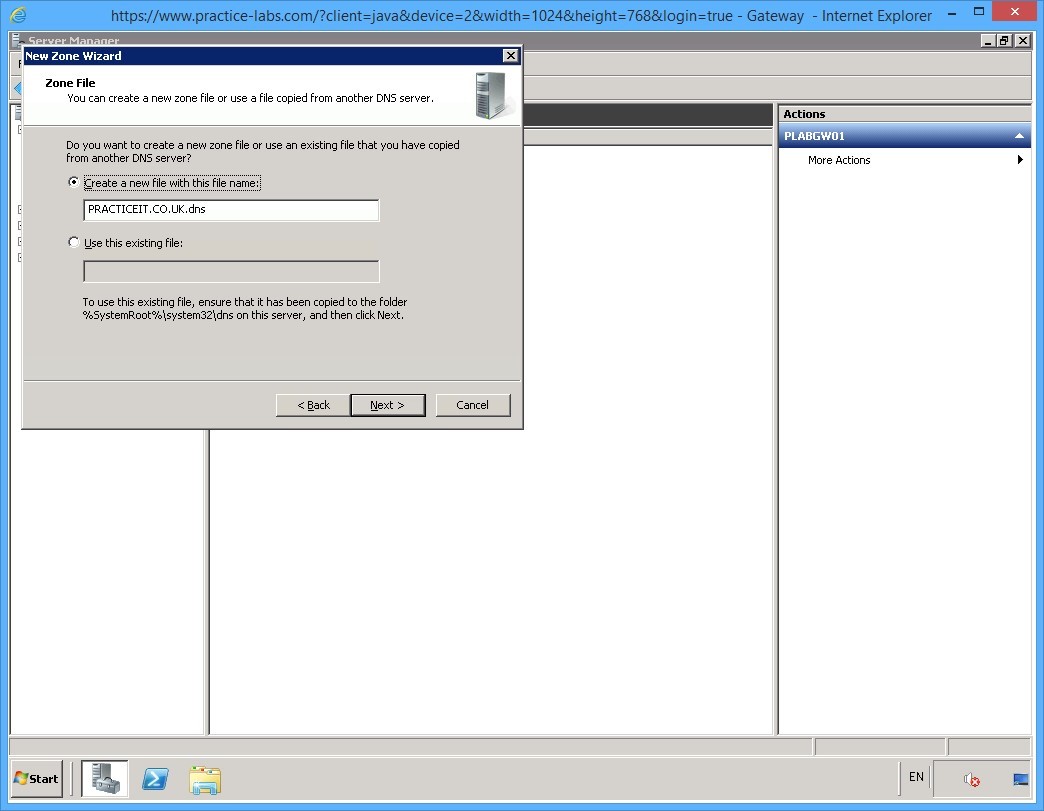
On the Zone File page, keep the default selection of Create a new file with this file name: text box.
Click Next.
Step 9
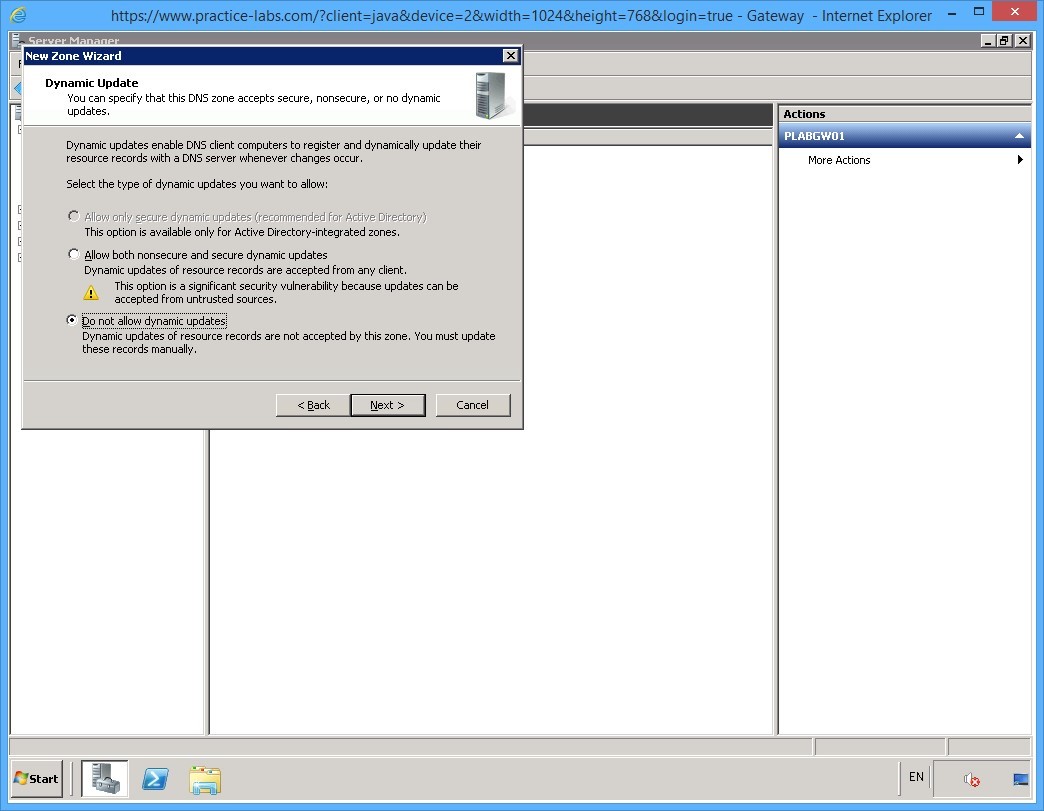
On the Dynamic Update page, ensure that Do not allow dynamic updates option is selected.
Click Next.
Step 10
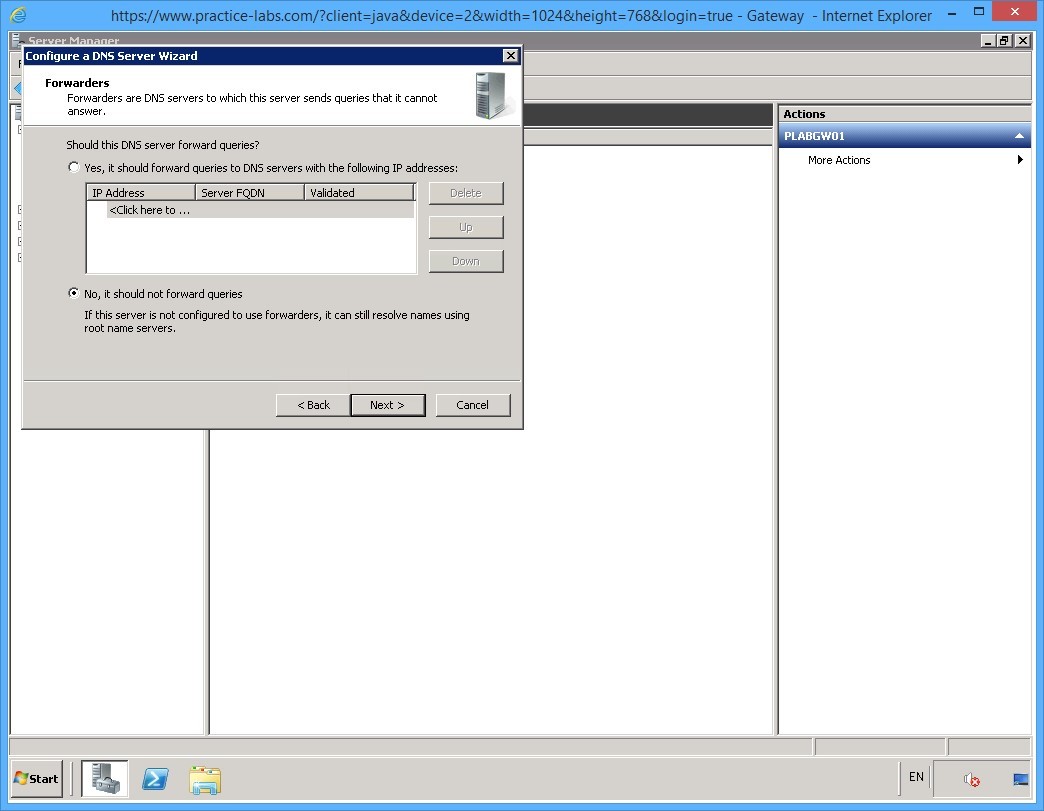
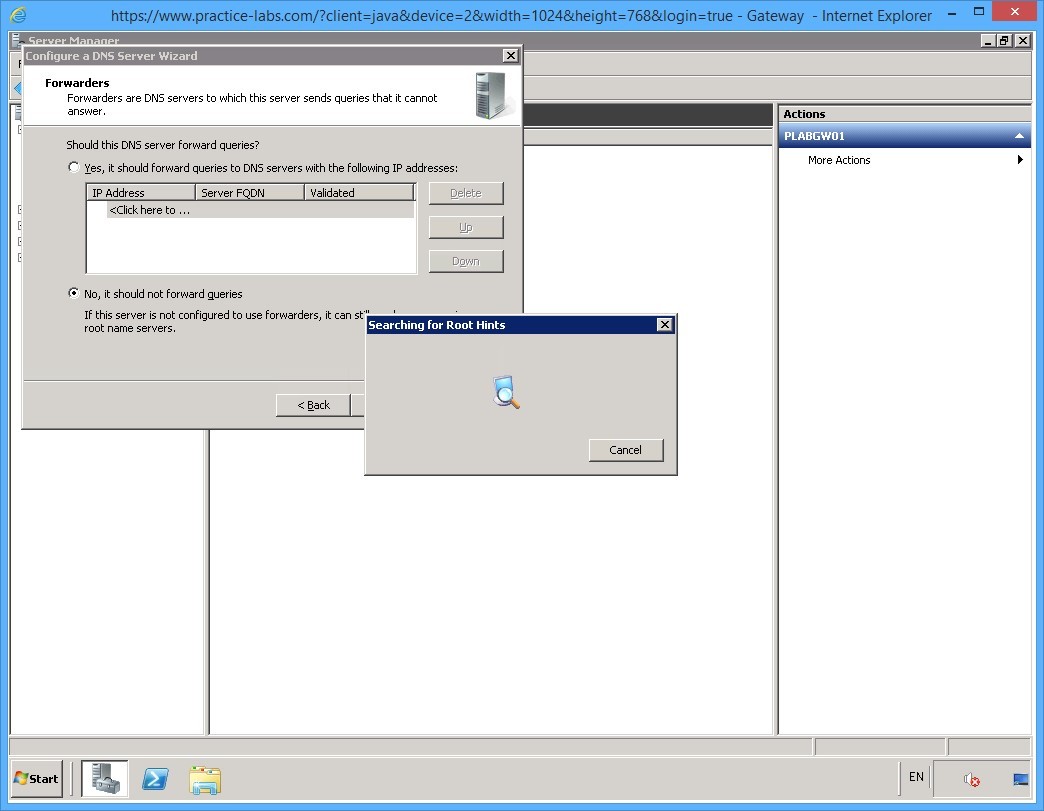
On the Forwarders page, select No, it should not forward queries option and click Next.
Step 11
The Searching for Root Hints dialog box is displayed.
Note: Windows Servers running the DNS service contain the root hints file. This file has information about the top level DNS servers that can be queried by Windows to resolve names outside of the authoritative DNS domains.
It searches for the Root Hints to complete the configuration. This will take a few seconds so please wait.
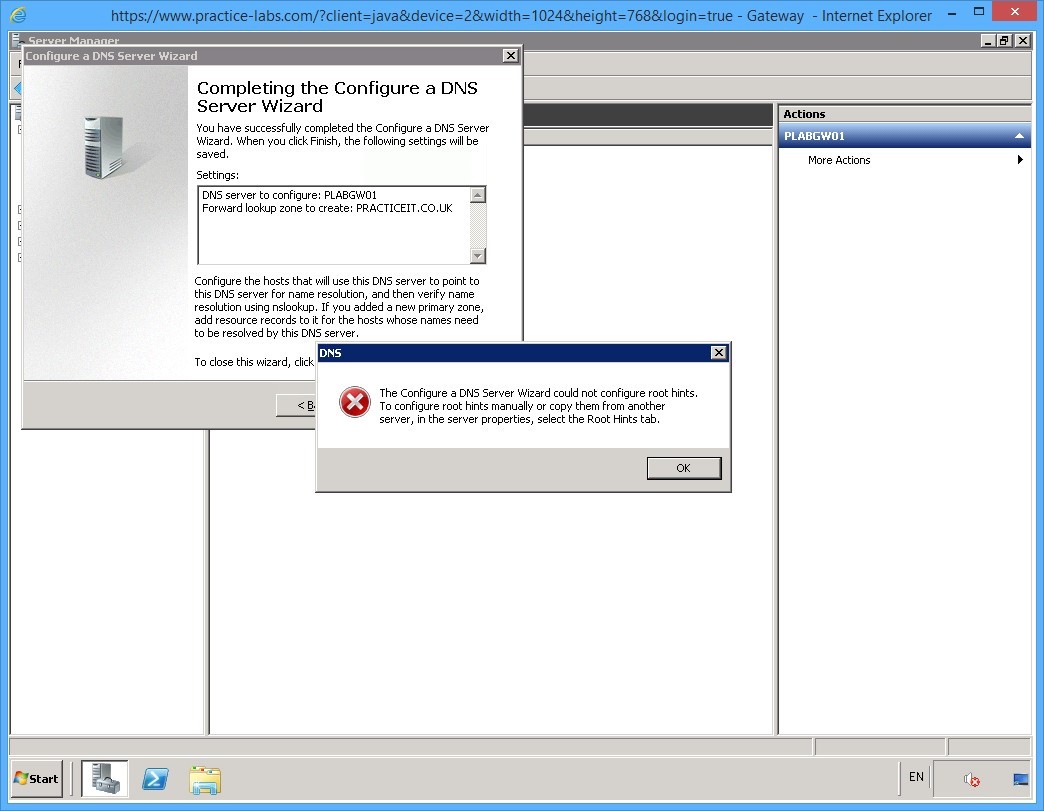
Step 12
On the completion page, click Finish.
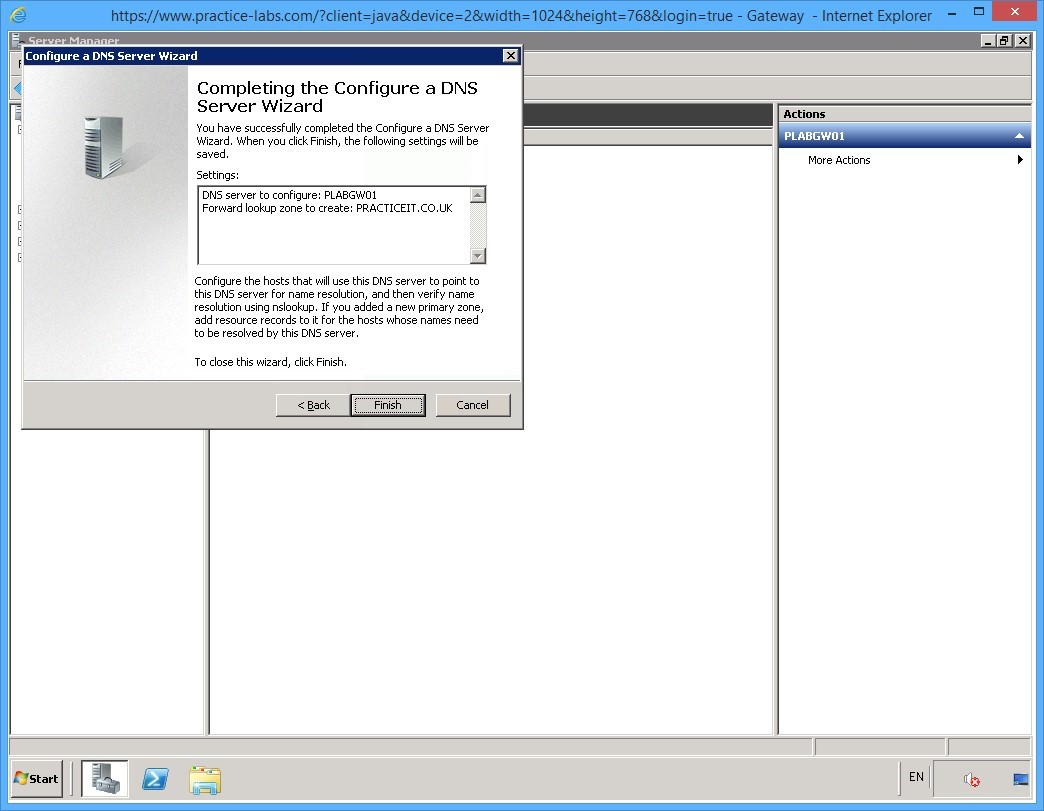
Step 13
The DNS dialog box is displayed. Read the information mentioned and use it to configure roots, if required.
Note: This DNS server does not have authority over PRACTICEIT.CO.UK. Therefore, you don’t need to configure root hints on this device, because this server is located in an isolated lab environment.
Click OK to close the dialog box.
The Completing the Configure a DNS Server Wizard window will automatically close.
Step 14
Close Server Manager.
Keep all devices powered on in their current state and proceed to the next task.
Task 3 - Configure Forward lookup Zones on DNS
Forward lookup zones in DNS are used for resolving fully qualified domain names (FQDN) to numeric IP addresses.
To configure forward lookup zones, perform the following steps:
Step 1
On the PLABGW01 device, DNS server is now installed and configured.
Click Start, select Administrative Tools, and then select DNS.
Step 2
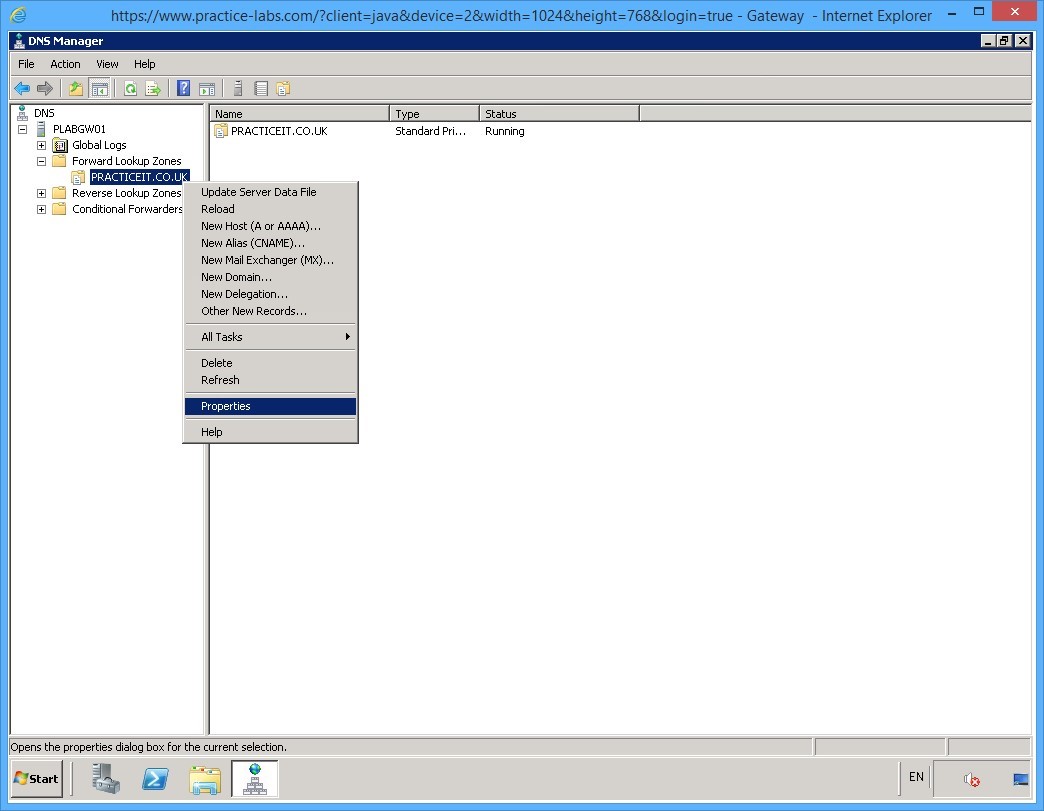
The DNS Manager window is displayed.
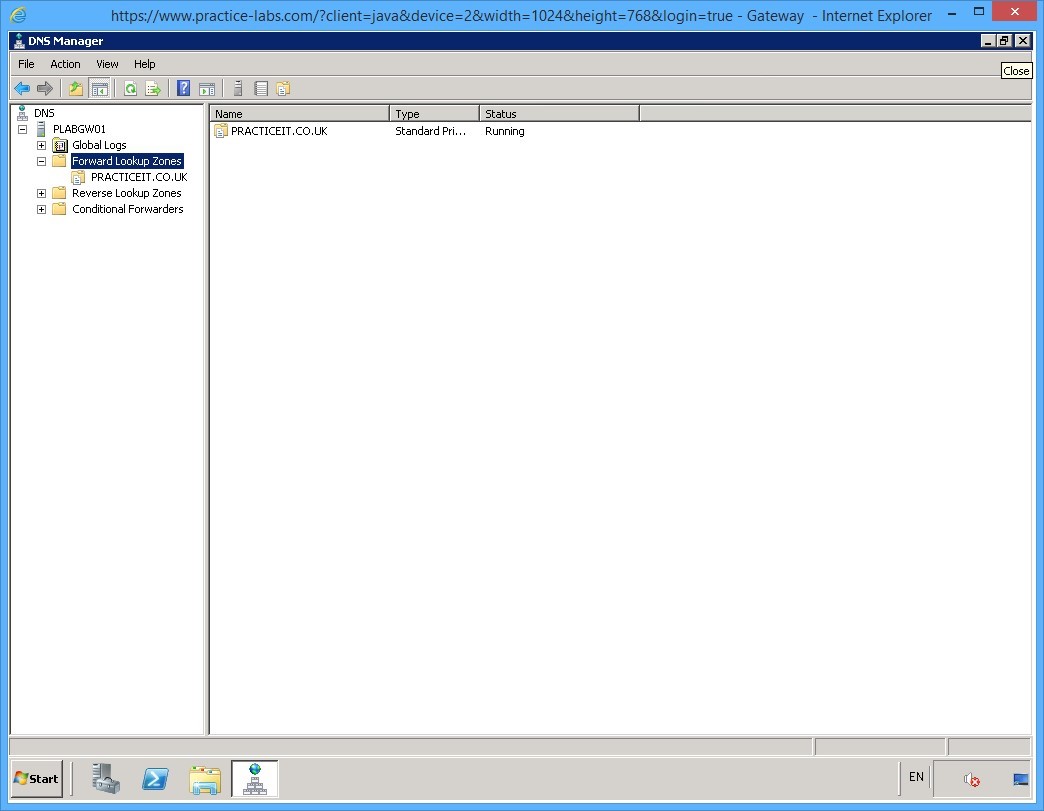
From the left pane, expand PLABGW01, then expand Forward Lookup Zone.
Click PRACTICEIT.CO.UK node.
Right-click PRACTICEIT.CO.UK and select Properties.
Step 3
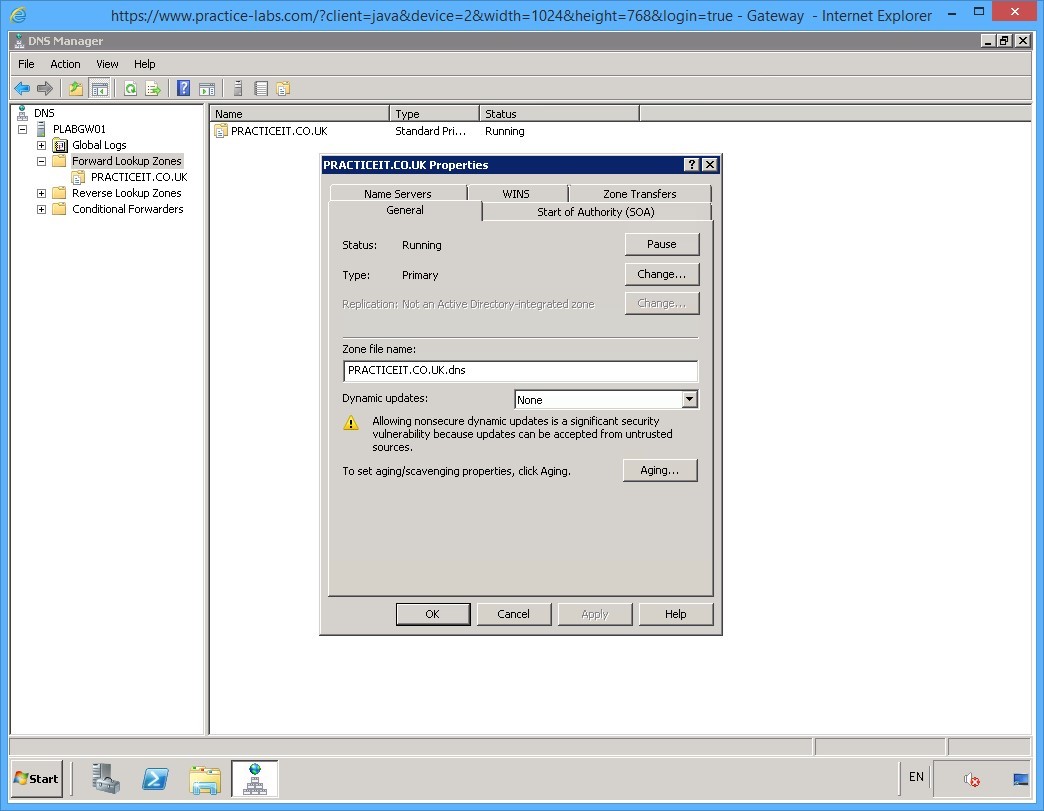
The PRACTICEIT.CO.UK Properties dialog box is displayed.
On the General tab, ensure that Type is set to Primary.
Step 4
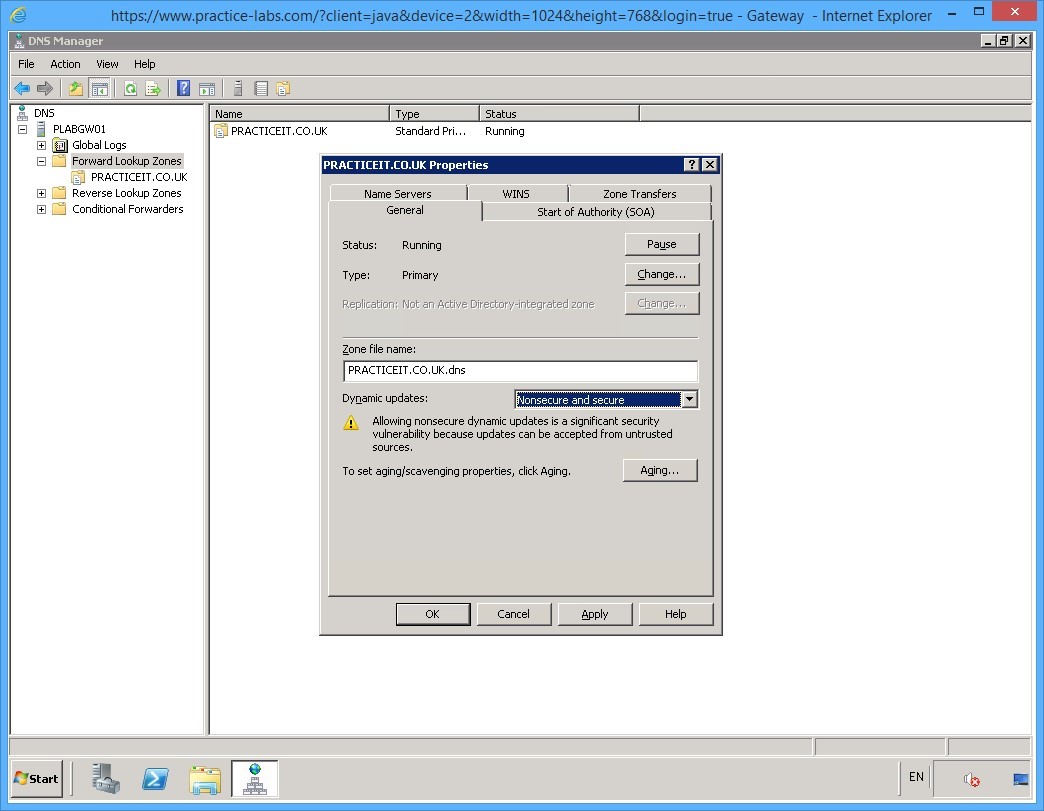
In the Dynamic updates drop-down, select Non-secure and secure. Click Apply and then click OK.
Step 5
Dynamic updates of both types, secure and non-secure, are now allowed on the DNS server.
Close the DNS manager to go back to the PLABGW01 desktop.
Keep all devices powered on in their current state and proceed to the next task.
Task 4 - Verify Dynamic DNS
Windows Server DNS can accept automatic updates from clients for the resource records found in its zone file. This greatly reduces administrative effort because DNS server can keep up with the changes in the network. For example, if the IP address of a computer is modified due to network configuration requirements, the computer will update its own resource record with the DNS server.
To setup dynamic DNS, perform the following steps:
Step 1
Connect to the PLABDC01 device.
Access DNS Manager by clicking Start, selecting Administrative Tools, and then selecting DNS.
Note: You can setup secure dynamic updates only if the DNS server is a domain controller and if the zone type is an Active Directory Integrated zone.
Step 2
On the DNS Manager window, expand PLABDC01 from the left pane, and then expand Forward Lookup Zones.
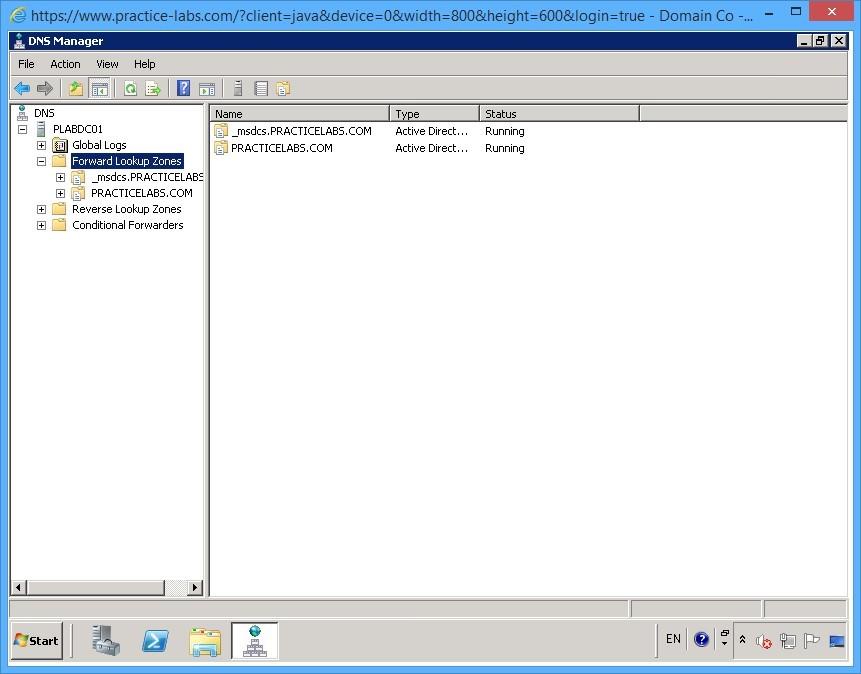
Step 3
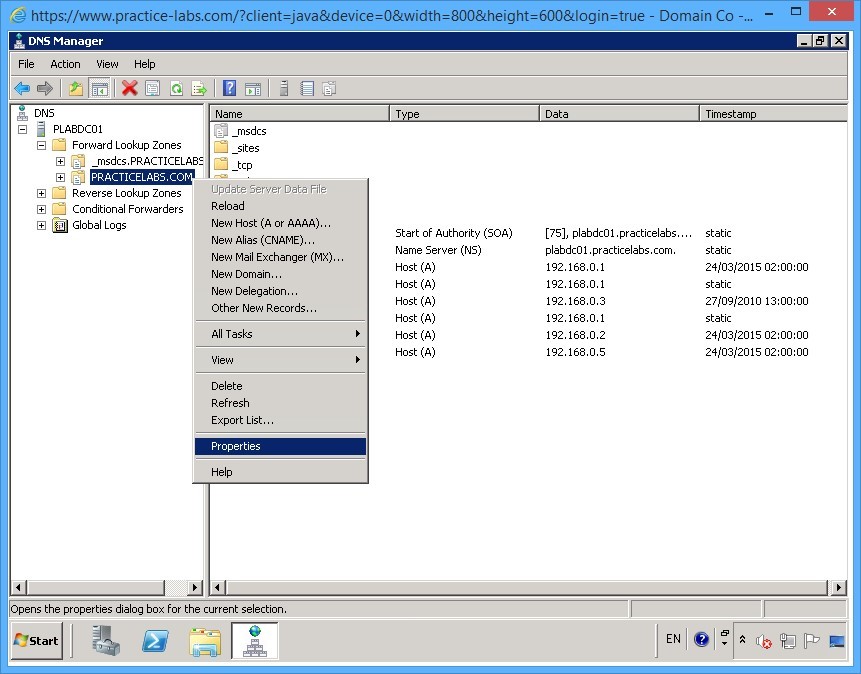
Expand PRACTICELABS.COM node.
Right-click on PRACTICELABS.COM, then select Properties.
Step 4
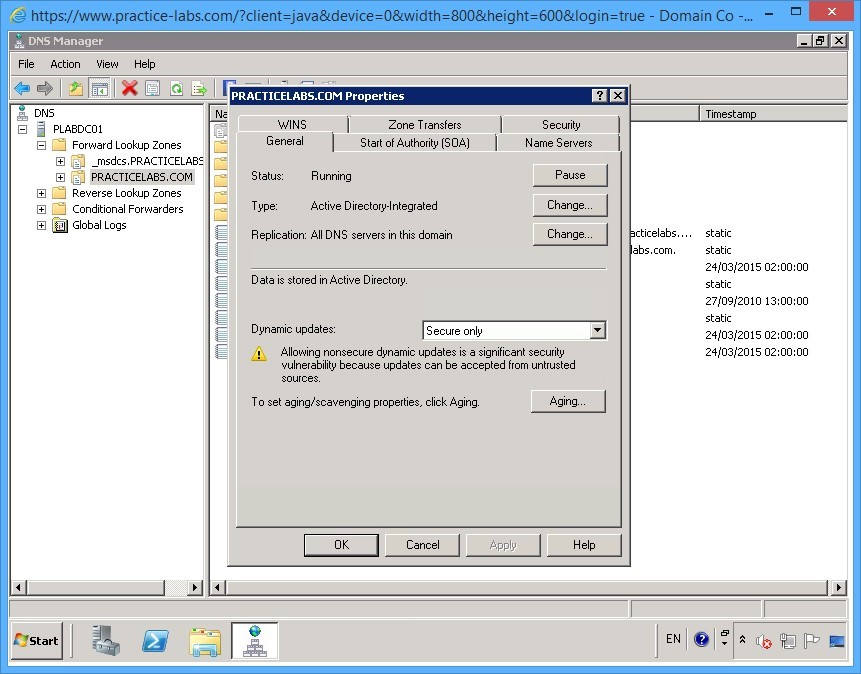
The PRACTICELABS.COM Properties dialog box is displayed.
In the General tab, ensure that the parameter Type is set to Active Directory-Integrated.
Verify that Secure only for the Dynamic updates drop-down is selected.
Click OK.
Your DNS server is now set for dynamic DNS operations.
Step 5
You are redirected back to DNS Manager application window.
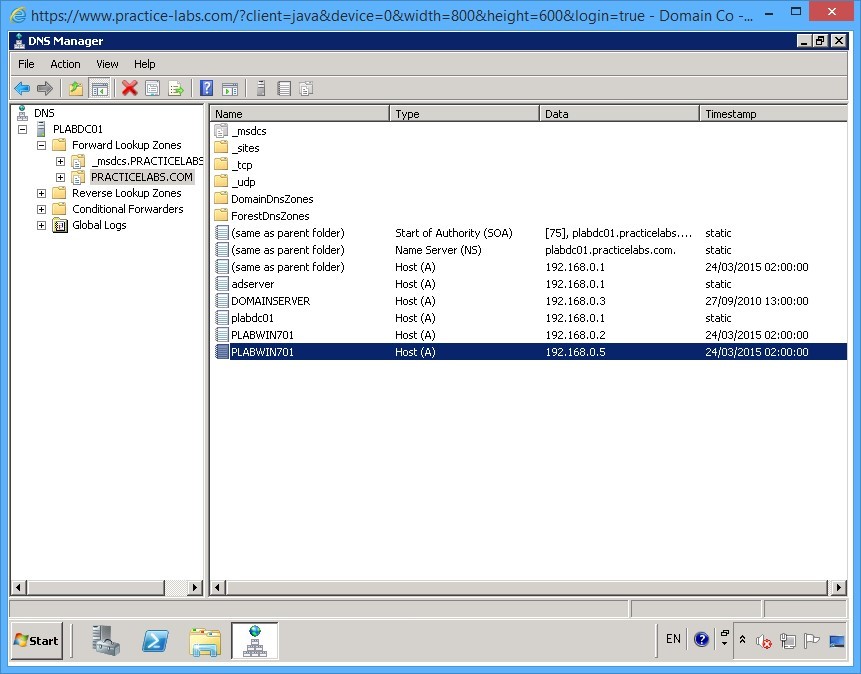
Select PRACTICELABS.COM domain and observe the resource records listed on the right details pane.
Please note that PLABWIN701 has two network interfaces installed in the said device.
Look for PLABWIN701 Host (A) record with an IP address 192.168.0.5.
This is the dynamic IP address assigned to PLABWIN701 by DHCP server service running in PLABGW01.
Keep DNS Manager window open.
Keep all devices powered on in their current state and proceed to the next task.
Task 5 - Change Dynamic IP Address to Static and Test Dynamic DNS Registration
In this task, you will change the IP address of PLABWIN701 to verify that PLABDC01 DNS can automatically update its DNS resource records.
Step 1
Switch over to PLABWIN701 device.
Go to system tray and right-click on network icon and select Open Network and Sharing Center.
Step 2
In Network and Sharing Center window, under the View your active networks section, click on Local Area Connection 2 link.

Step 3
In Local Area Connection 2 Status dialog box, click Properties.
Step 4
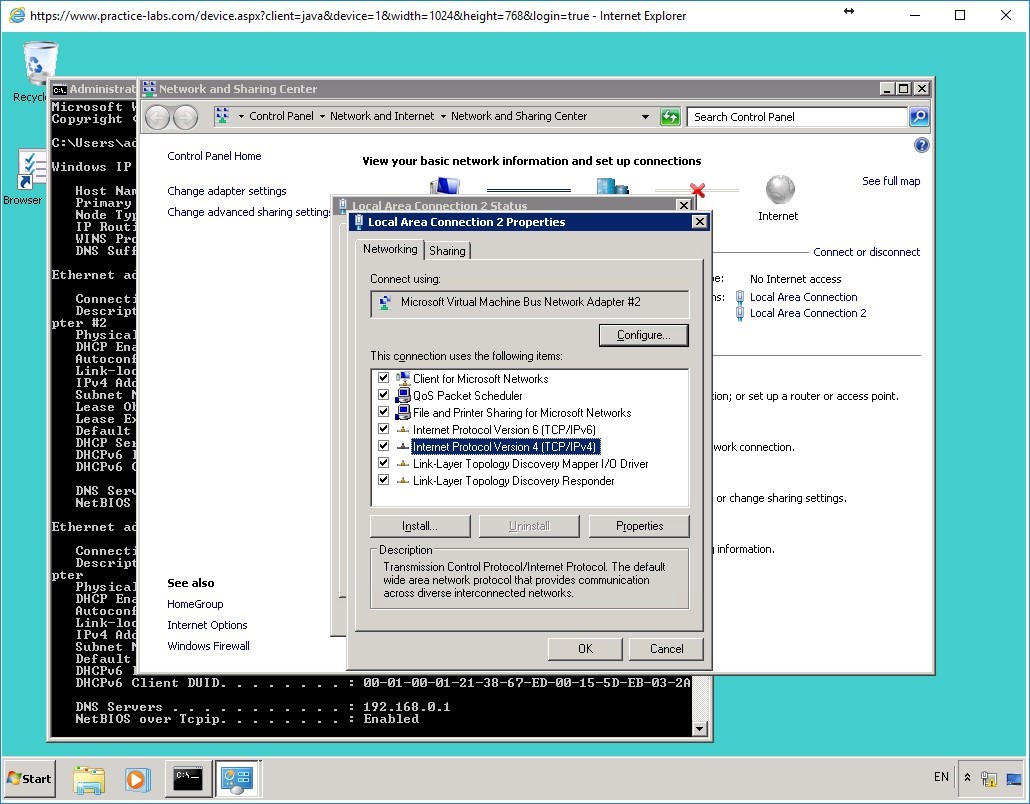
On the Local Area Connection 2 Properties dialog box, select Internet Protocol Version 4 (TCP/IPv4) and click Properties.
Step 5
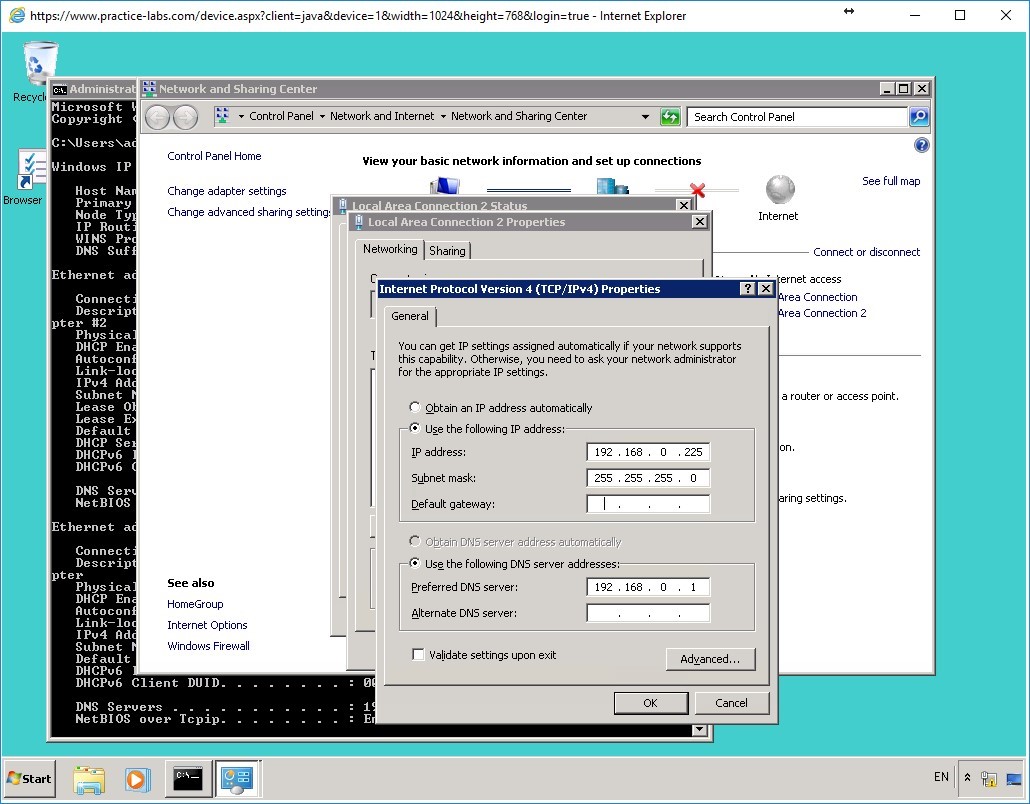
On the Internet Protocol Version 4 (TCP/IPv4) Properties dialog box, click Use the following IP address option.
In the IP address text box, type:
192.168.0.225
Click in Subnet mask text box and it automatically filled in with 255.255.255.0.
Similarly, click the Use the following DNS server addresses option and specify the Preferred DNS server as:
192.168.0.1
Clear the Default gateway text box of any IP address and keep Alternate DNS server blank.
Click OK.
Step 6
Click Close on the Local Area Connection 2 Properties window and Local Area Connection 2 Status.
Similarly, close Network and Sharing Center window.
Step 7
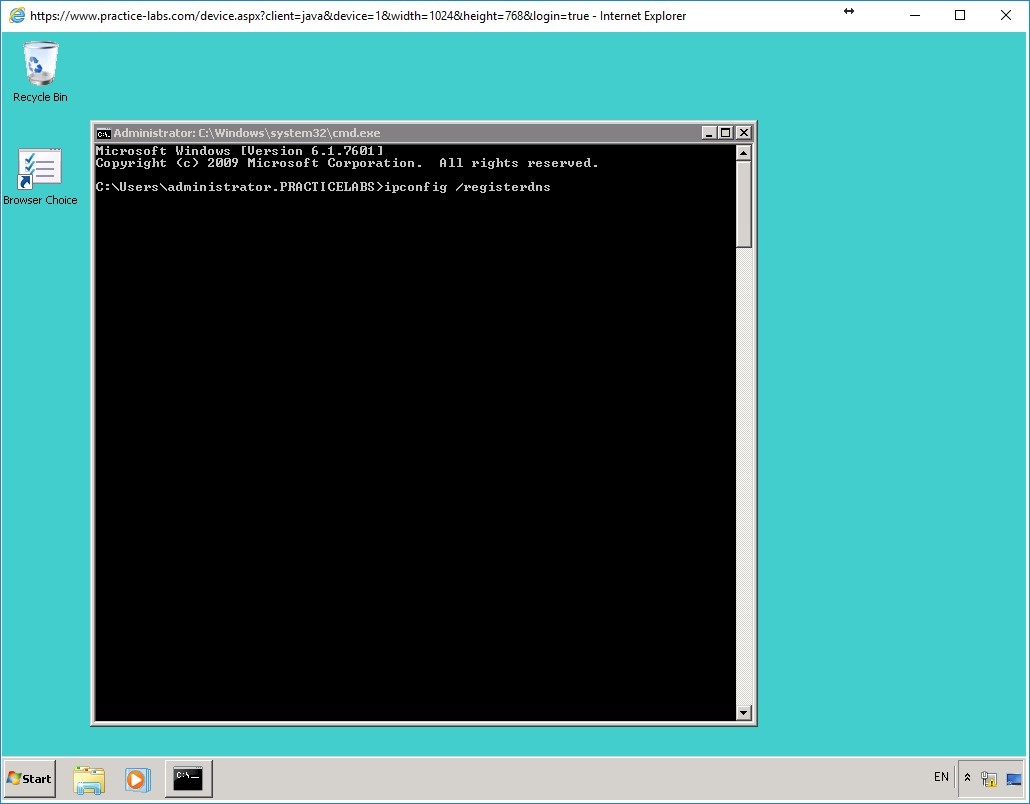
Click Start and in Search programs and files, type cmd and press Enter.

Step 8
On the command prompt, you will force the registration of PLABWIN701’s static IP address.
Type the following:
ipconfig /registerdns
Press Enter.
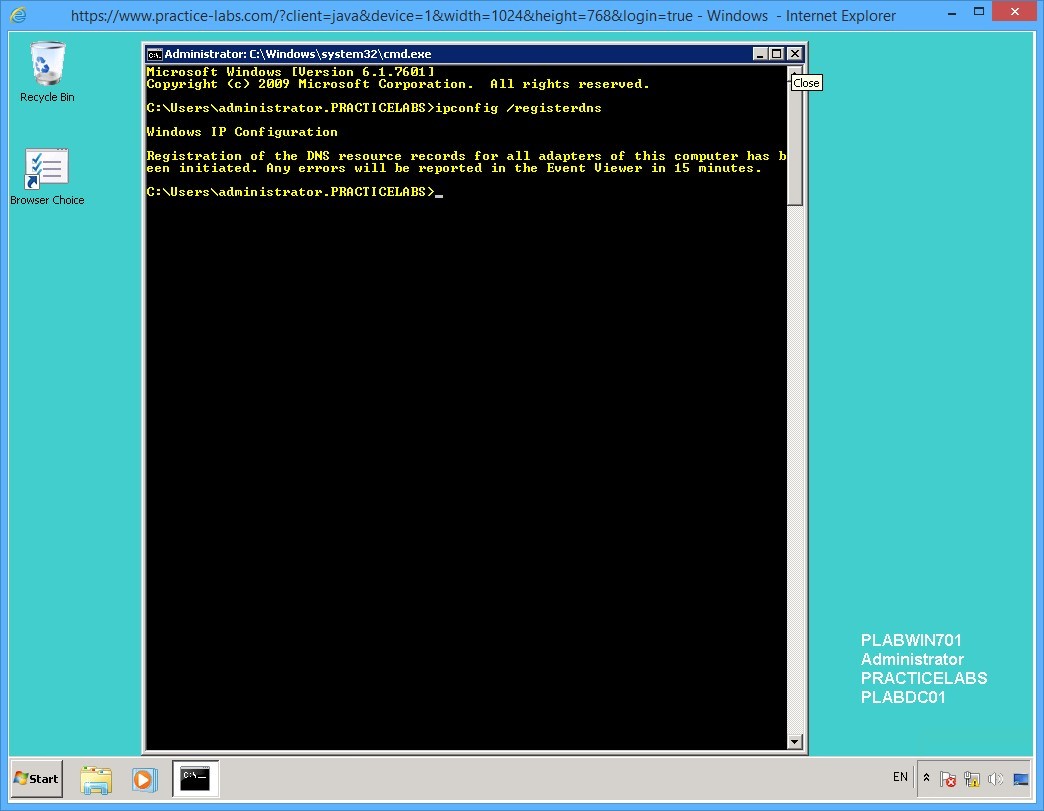
Step 9
This command you entered in the previous step will register 192.168.0.225 as the new static IP address for PLABWIN701.
It may take about 15 minutes or more for the registration to appear in PLABDC01 server.
Close command prompt window.
Step 10
Switch to PLABDC01. From DNS Manager, select PRACTICELABS.COM node.
Click the Refresh button.
Step 11
Notice the new IP address 192.168.0.225 is now registered for PLABWIN701.
Keep DNS Manager open.

Keep all devices powered on in their current state and proceed to the next task.
Task 6 - Creating a Reverse Lookup Zone
A reverse lookup zone translates the numeric IP address of a host to its fully qualified domain name. This zone is useful for DNS servers facing the public network like the Internet.
When an IP address is resolved to its fully qualified domain name, it verifies the identity of a host as a registered computer in an organization.
To create a reverse lookup zone, perform the following steps:
Step 1
On PLABDC01 server, DNS Manager is open
Expand Reverse Lookup Zones node.
Then right-click Reverse Lookup Zones node and select New Zone…
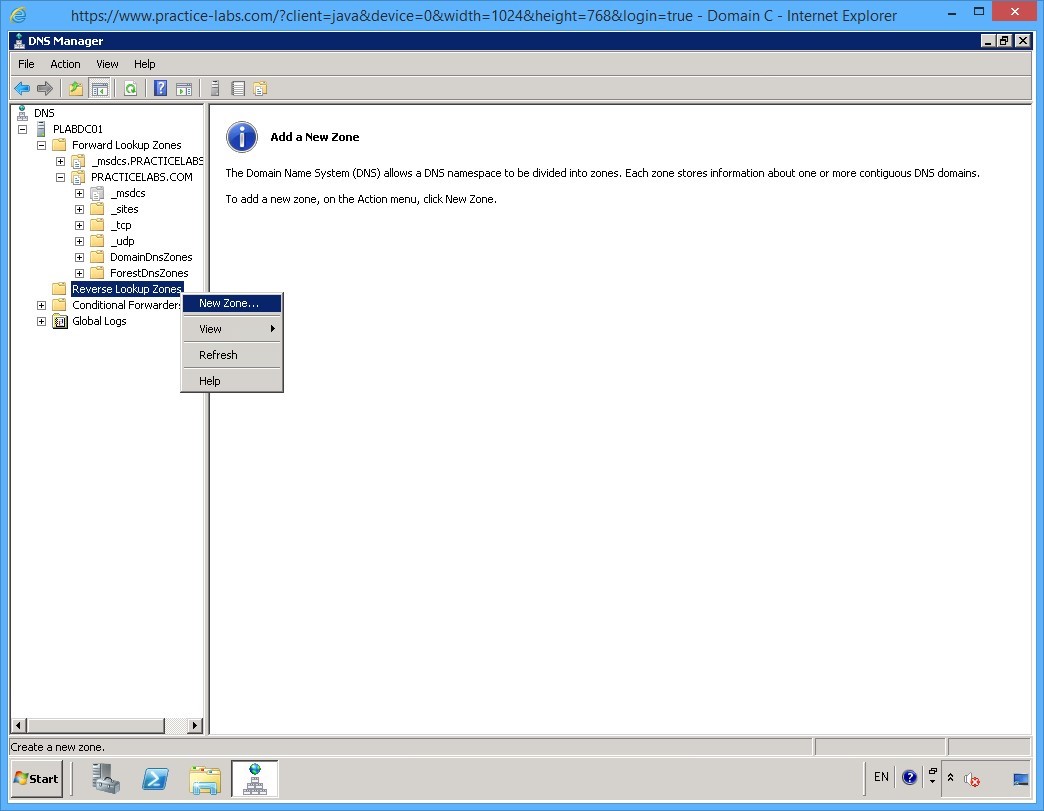
Step 2
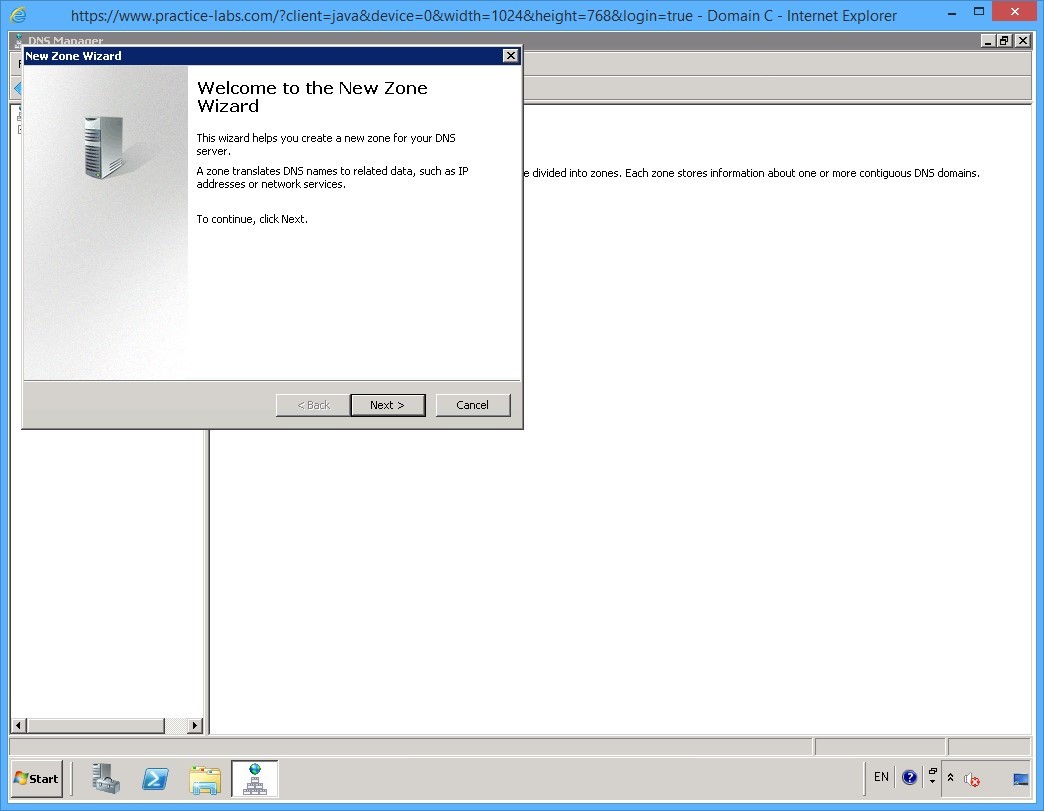
On the Welcome to the New Zone Wizard window, click Next.
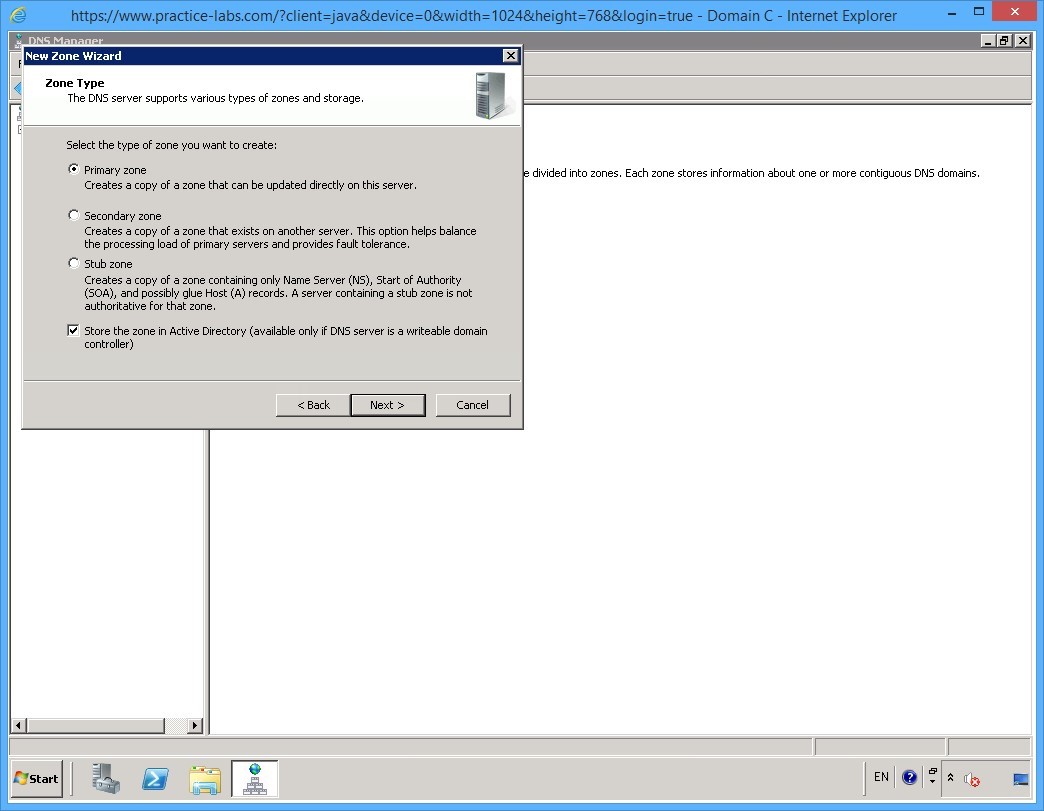
Step 3
On the Zone Type page, keep the default selections.
Click Next.
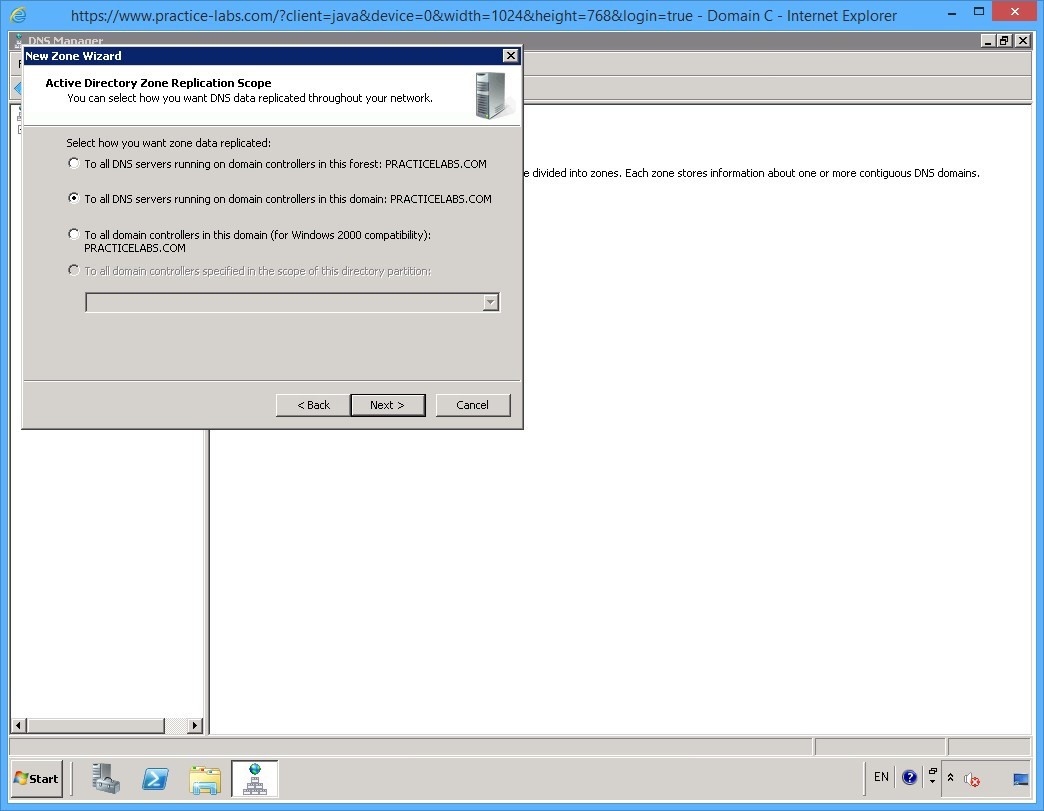
Step 4
On the Active Directory Replication Scope page, keep the default selections.
Click Next.
Step 5
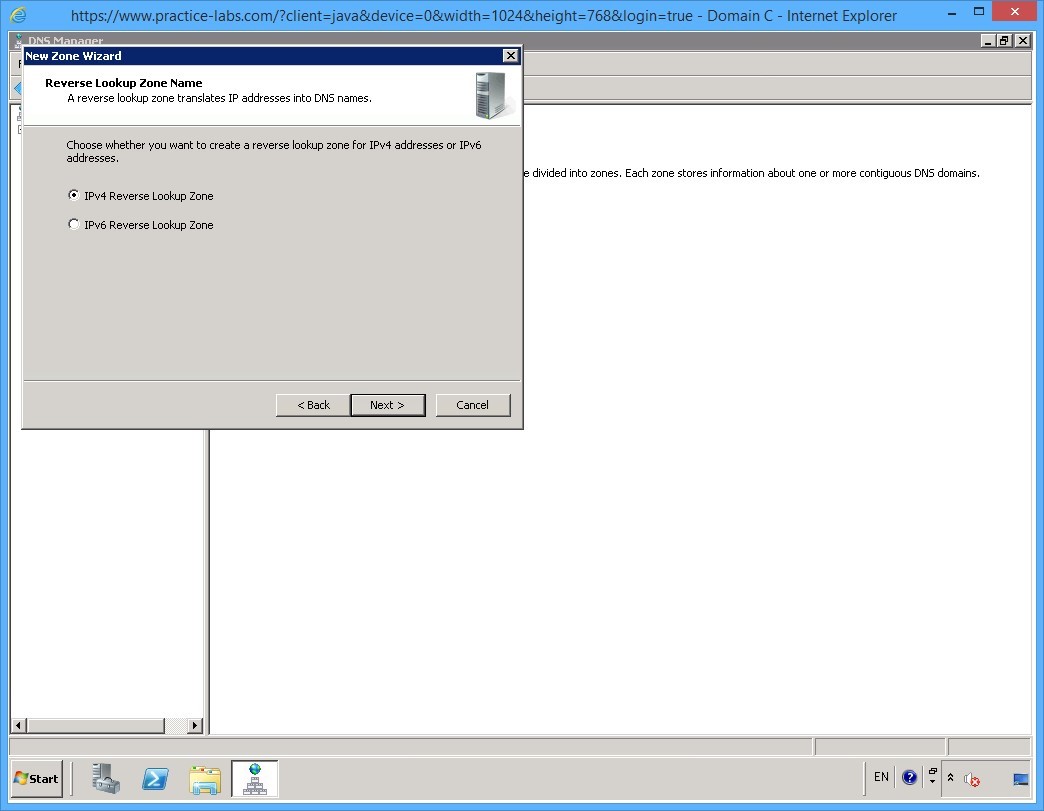
On the Reverse Lookup Zone Name page, ensure that IPv4 Reverse Lookup Zone option is selected.
Click Next.
Step 6
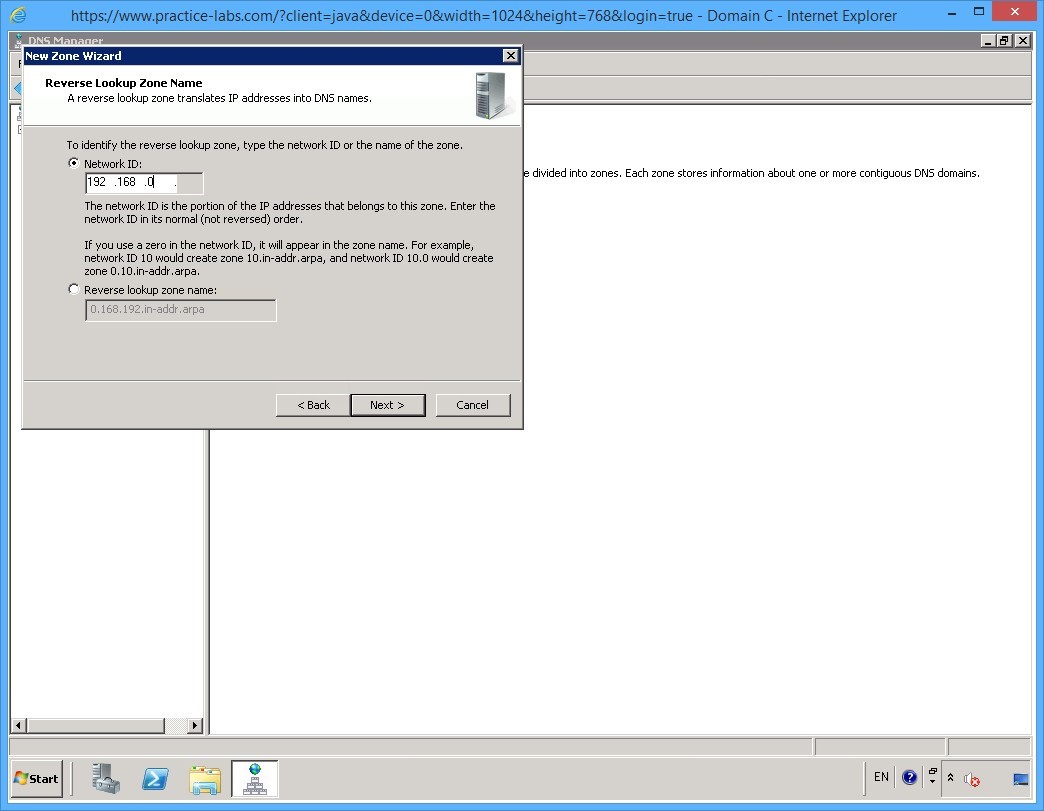
On the Reverse Lookup Zone Name page, click in the Network ID text box and type:
192.168.0
Click Next.
Step 7
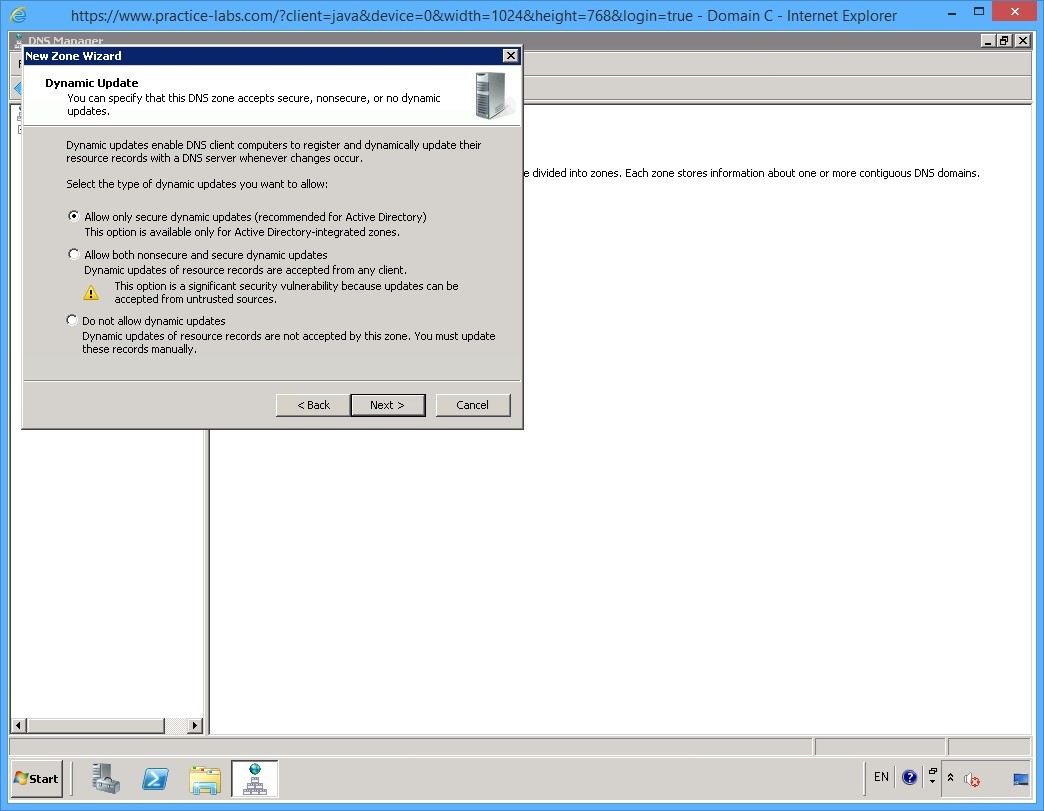
On the Dynamic Update page, keep the default settings.
Click Next.
Step 8
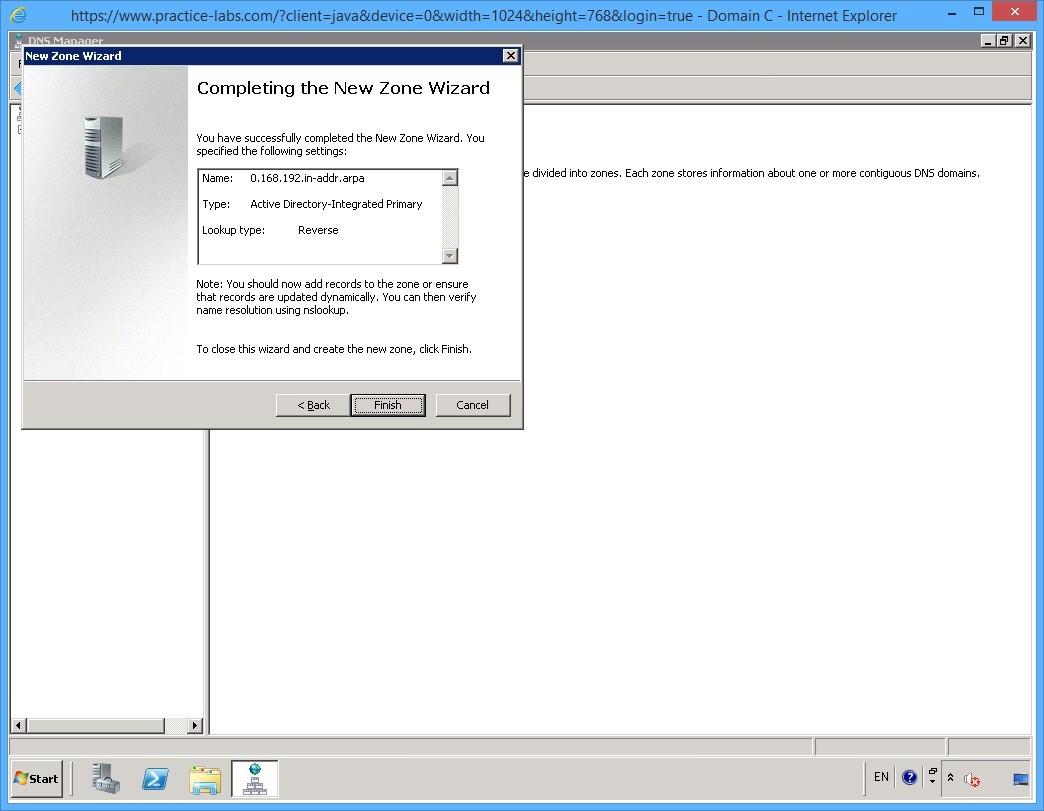
On the Completing the New Zone Wizard page, click Finish.
Keep DNS Manager window open.
Keep all devices powered on in their current state and proceed to the next task.
Task 7 - Working with DNS Resource Records
In addition to Hosts (A) record and Service Location Records (SRV) that are automatically created in DNS server, there are other records that you can create and configure.
Pointer (PTR) records are used in Reverse Lookup Zones where an IP address is resolved to its fully qualified domain name. This record is useful to verify the identity of hosts that are accessible from the public Internet.
Canonical name (CNAME) is another name that you can assign to a host. This record is useful if the host is accessible from the public network and you would like to hide the real host name of a given device.
To create the PTR and CNAME records, perform the following steps:
Step 1
On PLABDC01 device, DNS Manager is open.
Select PRACTICELABS.COM node.
On the details pane on the right, right-click plabdc01 and select Properties.
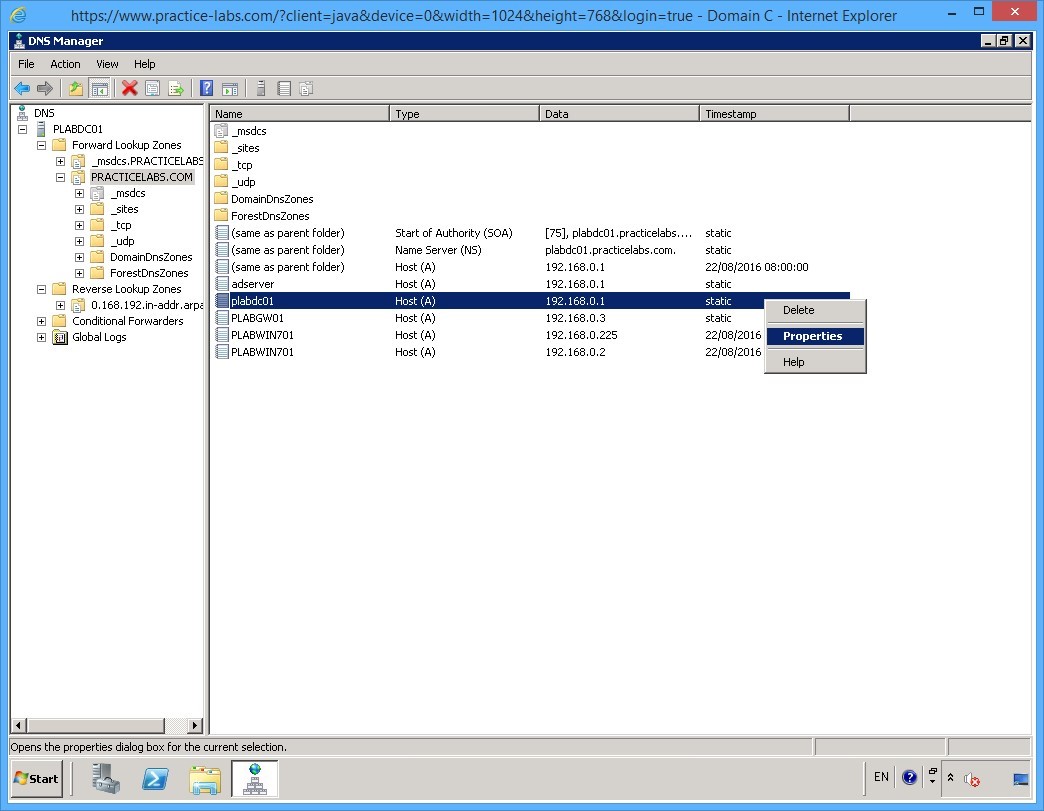
Step 2
Notice that Update associated pointer (PTR) record check box is already selected.
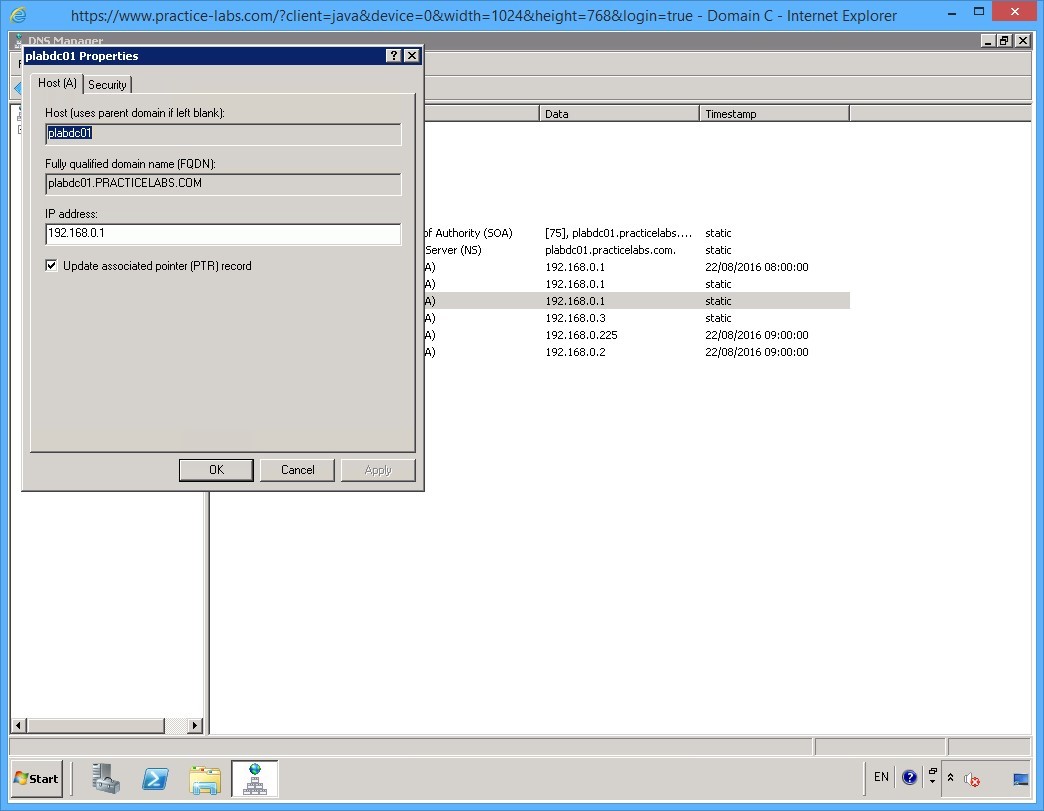
Step 3
Clear the Update associated pointer (PTR) record check box.
Then click Apply.

Step 4
Once again, select Update associated pointer (PTR) record check box.
Then click OK.
The purpose of doing the clearing and enabling the said check box is to refresh the PTR record of plabdc01 host.

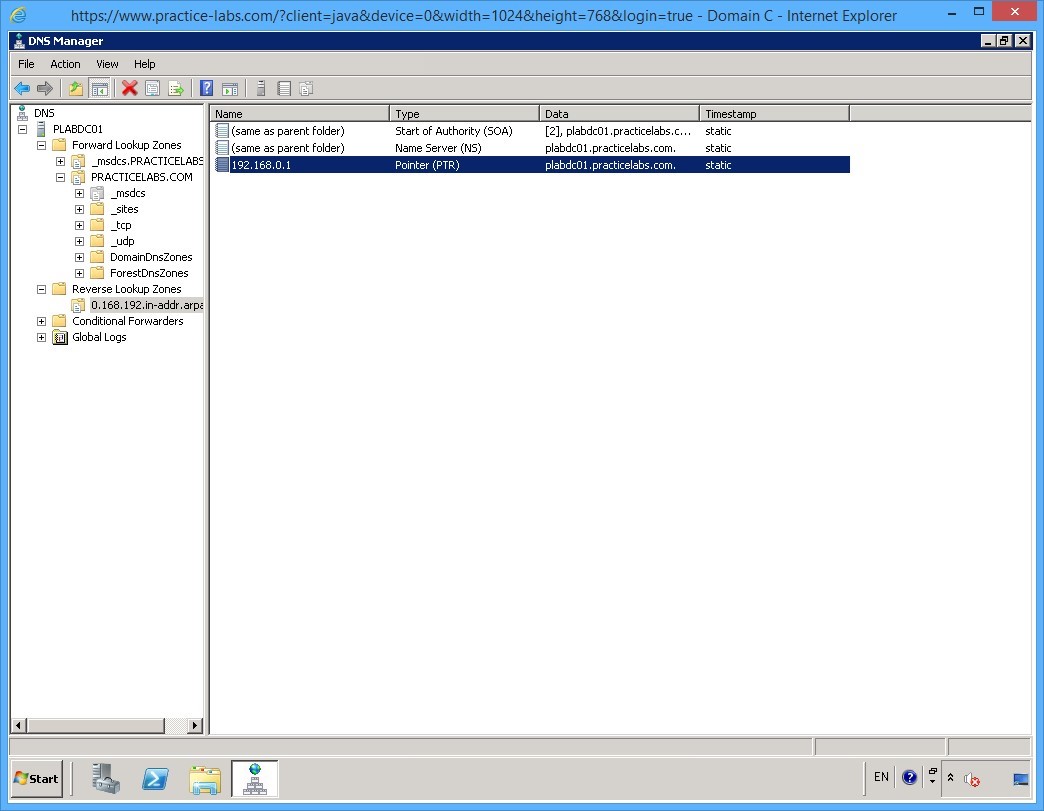
Step 5
Back on DNS Manager.
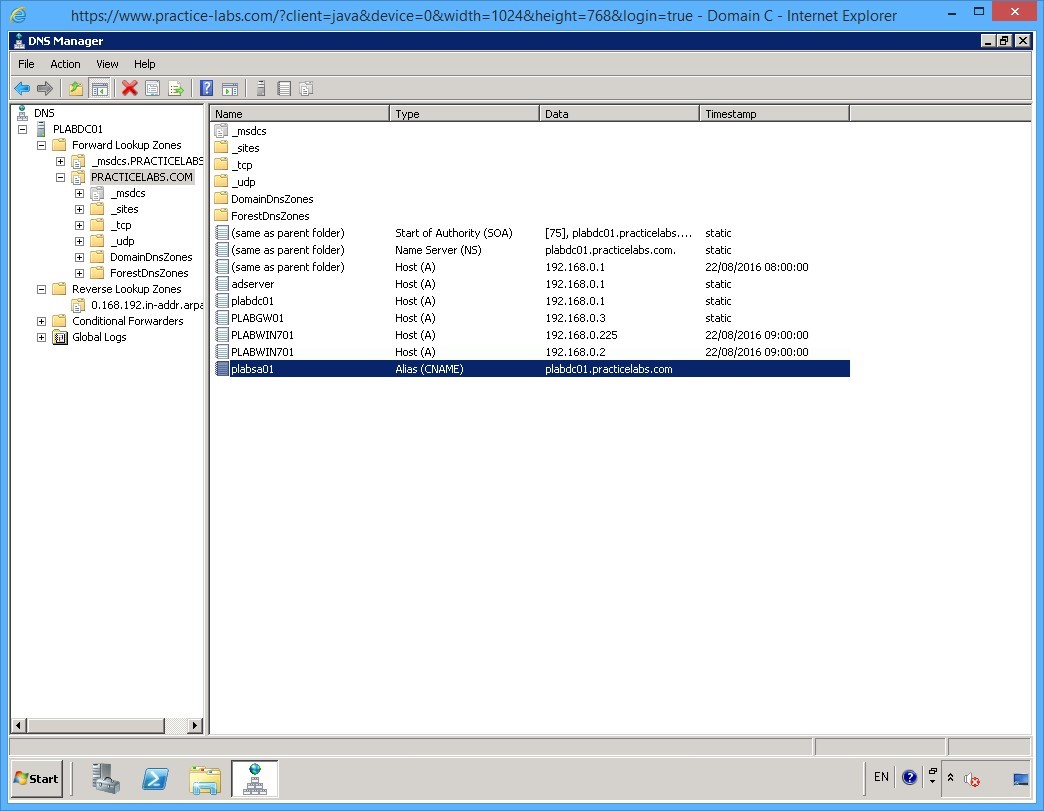
Navigate to Reverse Lookup Zones and click 0.168.192.in-addr.arpa node.
Observe the PTR record of plabdc01.practicelabs.com.
Step 6
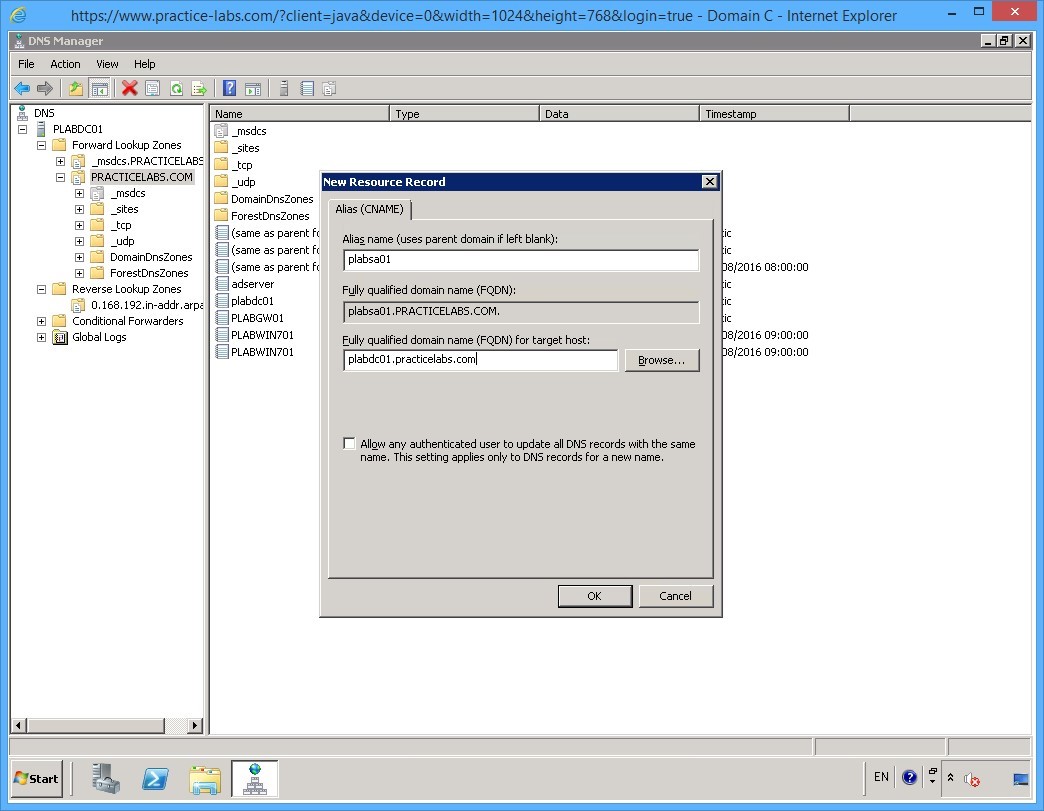
Right-click PRACTICELABS.COM node and select New Alias (CNAME)…
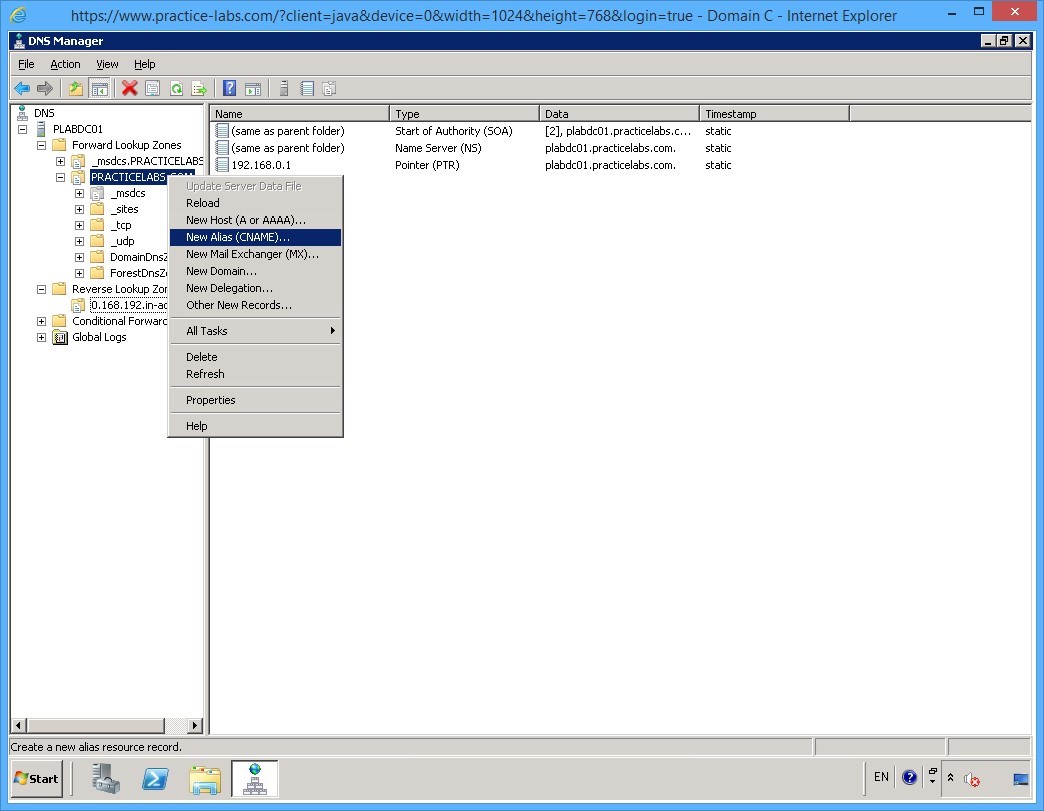
Step 7
On the New Resource Record window, in the Alias name text box, type:
plabsa01
In the Fully qualified domain name (FQDN) for target host: text box, type:
plabdc01.practicelabs.com
Click OK.
Step 8
The new alias is now added.
Step 9
To test if the PTR and CNAME records are resolvable, switch to PLABWIN701.
Launch a command prompt as you did earlier.
Step 10
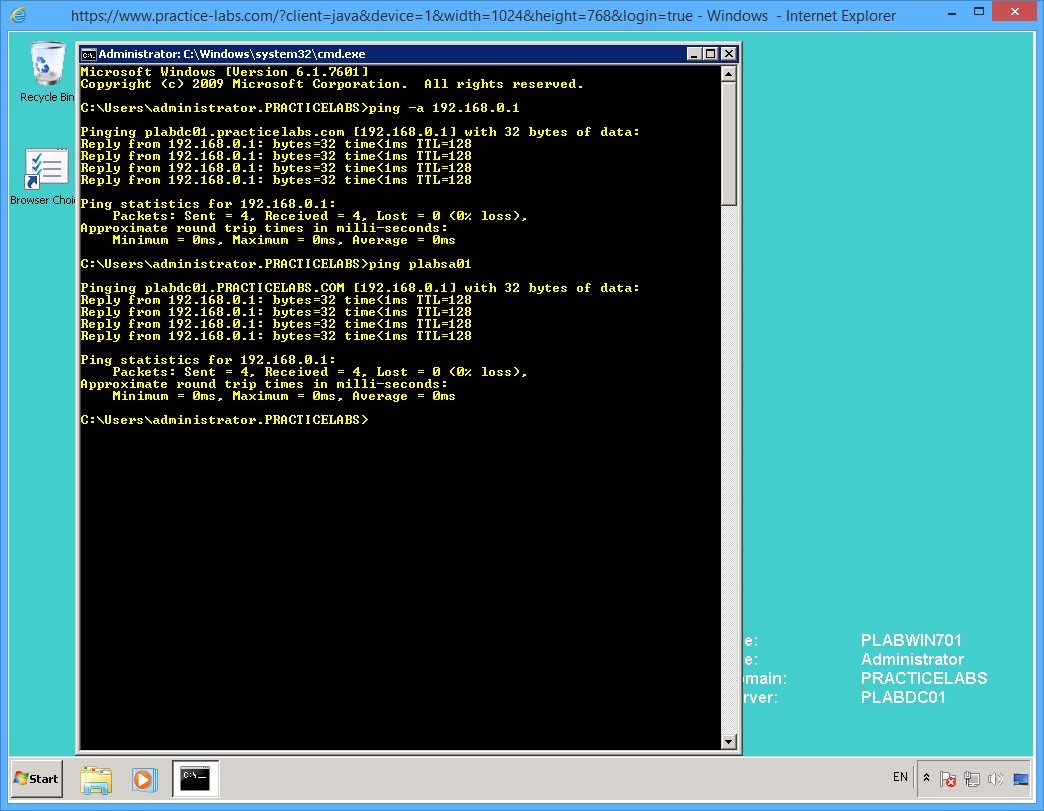
Now type:
ping -a 192.168.0.1
Press Enter.

Step 11
Notice that 192.168.0.1 was resolved to its FQDN plabdc01.practicelabs.com.
On the next prompt, type:
ping plabsa01
Press Enter.
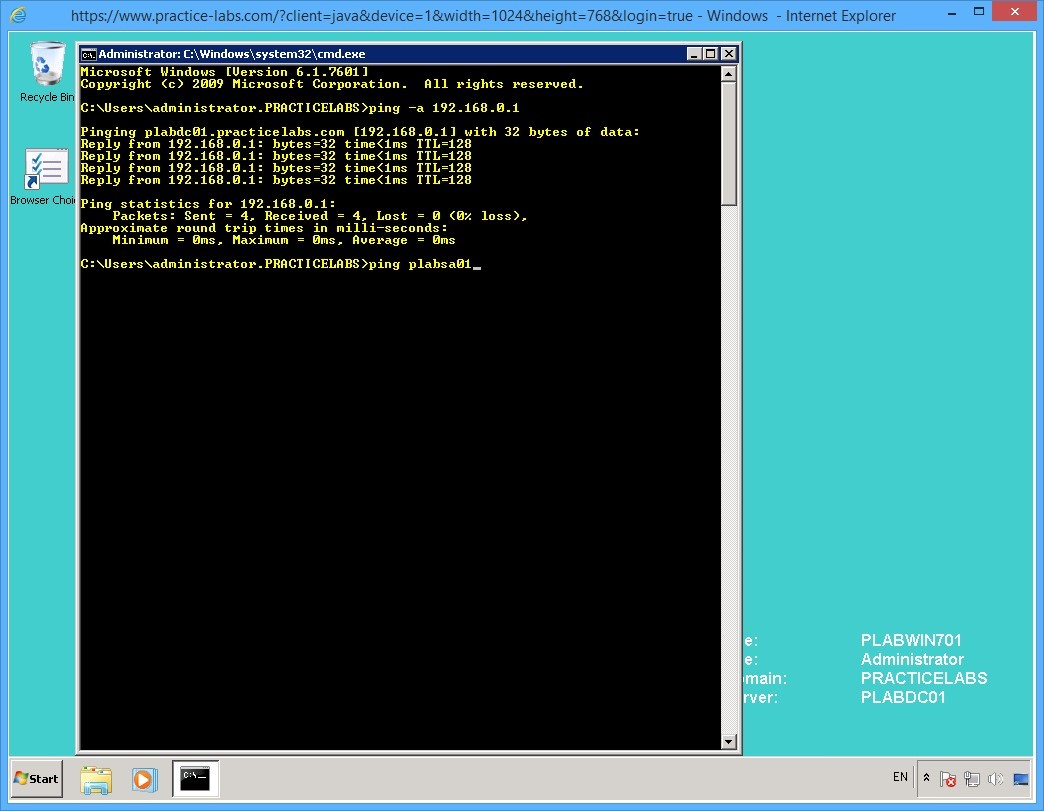
Step 12
You get response from plabsa01 which comes from plabdc01.practicelabs.com.
This means that the CNAME record works.
Shut down all virtual machines used in this exercise using Practice Labs power button function to revert these devices to their default settings.
Alternatively, you may sign out of the lab portal to power down all devices.
Summary
In this module, you carried out the steps to install and configure the following network services:
- Dynamic Host Configuration Protocol (DHCP)
- Domain Name System (DNS)